2016年12月29日 星期四

[PHP] 使用 str_getcsv 處理 CSV 格式 (Google Docs export CSV format)

這議題已經很久,之前一直沒踩到什麼,直到處理 Google doc export the CSV format ...

大部分的分析都用:

foreach ( @explode("\n", file_get_content('https://docs.google.com/spreadsheets/d/.../export?format=csv...')) as $line ) {
$field = str_getcsv($line);
}


但是,若有 enclosure 的方式(例如 "...\n....\n") 就會出包啦,這在 http://php.net/manual/en/function.str-getcsv.php 網站上也有人提到,解法就是一樣用 str_getcsv 去切 $row:

$row = str_getcsv( file_get_content('https://docs.google.com/spreadsheets/d/.../export?format=csv...'), "\n");
foreach( $row as $line ) {
$field = str_getcsv($line);
}


但是,在處理 Google Docs 又發現切不對,最後發現改用 "\r\n" 即可 :P

$row = str_getcsv( file_get_content('https://docs.google.com/spreadsheets/d/.../export?format=csv...'), "\r\n");
foreach( $row as $line ) {
$field = str_getcsv($line);
}


Updated @ 2017/05/04
可以改用 tsv 輸出: $csv = explode("\n", @file_get_contents('https://docs.google.com/spreadsheets/d/.../export?format=tsv...'));
array_shift($csv); // remove header


foreach($csv as $line) {
$fields = str_getcsv($line, "\t");
print_r($fields);
}

2016年12月3日 星期六

[C] 使用 SQLite - sqlite3_bind_text 之 value 一直配對(綁定)錯誤

最近整理兩年前的程式,一直有空時會重構,由於時間拉太長了,我已不記得改過什麼,又懶得看 git log,就這樣東摸摸西摸摸,最後發現 bug 了。

有一張表:

CREATE TABLE IF NOT EXISTS test (
id INTEGER PRIMARY KEY AUTOINCREMENT,
data TEXT NOT NULL
);


接著,不斷新增資料,並且透過 sqlite3_bind_text 維護:

INSERT OR IGNORE INTO test (data) VALUES (?),(?),(?)

然而,透過 sqlite3_bind_text 綁定時,一直出錯,起初以為是 UTF-8 問題,但早期程式也沒問題,透過觀察,發現記憶體不如預期,追了好一陣子,發現是 sqlite3_bind_text 的參數問題 Orz

https://www.sqlite.org/c3ref/c_static.html
Constants Defining Special Destructor Behavior

typedef void (*sqlite3_destructor_type)(void*);
#define SQLITE_STATIC      ((sqlite3_destructor_type)0)
#define SQLITE_TRANSIENT   ((sqlite3_destructor_type)-1)


原因在於我一直用 SQLITE_STATIC 啦,但我的結構已經是 std::vector<std::unordered_map<std::string, std::string>> values 這種稍微複雜的,並且透過 iterator 不斷變換資料,因此,必須改用 SQLITE_TRANSIENT 才對。

std::vector<std::unordered_map<std::string, std::string>> values;
std::vector<std::string> fields ({ "data" });
for (auto item : values) {
for (auto field: fields) {
if (item.find(field) != item.end()) {
if (SQLITE_OK != sqlite3_bind_text(stmt, i, item[field].c_str(), -1, SQLITE_TRANSIENT)) {
}
} else {
if (SQLITE_OK != sqlite3_bind_null(stmt, i)) {
}
}
}
}


最後還是埋了個 gtest 定期測試了。

2016年11月6日 星期日

新夥伴 - MacBook Pro (Retina, 13-inch, Early 2015)

MBPR

在 2012 年夏天買的 MBP 在今年漸漸顯出疲態 XD 除了 Android Studio 編的很慢外,最重要的是螢幕開始出現漸白的事件 Orz 恰逢 Apple 發布最新 MBP 後,我選擇添購前一代的 MacBook Pro (Retina, 13 英吋, 2015 年初) (MF839TA/A),也順勢把 MBP 2011 Late 送修,可能是上蓋總成的問題,但維修人員也不確定主機板是否也有問題,若是主機板就不能修了,我個人是一直覺得只是單純的線材老化 XD 總之,還是該迎見新朋友了。


買筆電真是個掙扎,實用度只剩下 coding 吧?其他的都靠手機、平板搞定。

好好把他當個起點,把時間再規劃好一點吧!真的覺得時間越來越貴了,貴到讓人無法把腦中的想法執行出來、貴到大家的機會成本不斷提高。

2016年10月9日 星期日

iOS 開發筆記 - 建立/更新 Apple Push Notification Service (APNs) 憑證、P12轉PEM、驗證 PEM、PHP 範例程式

APNs_export_key

以前寫過幾篇 APNs 筆記,但好像都沒很完整,結果每年要更新憑證時,都要再找資料複習一次 Orz 所以就把它筆記下來吧!
首先,在 iOS Developer 網站上可以維護 APNs 憑證,然而,一旦過期,其實會自動消失 Orz 而 APNs 這服務滿像開發一次後就一直擺在那,沒用行事曆紀錄肯定忘掉。

如果,當初的 Certificate Signing Request (CSR) 以及 private key(.p12) 還留著的話,可以繼續拿來用,若沒有的話,就重新建立。整個就像第一次建立一樣 :P

Step 1:

iOS Developer Website -> Certificate -> All -> [+] -> Production -> Apple Push Notification service SSL (Sandbox & Production) -> App ID: -> Your App ID -> About Creating a Certificate Signing Request (CSR) -> Upload CRS file

若之前的 CSR 跟 p12 都還在,就可以省去製作 CSR,直接拿舊的上傳;若要新建立就從 Keychain -> 憑證輔助程式 -> 從憑證授權要求憑證 -> 輸入 email -> 預設將產生 CertificateSigningRequest.certSigningRequest 檔案,把他拿去上傳吧。另外,記得要把下載到的 aps.cer 點擊匯入至 keychain 中。

Step 2:

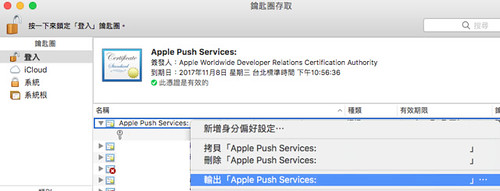
在 keychain -> 類別 -> 我的憑證 -> 可以看到 Apple Push Service 資訊,展開後,點擊專用密鑰,在點擊上方的憑證後,可以以憑證為單位輸出 p12 資料,這是跟 APN server 溝通的通行證。

Step 3:

使用 openssl 將通行證轉檔,從 p12 成 pem 檔

$ openssl pkcs12 -in App.p12 -out App.pem -nodes

轉換後,可以用文字編輯器打開 App.pem 檔案,會看到兩段:

-----BEGIN CERTIFICATE-----
...
-----END CERTIFICATE-----
-----BEGIN PRIVATE KEY-----
...
-----END PRIVATE KEY-----


而 CERTIFICATE 上頭也會標記是哪個 App ID 的,未來忘記都可以翻來看

Step 4:

做簡單的 pem 驗證即可。

Production:

$ openssl s_client -connect gateway.push.apple.com:2195 -cert App.pem

Sandbox:

$ openssl s_client -connect gateway.sandbox.push.apple.com:2195 -cert App.pem

若 pem 是正常的,應該連線完就停在那邊:

...
---
SSL handshake has read 3385 bytes and written 2515 bytes
---
New, TLSv1/SSLv3, Cipher is AES256-SHA
Server public key is 2048 bit
Secure Renegotiation IS supported
Compression: NONE
Expansion: NONE
No ALPN negotiated
SSL-Session:
    Protocol  : TLSv1.2
    Cipher    : AES256-SHA
    Session-ID:
    Session-ID-ctx:
    Master-Key: #######
    Key-Arg   : None
    PSK identity: None
    PSK identity hint: None
    SRP username: None
    Start Time: 1476026971
    Timeout   : 300 (sec)
    Verify return code: 0 (ok)
---
^C


Step 5:

可以拿 pem 跟 APNs 互動了!以下是片段 PHP 程式碼,有興趣可再試試 changyy/codeigniter-library-notification 包好的 library。

<?php

$ssl_ctx = stream_context_create();
stream_context_set_option($ssl_ctx, 'ssl', 'local_cert', $pem_file_path);

if( is_resource( $fp = stream_socket_client(
$use_sansbox ? 'ssl://gateway.sandbox.push.apple.com:2195' : 'ssl://gateway.push.apple.com:2195',
$err,
$errstr,
60,
STREAM_CLIENT_CONNECT|STREAM_CLIENT_PERSISTENT,
$ssl_ctx
) ) ) {

//$payload = array(
// 'aps' => array(
// 'alert' => array(
// 'title' => $title,
// 'body' => $message,
// )
// )
//);

$packed_data =
// Command (Simple Notification Format)
chr(0)
// device token
. pack('n', 32) . pack('H*', $notification_token)
// payload
//. pack('n', strlen($raw_cmd)) . $raw_cmd;
. $raw_data;

if( @fwrite($fp, $packed_data, strlen($packed_data)) !== false ) {
echo "SUCCESS";
} else {
echo "FAILURE";
}

fclose($fp);
}

2016年10月4日 星期二

查看 APK 裡頭的 Package Name @ Mac OS 10.11.6

透過 aapt 工具,以 Mac OS 來說,大概落於 ~/Library/Android/sdk/build-tools/xxxx/aapt,用法:

$ ~/Library/Android/sdk/build-tools/23.0.2/aapt dump badging app-release.apk | grep package:\ name
package: name='aa.bb.cc' versionCode='###' versionName='######' platformBuildVersionName='#.#.#.####'

2016年9月8日 星期四

Ansible 筆記 - 設定 Nginx 啟用 ngx_http_geoip_module.so 片段程式 @ Ubuntu 14.0

其實該寫成 Ansible Role 的,但一時之間有點懶,先把練習的片段紀錄一下。

安裝 nginx-module-geoip:

$ cat geoip-nginx.yml
---
    - name: install geoip packages
      apt: name={{ item }} update_cache=yes state=latest
      with_items:
        - nginx-module-geoip
      when: install_package is defined and install_package

    - name: check maxmind db - http://geolite.maxmind.com/download/geoip/database/GeoLiteCountry/GeoIP.dat.gz
      command: bash -c 'test -e /data/GeoIP.dat || curl http://geolite.maxmind.com/download/geoip/database/GeoLiteCountry/GeoIP.dat.gz | gunzip - > /data/GeoIP.dat'

    - name: check maxmind db - http://geolite.maxmind.com/download/geoip/database/GeoLiteCity.dat.gz
      command: bash -c 'test -e /data/GeoLiteCity.dat || curl http://geolite.maxmind.com/download/geoip/database/GeoLiteCity.dat.gz | gunzip - > /data/GeoLiteCity.dat'


設定 nginx.conf:

$ cat server-deploy.yml
...
  tasks:
    ...
    - include: geoip-nginx.yml
    - name: setup nginx config file - add modules/ngx_http_geoip_module.so
      lineinfile:
        dest: /etc/nginx/nginx.conf
        insertbefore: '^user '
        line: 'load_module "modules/ngx_http_geoip_module.so";'

    - name: setup nginx config file - setup geoip resource path
      lineinfile:
        dest: /etc/nginx/nginx.conf
        insertafter: '^http {'
        line: '    geoip_country /data/GeoIP.dat; geoip_proxy 192.168.0.0/16; geoip_proxy 10.0.0.0/24; geoip_proxy_recursive on;'
        #line: '    geoip_city    /data/GeoLiteCity.dat;'

    - name: setup nginx file to enable geoip - update log format
      lineinfile:
        dest: /etc/nginx/nginx.conf
        regexp: ".*?http_user_agent.*?http_x_forwarded_for"
        line: "                      '\"$http_user_agent\" \"$http_x_forwarded_for\"' $geoip_country_code \"$geoip_country_name\" ;"

    - name: setup nginx file to enable geoip - add GEOIP_COUNTRY_CODE for FastCGI
      lineinfile:
        dest: /etc/nginx/fastcgi_params
        insertbefore: "^fastcgi_param QUERY_STRING"
        line: "fastcgi_param     GEOIP_COUNTRY_CODE $geoip_country_code;"


如此一來,產生的 nginx.conf 如下:

$ cat /etc/nginx/nginx.conf && sudo nginx -t

load_module "modules/ngx_http_geoip_module.so";
user www-data;
worker_processes  1;

error_log  /var/log/nginx/error.log warn;
pid        /var/run/nginx.pid;


events {
    worker_connections  1024;
}


http {
    geoip_country /data/GeoIP.dat; geoip_proxy 192.168.0.0/16; geoip_proxy 10.0.0.0/24; geoip_proxy_recursive on;
    include       /etc/nginx/mime.types;
    default_type  application/octet-stream;

    log_format  main  '$remote_addr - $remote_user [$time_local] "$request" '
                      '$status $body_bytes_sent "$http_referer" '
                      '"$http_user_agent" "$http_x_forwarded_for"' $geoip_country_code "$geoip_country_name" ;

    access_log  /var/log/nginx/access.log  main;

    sendfile        on;
    #tcp_nopush     on;

    keepalive_timeout  65;

    #gzip  on;

    include /etc/nginx/conf.d/*.conf;
}
nginx: the configuration file /etc/nginx/nginx.conf syntax is ok
nginx: configuration file /etc/nginx/nginx.conf test is successful


查看 /var/log/nginx/access.log 就可以看到類似的範例:

.... CN,CHN,"China"
.... US,USA,"United States"


更多變數定義,請參考:http://nginx.org/en/docs/http/ngx_http_geoip_module.html

2016年9月7日 星期三

[Linux] Nginx 啟用 nginx-module-geoip @ Ubuntu 14.04

Nginx 從 1.9.1 起,支援 Dynamic Modules 囉,此例是想要使用 MaxMind 來進行 IP 反查,接著想說有沒有方便的整合方式,像是寫 PHP 就用 MaxMind PHP library 等。

接著,就先查一下自己的 nginx 情況吧!

$ nginx -V
nginx version: nginx/1.10.1
... 找關鍵字 ...
--with-http_geoip_module=dynamic
...


很 OK ,接著再裝一下 ngx_http_geoip_module.so 吧!

$ apt-cache search nginx-module-geoip
nginx-module-geoip - geoip module
$ sudo apt-get install nginx-module-geoip
...
The GeoIP dynamic module for nginx has been installed.
To enable this module, add the following to /etc/nginx/nginx.conf
and reload nginx:

    load_module modules/ngx_http_geoip_module.so;

Please refer to the module documentation for further details:
http://nginx.org/en/docs/http/ngx_http_geoip_module.html
...


下載 MaxMind 資料:

$ curl http://geolite.maxmind.com/download/geoip/database/GeoLiteCountry/GeoIP.dat.gz | gunzip - > /data/GeoIP.dat
$ curl http://geolite.maxmind.com/download/geoip/database/GeoLiteCity.dat.gz | gunzip - > /data/GeoLiteCity.dat


設置 Nginx,把 load_module 擺在最前頭
$ sudo vim /etc/nginx/nginx.conf
load_module "modules/ngx_http_geoip_module.so";
...

http {
    #geoip_country /data/GeoIP.dat;
    geoip_city    /data/GeoLiteCity.dat;
    ...

    log_format  main  '$remote_addr - $remote_user [$time_local] "$request" '
                      '$status $body_bytes_sent "$http_referer" '
                      '"$http_user_agent" "$http_x_forwarded_for" '
                      'GeoCountry[ "$geoip_country_name" "$geoip_country_code" "$geoip_country_code3" ] '
                      'GeoCity[ "$geoip_city_country_code" "$geoip_city_country_code3" "$geoip_city_country_name" ] '
                      'GeoLocation[ "$geoip_latitude" "$geoip_longitude" "$geoip_region" "$geoip_region_name" "$geoip_city" "$geoip_postal_code" ] '
    ;

    access_log  /var/log/nginx/access.log  main;
...

$ sudo service nginx reload


如此一來,就可以翻 /var/log/nginx/access.log 看看豐富的 GeoInfo 啦

2016年8月28日 星期日

[Mac] TOTO LINK N150UA @ MacOSX 10.11.6

MTK Wireless Utility

經過黃色鬼屋買了一張 USB 無線網卡,結果就是一場災難的開始 XD (買的比網路上貴外,設定又如此搞剛)回來用 MacOSX 來測試,然後附贈的安裝 CD 跟 TOTO LINK (Ralink) 官網下載都無法成功設定,且文件上都說只支援 10.6 ~ 10.10 ,看來文件所敘無誤。

接著,開始翻他的硬體資訊,發現有 MediaTek 字樣!追了一下原來是 MediaTek 產出啊,網路上也看了幾篇 MTK 跨入無線網卡的新聞介紹,原來我 lag 那麼久 :P

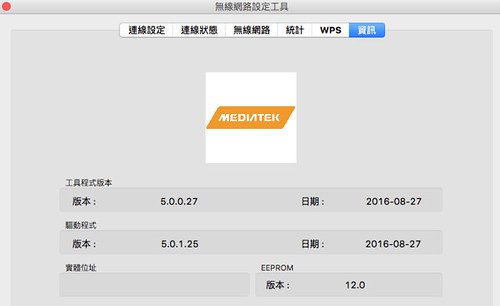
最後,就是跑去 MediaTek 網站下載驅動程式(內含 Wireless Utility):MT7612_7610U_D5.0.1.25_SDK1.0.2.18_UI5.0.0.27_20151209
總之,裝了 MTK 的那包後,終於可以成功設定網路了 Orz 最大的缺點是安裝軟體時,還得自行閉上眼默認沒有簽署認證的程式包。

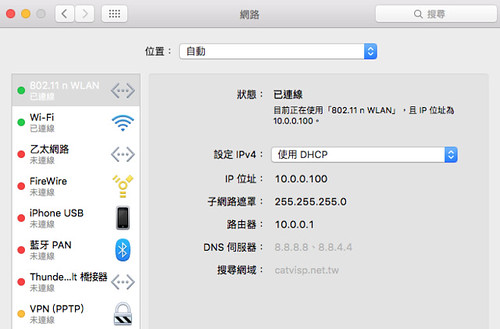
透過這次我也才明瞭在 MacOSX 設置 USB 無線網卡時,基本上都是透過第三方軟體設置的,且在 MacOSX 自身的網路偏好設定只能觀看而無法設定

MacOSX Wireless Utility

2016年8月22日 星期一

[Mac] MacPorts: no destroot found @ Mac OSX 10.11.6

前陣子一直在測試相容性問題,不斷地用 sudo port -fp uninstall installed 清光軟體。但一直懶沒把所有相依性刪光,在安裝 py-pip27 時,就會蹦出以下錯誤訊息:

$ sudo port install py27-pip
--->  Computing dependencies for py27-pip
--->  Installing py27-pip @8.1.2_0
Error: org.macports.install for port py27-pip returned: no destroot found at: /opt/local/var/macports/build/_opt_local_var_macports_sources_rsync.macports.org_release_tarballs_ports_python_py-pip/py27-pip/work/destroot
Please see the log file for port py27-pip for details:
    /opt/local/var/macports/logs/_opt_local_var_macports_sources_rsync.macports.org_release_tarballs_ports_python_py-pip/py27-pip/main.log
To report a bug, follow the instructions in the guide:
    http://guide.macports.org/#project.tickets
Error: Processing of port py27-pip failed


解法就是老老實實參考 MacPorts - 2.4. Uninstall 官方文件清資料,仔細做了以下動作:

$ sudo rm -rf /opt/local/ ~/.macports

下載並安裝最新版 MacPorts: https://distfiles.macports.org/MacPorts/MacPorts-2.3.4-10.11-ElCapitan.pkg

重新安裝需要的軟體:

$ sudo port selfupdate
$ sudo port install py27-pip

見山不是山的年代

Sunny

五味雜陳的心事,很容易被接連不斷的事件給淹沒了。偶爾跟同輩的閒聊,成了忙碌中僅存的偷閒。

年過三十之後,莫名地成為家中、社會中的接近第一線衝刺者,要不成家帶小孩、要不事業上也扛了重任,看著社會新聞上不斷起舞的議題,轉過頭跟同輩閒聊,一致的認同,又到了見山不是山的年代。

記得學生時代時,看見八卦是八卦,現在這個年紀,看見八卦開始會反芻成更深一層的心境,什麼帶風向、什麼鼓吹人心等,就像 22k 是個假議題,打房亦是如此,當然想用在工作上老闆的精神喊話也是可以的 XD 八卦看久了還是八卦,知道對人生也是零分,不知道也是零分,唯一留下的卻是激昂的情緒。

唯一不變的還是時間只有 24 小時啊,需要時時提醒自己,投資在哪,成就就在哪邊,把時間花在美好的事物上吧 :)

我想,過個幾年,會再進入見山又是山的年代吧!八卦又變回八卦,風向又將回歸風向,跟著沉淪也沒啥不好的?

2016年8月19日 星期五

AWS 筆記 - 透過 VPN/IPSEC 讓 AWS VPC 與 Microsoft Azure VirtualNetwork 互通

對 Azure 來說,預設建置的 VirtualNetwork 就是 10.0.0.0 開頭的網路環境,大多可以繼續延用下去。在這延續上一篇 AWS 筆記 - 建置自己的 VPC 且透過 VPN/IPSec 讓各個 Region 的 VPC 互通 ,先簡略調整 Azure VirtualNetwork 環境,接著建置 Azure VPC 與 AWS VPC 連線機制。

假設 AWS VPC 為 10.100.0.0/16 網域,而 Azure VirtualNetwork 為 10.50.0.0/16 網域。

設置 Azure VPC:

Azure Portal -> New
-> Resource -> Create -> name=StudyVPN, Location=WestUS
-> Networking -> VirtualNetwork
-> Name=US
-> Address Space=10.50.0.0/16
-> Subnet Name=default
-> Subnet address range=10.50.0.0/24
-> Location = WestUS
-> Virtual Machines -> Ubuntu Server 14.04
-> Name=VPN
-> Location = WestUS
-> DS1_V2 Standard

請先將 AWS EC2 Security Group 跟 Azure Network security group 都設置好、開放對方 VPN IP。此例為 AWS EU-West-1 機器跟 Azure WestUS 機器,設置完防火牆後,先 ping 一下彼此吧。

在 EU-West-1 的 VPN Server 機器,其 public ip = 52.209.16.24:

$ ping 13.88.186.107

在 Azure WestUS 的 VPN Server 機器,其 public ip = 13.88.186.107:

$ ping 52.209.16.24

先設置 Azure VPN server:

$ sudo apt-get update && sudo apt-get -y upgrade && sudo apt-get -y dist-upgrade && sudo apt-get autoremove && sudo apt-get autoclean

$ sudo apt-get install openswan
$ ls /etc/ipsec*
/etc/ipsec.conf  /etc/ipsec.secrets

/etc/ipsec.d:
aacerts  cacerts  certs  crls  examples  ocspcerts  policies  private
$ sudo ipsec setup version
Linux Openswan U2.6.38/K3.19.0-65-generic (netkey)
See `ipsec --copyright' for copyright information.
$ sudo vim /etc/ipsec.d/AWS-EU-WEST-1.conf
conn Connect-to-AWS-EU-WEST-1
 type=tunnel
 authby=secret

 leftid=13.88.186.107
 left=%defaultroute
 leftsubnet=10.50.0.0/16
 leftnexthop=%defaultroute

 right=52.209.16.24
 rightsubnet=10.100.0.0/16

 pfs=yes
 auto=start
$ sudo vim /etc/ipsec.d/AWS-EU-WEST-1.secrets
13.88.186.107 52.209.16.24 : PSK "IPSEC_PASSWORD"

$ sudo vim /etc/ipsec.conf
#protostack=auto
protostack=netkey

#...
include /etc/ipsec.d/AWS-EU-WEST-1.conf

$ sudo vim /etc/ipsec.secrets
include /etc/ipsec.d/AWS-EU-WEST-1.secrets

$ sudo ipsec setup restart
ipsec_setup: Stopping Openswan IPsec...
ipsec_setup: Starting Openswan IPsec U2.6.38/K3.19.0-65-generic...


更新 AWS VPN server:

$ sudo vim /etc/ipsec.d/AZURE-US-WEST.conf
conn Connect-to-AZURE-EU-WEST
 type=tunnel
 authby=secret

 leftid=52.209.16.24

 left=%defaultroute
 leftsubnet=10.100.0.0/16
 leftnexthop=%defaultroute

 right=13.88.186.107
 rightsubnet=10.50.0.0/16

 pfs=yes
 auto=start
$ sudo vim /etc/ipsec.d/AZURE-US-WEST.secrets
$ sudo ipsec setup restart
ipsec_setup: Stopping Openswan IPsec...
ipsec_setup: Starting Openswan IPsec U2.6.37/K4.4.11-23.53.amzn1.x86_64...
ipsec_setup: /usr/libexec/ipsec/addconn Non-fips mode set in /proc/sys/crypto/fips_enabled


當兩邊的設定好後,並且用 ipsec setup restart 後,另一方才可以用指令連上對方:

Azure VPN server:

$ sudo ipsec auto --up Connect-to-AWS-EU-WEST-1
117 "Connect-to-AWS-EU-WEST-1" #4: STATE_QUICK_I1: initiate
004 "Connect-to-AWS-EU-WEST-1" #4: STATE_QUICK_I2: sent QI2, IPsec SA established tunnel mode {ESP=>0x29ba22d7 <0x68b944dd xfrm=AES_128-HMAC_SHA1 NATOA=none NATD=52.209.16.24:4500 DPD=none}


AWS VPN server:

$ sudo ipsec auto --up Connect-to-AZURE-EU-WEST
117 "Connect-to-AZURE-EU-WEST" #6: STATE_QUICK_I1: initiate
004 "Connect-to-AZURE-EU-WEST" #6: STATE_QUICK_I2: sent QI2, IPsec SA established tunnel mode {ESP=>0x74246b5f <0x7156f72b xfrm=AES_128-HMAC_SHA1 NATOA=none NATD=13.88.186.107:4500 DPD=none}


並且兩邊就可以 ping 彼此的 private ip 囉!

接著還需設定 routing table 以及對 AWS VPN Server機器打開 Change Source/Dest. Check 、對 Azure VPN Server 機器的網卡打開 IP forwarding 後,兩邊機器就可以互相 ping  到啦:

對 AWS 而言,在 VPC Dashboard -> Route 中,將相關的子網域都添加一則 10.50.0.0/16 導向至 AWS VPN Server (別忘了,若第一次設置 EC2 上的 VPN Server,還要從 EC2 Dashboard 修改該機器,取消 Change Source/Dest. Check)

對 Azure 而言,Azure portal -> New -> Networking -> Route table ,建立後,再去設定

Resource -> Route table -> Settings
-> Routes -> Add -> Route name=ToAWS, Address prefix=10.100.0.0/16, Next hop type=Virtual appliance -> Next hop address=10.50.0.4 (Azure VPN Server Private IP)
-> Subnet -> Associate subnet -> 挑選 VirtualNetwork、挑選 Subnet

最後,記得 NAT 相關要設定好,像在 Azure 上的 VPN server 是從一台乾淨的 Ubuntu 14.04 裝後,還必須設定以下:

$ echo "net.ipv4.ip_forward = 1" | sudo tee -a /etc/sysctl.conf
$ echo "net.ipv4.conf.all.accept_redirects = 0" | sudo tee -a /etc/sysctl.conf
$ echo "net.ipv4.conf.all.send_redirects = 0" | sudo tee -a /etc/sysctl.conf
$ for vpn in /proc/sys/net/ipv4/conf/*; do echo 0 | sudo tee $vpn/accept_redirects; echo 0 | sudo tee $vpn/send_redirects; done
$ sudo sysctl -p


其他備註:

$ sudo ipsec setup restart
ipsec_setup: Stopping Openswan IPsec...
ipsec_setup: Starting Openswan IPsec 2.6.38...
ipsec_setup: No KLIPS support found while requested, desperately falling back to netkey
ipsec_setup: NETKEY support found. Use protostack=netkey in /etc/ipsec.conf to avoid attempts to use KLIPS. Attempting to continue with NETKEY


解法 => protostack=netkey

$ sudo ipsec auto --up Connect-to-AWS-EU-WEST-1
022 "Connect-to-AWS-EU-WEST-1": We cannot identify ourselves with either end of this connection.


解法 => 先把一些錯誤訊息修掉,如 sudo ipsec setup restart 看到的問題,接著再看 conn 的設定,當設定錯誤也會看到這段訊息。

2016年8月17日 星期三

AWS 筆記 - 建置自己的 VPC 且透過 VPN/IPSec 讓各個 Region 的 VPC 互通

Amazon VPC 的全名為 Amazon Virtual Private Cloud,就是所謂的內網架構,在此網路架構內的機器可以互通有無。https://aws.amazon.com/tw/vpc/

假設使用情境:
  1. 建立一個 VPC 網段為 10.100.0.0/16
  2. 建立兩個 Subnet 網段 A 跟 B 分別為 10.100.1.0/24, 10.100.2.0/24 且為不同 Availability Zone
  3. 其中 A 網段不給予 Public IP ,而 B 網段會有 Public IP
  4. 其中 A 網段需建立 NAT 運作方式,可以連外,也可以被 B 網段連到
建置方式:

VPC dashboard
-> Your VPCs -> Create VPC
-> 給定 CIDR block,如 10.100.0.0/16
-> Subnets -> Create Subnet
-> 挑選剛剛建立 VPC 以及 Availability Zone (兩個 Subnet 挑不同區),以及給定 CIDR block
-> A 網段 10.100.1.0/24
-> B 網段 10.100.2.0/24 並打開 Auto-Assign Public IP 屬性
-> Internet Gateways -> Create Internet Gateway
-> 勾選後,點擊 Attach to VPC -> 挑剛剛的 10.100.0.0/16
-> Nat Gateways -> Create NAT Gateway
-> 在此只需建立 A 網段的 NAT Gateway,但要建立在 B 網段,才能讓 A 網段的機器連出去 -> 給予 EIP/Create New EIP
-> Route Tables -> Create Route Table
-> 建立 A 網段 10.100.1.0/24 專屬表 -> 並設置 0.0.0.0/0 給予剛剛建立的 NAT   -> 建立 B 網段 10.100.2.0/24 專屬表 -> 並設置 0.0.0.0/0 給予剛剛建立的 Internet Gateway
-> 回到 Subnets 分別挑選 A/B 網段並更新他們的 route table

如此一來,就有一個 VPC = 10.100.0.0/16 ,內有兩個 subnet = A網段 10.100.1.0/24, B網段 10.100.2.0/24,其中 A 網段聯外方式就是透過 NAT 出去(對外會看到NAT IP),而 B 網段則是用 public ip 透過 Internet Gateway 出去。機器們可以用 curl ipino.io 去驗證 IP ,以及使用 ping 來檢驗是不是可以連到彼此。以上就是自建 VPC 且擁有 public ip 跟 private ip 網段的部分。

接著進行不同 Region VPC 溝通方式,不同 Region VPC 要溝通的方式,就只是單純在各個 Region 架設 VPN/IPSEC Server 互連,除了彼此更新 Route Table 外,還需在 VPN 機上打開防火牆、取消封包檢查等,如此一來即可處理封包移動流程。

假設有 10.100.0.0/16 跟 10.200.0.0/16 兩個網段,一處在 EU-West-1 另一處在 SA-EAST-1 ,一樣透過上述先建立完 VPC-EU-West-1 跟 VPC-SA-EAST-1,並且分別建立 Subnet EU-WEST-1 10.100.1.0/24 跟 SA-EAST-1 10.200.1.0/24 且兩者都有 Public IP(在此不做 private subnet),接著分別在這兩各區域,各開一台機器安裝 IPSEC,在此直接挑 Community AMIs -> amzn-ami-vpc-nat -> amzn-ami-vpc-nat-hvm-2016.03.3.x86_64-ebs CentOS ,並且使用 ec2-user 帳號登入。建議先在兩台 VPN server 彼此 ping 一下對方(在 Security Group 可以偷懶開放對方 IP 所有網路流量),接著就設定 IPSEC 的部分:

兩台機器都安裝 openswan 軟體:

$ sudo yum install openswan
$ sudo ls /etc/ipsec*
/etc/ipsec.conf  /etc/ipsec.secrets

/etc/ipsec.d:
policies


在 EU-WEST-1 機器,其 public ip = 52.209.16.24:

$ sudo vim /etc/ipsec.d/SA-EAST-1.conf
conn Connect-to-SA-EAST-1
type=tunnel
authby=secret

leftid=52.209.16.24
left=%defaultroute
leftsubnet=10.100.0.0/16
leftnexthop=%defaultroute

right=52.67.138.147
rightsubnet=10.200.0.0/16

pfs=yes
auto=start
$ sudo vim /etc/ipsec.d/SA-EAST-1.secrets
52.209.16.24 52.67.138.147: PSK "IPSEC_PASSWORD"
$ sudo grep -c "^include /etc/ipsec.d/" /etc/ipsec.conf > /dev/null || (echo "include /etc/ipsec.d/*.conf" | sudo tee --append /etc/ipsec.conf)
$ sudo grep -c "^include /etc/ipsec.d/" /etc/ipsec.secrets > /dev/null || (echo "include /etc/ipsec.d/*.secrets" | sudo tee --append /etc/ipsec.secrets)
$ sudo ipsec setup restart
$ sudo ipsec auto --up Connect-to-SA-EAST-1
117 "Connect-to-SA-EAST-1" #3: STATE_QUICK_I1: initiate
004 "Connect-to-SA-EAST-1" #3: STATE_QUICK_I2: sent QI2, IPsec SA established tunnel mode {ESP=>0xe7553eef <0xa8498182 xfrm=AES_128-HMAC_SHA1 NATOA=none NATD=52.67.138.147:4500 DPD=none}


在 SA-EAST-1 機器上,其 public ip = 52.67.138.147:

$ sudo vim /etc/ipsec.d/EU-WEST-1.conf
conn Connect-to-EU-WEST-1
type=tunnel
authby=secret

leftid =52.67.138.147
left=%defaultroute
leftsubnet=10.200.0.0/16
leftnexthop=%defaultroute

right=52.209.16.24
rightsubnet=10.100.0.0/16

pfs=yes
auto=start
$ sudo vim /etc/ipsec.d/EU-WEST-1.secrets
52.67.138.147 52.209.16.24 : PSK "IPSEC_PASSWORD"
$ sudo grep -c "^include /etc/ipsec.d/" /etc/ipsec.conf > /dev/null || (echo "include /etc/ipsec.d/*.conf" | sudo tee --append /etc/ipsec.conf)
$ sudo grep -c "^include /etc/ipsec.d/" /etc/ipsec.secrets > /dev/null || (echo "include /etc/ipsec.d/*.secrets" | sudo tee --append /etc/ipsec.secrets)
$ sudo ipsec setup restart
$ sudo ipsec auto --up Connect-to-EU-WEST-1
117 "Connect-to-EU-WEST-1" #5: STATE_QUICK_I1: initiate
004 "Connect-to-EU-WEST-1" #5: STATE_QUICK_I2: sent QI2, IPsec SA established tunnel mode {ESP=>0x681a5ce6 <0xcb613471 xfrm=AES_128-HMAC_SHA1 NATOA=none NATD=52.209.16.24:4500 DPD=none}


接著,就可以在兩台機器上,分別 ping 對方的 private ip 來測試,如此一來就算打通一條連線,最後要做的就是設定 VPC 的 route table:

在 EU-WEST-1 VPC (10.100.0.0/16) 的所有 Subnet (例如10.100.1/16),多添加一條 routing rule = 10.200.0.0/16 而 Target 用 EU-WEST-1 上的 VPN Server (可以在 Target 上打 i 關鍵字,就可以看到 EC2 server);在 SA-EAST-1 VPC (10.200.0.0/16) 裡所有的 Subnet (例如 10.200.1.0/16) ,多添加一條 routing rule = 10.100.0.0/16 而 Target 用 SA-EAST-1 上的 VPN Server 。

最後,回到 EC2 Dashboard ,將各區域的 VPN Server 的設定更新一下:Actions -> Networking -> Change Source/Dest. Check -> Disable,如此一來,雙方 VPC 下的機器,就可以互相 ping 和連線了。

在此使用 IPSEC 的做法,是因為後續可以來做跨 ISP 的結合,如 Azure service 等。

2016年8月16日 星期二

[Linux] 查看 Process STDOUT @ Ubuntu 14.04

有一台 server 某個服務一直會掛掉,由於什麼資訊都沒有,就想到有沒有可以偷窺別人程式的 stdout 的方式,接著就出現了 strace - trace system calls and signals  啦 :P

用法:

$ sudo strace -p ProcessID -s OutputStringLength -e write

其中 OutputStringLength 預設是 32 bytes ,所以不知道對方會噴什麼,就填大一點的數字就好。

如此一來,就可以觀察 crash process 最後到底吐了什麼出來。唯一比較難搞的是有些服務掛了會重啟,要不斷追蹤其 pid 再執行上述的指令。

2016年8月15日 星期一

AWS 筆記 - 在 AWS Billing 使用 Tag 關注各個服務的開銷

AWSBillingGroupByTag

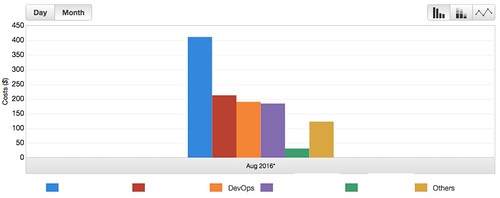
前陣子在追一些花費時,跟同事花了不少功夫在節費,同事頗厲害,一下就看到不少可省錢的地方,只是省了一輪後,還是希望能夠查看各項服務的開銷,最好每月追蹤,然而,在 AWS Billing 預設報告都是以 AWS Service 為單位,而非依照我們自己的服務為單位,例如一個服務用到數台 EC2 跟一台 RDS 時,希望把這費用可以記在一起,特別又有流量等問題等。

結果翻一下 AWS Billing ,果然已有這類功能,頗夠用!只需在 EC2/RDS 的機器上都多一個 tag 來辨識,例如 tag=Price 且同一個服務就用一樣的數值(例如服務網址),並且在 Load Balancer 和 Auto Scaling 都可以添加 tag 。

接著在 AWS Billing 的 Cost allocation tags 上,挑選剛剛新增完的 Price 標籤並 Save 起來,等幾天後,就可以用 AWS Billing - Cost Explorer 看到漂亮的圖了(用 Group by Tag => Price),並支援以天或月顯示,並且會有明確地數字表格顯示各個服務花了多少錢。

2016年8月8日 星期一

Command line 批次顯示圖片寬高 @ Mac OS X 10.11.6

使用 sips 指令即可:

$ sips
sips 10.4.4 - scriptable image processing system.
This tool is used to query or modify raster image files and ColorSync ICC profiles.
Its functionality can also be used through the "Image Events" AppleScript suite.
Try 'sips --help' or 'sips --helpProperties' for help using this tool


用法:

$ find . -name "*.jpg" -exec sips -g pixelHeights -g pixelWidth {} \;

2016年8月4日 星期四

Microsoft Azure 管理筆記 - 使用 Image (Resource Manage - template.json) 快速建構、搬遷 Data Center

這個概念是這樣,為了服務世界各地的朋友們,可能一開始在日本服務,過了一陣子想要在美西服務,這時在 AWS 上可以很便利地將 AMI 複製到其他 Region ,而對 Azure 咧?概念是一樣,但在 Azure Resource Manage 的思維下,做法多了很多步。

參考資料:
步驟如下(在此有做 storage account 的切換,若是要沿用同一個 storage account 可以不用做第三步):
  1. 建立新的 Resource:US,歸屬定 West US
  2. 建立 Virtual Network、Subnet
  3. 建立 Storage account,此乃資料儲存帳號
  4. 將原本所在的 Image (vhd) 複製到新的 Storage account
  5. 建立 Network Interface Controller
  6. 將原本的 template.json 修改,把storage account更新至新的區域
  7. 即可建置新機器
細部流程,大多以 Azure cli 運行:

建立位於 West US 的 Resource Group: US

$ azure group create US westus --subscription MySubscription
info:    Executing command group create
+ Getting resource group US                                                  
+ Creating resource group US                                                
info:    Created resource group US
data:    Id:                  /subscriptions/MySubscription/resourceGroups/US
data:    Name:                US
data:    Location:            westus
data:    Provisioning State:  Succeeded
data:    Tags: null
data:  
info:    group create command OK


建立 Virtual Network (也可多用 -a 10.1.0.0/16 來限制 address prefix)

$ azure network vnet create US USVirtualNetwork westus  --subscription MySubscription
info:    Executing command network vnet create
warn:    Using default address prefix: 10.0.0.0/8
+ Looking up the virtual network "USVirtualNetwork"                          
+ Creating virtual network "USVirtualNetwork"                                
data:    Id                              : /subscriptions/MySubscription/resourceGroups/US/providers/Microsoft.Network/virtualNetworks/USVirtualNetwork
data:    Name                            : USVirtualNetwork
data:    Type                            : Microsoft.Network/virtualNetworks
data:    Location                        : westus
data:    Provisioning state              : Succeeded
data:    Address prefixes:
data:      10.0.0.0/8
info:    network vnet create command OK


建立 Subnet

$ azure network vnet subnet create US USVirtualNetwork default -a 10.1.0.0/16 --subscription MySubscription
info:    Executing command network vnet subnet create
+ Looking up the virtual network "USVirtualNetwork"                          
+ Looking up the subnet "default"                                            
+ Creating subnet "default"                                                  
data:    Id                              : /subscriptions/MySubscription/resourceGroups/US/providers/Microsoft.Network/virtualNetworks/USVirtualNetwork/subnets/default
data:    Name                            : default
data:    Provisioning state              : Succeeded
data:    Address prefix                  : 10.1.0.0/16
info:    network vnet subnet create command OK


接著建議從 Azure Portal Web UI 建立 storage account ,大多採預設即可,需留意區域位置以及採用的 resource group,此例帳號名稱為 myusstorageaccount,而使用 azure 操作 storage 行為時,必須使用 storage access key,於是就 azure cli 先列出一下(也可以在 Azure Portal 找到)

$ azure storage account keys list myusstorageaccount --resource-group US --subscription MySubscription
info:    Executing command storage account keys list
+ Getting storage account keys                                              
data:    Name  Key             Permissions
data:    ----  --------------  -----------
data:    key1  111111111111==  Full    
data:    key2  222222222222==  Full    
info:    storage account keys list command OK


建立 system container(後續 AZURE_STORAGE_ACCOUNT 跟 AZURE_STORAGE_ACCESS_KEY 都會接在指令前面,方便 debug 用途)

$ AZURE_STORAGE_ACCOUNT=myusstorageaccount AZURE_STORAGE_ACCESS_KEY=111111111111== azure storage container create system
info:    Executing command storage container create
+ Creating storage container system                                          
+ Getting storage container information                                      
data:    {
data:        name: 'system',
data:        metadata: {},
data:        etag: '"################"',
data:        lastModified: 'Thu, 04 Aug 2016 12:01:14 GMT',
data:        lease: { status: 'unlocked', state: 'available' },
data:        requestId: '############################',
data:        publicAccessLevel: 'Off'
data:    }
info:    storage container create command OK


接著,要把 Image copy 過來,這邊有些小細節要留意的,第一存取權限,第二這是非同步複製的。對於存取權限部分,請先將來源的 storage account 裡的 system container 的存取權限更新為 Blob 模式(此模式是必須知道完整的 URL 才能下載),預設是 private 模式(需搭配AZURE_STORAGE_ACCOUNT/AZURE_STORAGE_ACCESS_KEY才能),還有另一個是 Container 模式(這也是公開的,比 Blob 模式多了 listing 功能)。由於 azure storage blob 指令操作,對於 source 是 private 權限一直沒有成功 orz 且範例都是 Blob 的,只好忍痛跟著用了 Orz

以下是 source 為 private 權限,但 copy 一直沒成功(狀態會顯示success),但找不到資料的:

$ AZURE_STORAGE_ACCOUNT=myusstorageaccount AZURE_STORAGE_ACCESS_KEY=111111111111== azure storage blob copy start https://sourceaccount.blob.core.windows.net/system/Microsoft.Compute/Images/vhds/my-vm-osDisk.12345-23456-34567-45678.vhd system -a sourceaccount -k sourceaccount_KEY
info:    Executing command storage blob copy start
- Start copying blob https://sourceaccount.blob.core.windows.net/system/Microsoft.Compute/Images/vhds/my-vm-osDisk.12345-23456-34567-45678.vhd
data:    Copy ID                               Status
data:    ------------------------------------  -------
data:    ####################################  success
info:    storage blob copy start command OK


而將 source 更新為 Blob 存取權限後,就可以看到 Status 會顯示 pending 且約2~3分鐘,連 Azure Portal Web UI / Azure cli 都會找到!

$ AZURE_STORAGE_ACCOUNT=myusstorageaccount AZURE_STORAGE_ACCESS_KEY=111111111111== azure storage blob copy start https://sourceaccount.blob.core.windows.net/system/Microsoft.Compute/Images/vhds/my-vm-osDisk.12345-23456-34567-45678.vhd system
info:    Executing command storage blob copy start
- Start copying blob https://sourceaccount.blob.core.windows.net/system/Microsoft.Compute/Images/vhds/my-vm-osDisk.12345-23456-34567-45678.vhd
data:    Copy ID                               Status
data:    ------------------------------------  -------
data:    ####################################  pending
info:    storage blob copy start command OK

$ AZURE_STORAGE_ACCOUNT=myusstorageaccount AZURE_STORAGE_ACCESS_KEY=111111111111== azure storage blob show
info:    Executing command storage blob show
Container name:  system
Blob name:  Microsoft.Compute/Images/vhds/my-vm-osDisk.12345-23456-34567-45678.vhd
+ Getting storage blob information                                          
data:    Property       Value                                                                                            
data:    -------------  ----------------------------------------------------------------------------------------------------
data:    container      system                                                                                            
data:    name           Microsoft.Compute/Images/vhds/my-vm-osDisk.12345-23456-34567-45678.vhd
data:    blobType       PageBlob                                                                                          
data:    contentLength  1234567890                                                                                      
data:    contentType    application/octet-stream                                                                          
data:    contentMD5     ############==                                                                          
info:    storage blob show command OK


當複製完畢後(其實我也看不懂 azure storage blob show 的回報,也沒寫複製進度...),剩下就是建構一台機器的流程,包含建立 public ip、網路卡(NIC)、使用 template.json 發布。

如果你沒有把 Image 搬過來,直接用原本 template.json 開機器,會看到以下訊息(若同一個 storage account 則沒有問題):

error:   Deployment provisioning state was not successful
error:   Source and destination storage accounts for disk my-vm-osDisk.12345-23456-34567-45678.vhd are different.


若資料還沒搬完,會看到:

error:   Deployment provisioning state was not successful
error:   The resource operation completed with terminal provisioning state 'Failed'.
error:   Disk image https://myusstorageaccount.blob.core.windows.net/system/Microsoft.Compute/Images/vhds/my-vm-osDisk.12345-23456-34567-45678.vhd is in Pending state. Please retry when image is ready.


建立 IP:

$ azure network public-ip create US ip-my-server -l westus --subscription MySubscription

建立網卡:

$ azure network nic create US nic-my-server -k default -m USVirtualNetwork -l westus --subscription MySubscription

或給予 public ip:

$ azure network nic create US nic-my-server -k default -m USVirtualNetwork -l westus --subscription MySubscription -p ip-my-server

建立機器:

$ azure group deployment create US -f my-servier-template.json --subscription MySubscription -p '{"vmName":{"value":"my-server"},"networkInterfaceId":{"value":"/subscriptions/MySubscription/resourceGroups/US/providers/Microsoft.Network/networkInterfaces/nic-my-server"}}'

2016年8月2日 星期二

Microsoft Azure 管理筆記 - 使用 Azure CLI 自訂映像檔的維護方式

大部分的潮流都是走 PaaS 架構,然而,有些歷史的包袱只能走 IaaS 的架構 XD 而建立 Image 更是最基本的方式,甚至搭配 rsync 完成發布。而對於 Resource manage 機器來說,每次透過 capture 建立 Image 後,等於報廢回收,所以寫了個簡單的步驟記憶一下:
  1. 登入機器清除基本設定檔: $ sudo waagent -deprovision+user
  2. 透過 azure cli 執行 Shutdown:$ azure vm deallocate -g MyResource -n MyCurrentServer --subscription MySubscription
  3. 透過 azure cli 執行 Generalized:$ azure vm generalize MyResource MyCurrentServer --subscription MySubscription
  4. 透過 azure cli 執行 Capture:$ azure vm capture MyResource MyCurrentServer MyImageName -t MyImageName-Date.json --subscription MySubscription
做完後,原機器就可以下去領便當,可以把它 Delete 囉。

若預設產生的 MyImageName-Date.json 不夠用時,會自行添加資料,因此維護上就會出現麻煩,每次產生新的 template 中,其實只有 storageProfile 的設定,可以用 jq 跟 vimdiff 方便更新一下:

$ jq '' < MyImageName-old.json > old-formated.json
$ jq '' < MyImageName-Date.json > date-formated.json
$ vimdiff old-formated.json date-formated.json


把 old-formated.json 裡的 storageProfile 更新完成即可。

$ mv old-formated.json MyImageName-Date-formated.json

未來要建置原先那台機器時,就可以用以下指令在重建出來:

$ azure group deployment create MyResource -f MyImageName-Date-formated.json --subscription MySubscription

其他提醒:
  1. template.json 有描述 VHD 的資訊,若用上述 azure group deployment create 時,會彈跳出已存在的錯誤訊息,這時除了更新 template.json 資訊外,也可以到 Azure Portal -> Browse -> Storage account -> Blobs -> 沿路去找資料,把舊的、沒在用的砍掉再重跑
  2. 每次建立映像檔時,在 Azure Portal -> Browse -> Storage account -> Blobs -> system -> Microsoft.Compute -> Images -> vhds  會有 Image.vhd 跟 template.json 檔案,想清掉舊的可以去刪掉
  3. 製作完 Image 後的 server ,可以直接把它刪掉,但他的 NIC應當還會在,下次建立時,就可以沿用舊的網卡,通常 private ip 可以沿用,若有 public ip 的,若是 dynamic 配置則會變動
  4. 想使用同一個 template 開機器時,若多道指令一直跑時,指使用同一個 template file 時,會出現 Unable to edit or replace deployment 'filename-template.json' 
    : previous deployment from 'DATETIME' is still active. Please see https://aka.ms/arm-deploy for usage details. 偷懶的解法就是複製出來用 Orz 不知是不是 azure 採用 local file lock 等機制
  5. 若要採用 Availability Set 時,必須一開機就設定了,解法製作兩份 template.json ,一份用來維護 Image ,另一份就是開機就擺進 Availability Set,只需在 resources 中,多添加 : { "availabilitySet": { "id" : "/subscriptions/MySubscription/resourceGroups/MyResource/providers/Microsoft.Compute/availabilitySets/MyAvailabilitySet" } }, 來處理即可

Microsoft Azure 管理筆記 - 使用 Azure CLI 建立自訂的映像檔與開新機器的方式 (create a custom image/launch a server)

由於 Azure Portal 對 Resource manager 機器尚為提供 Web UI 可以方便點擊處理,就還是下海摸一下 command line 啦。

參考文件:

對 server 建立 image 過程中,server 狀態改變後會無法重啟,得用建立好的 Resource template 重新建立,需分外留意!機器就這樣下去領便當了 囧 (Azure/azure-powershell: UN-generalize a VM)

首先,遠端登入機器,執行此道指令

$ sudo waagent -deprovision+user

此命令會嘗試清除系統,使之適合重新佈建。這項作業會執行下列工作:

移除 SSH 主機金鑰 (如果組態檔中的 Provisioning.RegenerateSshHostKeyPair 是 'y')
清除 /etc/resolv.conf 中的名稱伺服器設定
移除 /etc/shadow 中的 root 使用者密碼 (如果組態檔中的 Provisioning.DeleteRootPassword 是 'y')
移除快取的 DHCP 用戶端租用
將主機名稱重設為 localhost.localdomain
刪除最後佈建的使用者帳戶 (取自於 /var/lib/waagent) 和相關聯的資料。


接著,再回到自己的常用的機器,改用 azure cli 對該機器設置以下流程:

$ azure config mode arm
info:    Executing command config mode
info:    New mode is arm
info:    config mode command OK


// Shutdown a virtual machine in a resource group and release the compute resources
$ azure vm deallocate -g MyResource -n MyCurrentVM --subscription MySubscription
info:    Executing command vm deallocate
+ Looking up the VM "MyCurrentVM"                            
+ Deallocating the virtual machine "MyCurrentVM"            
info:    vm deallocate command OK


// Set the state of a VM in a resource group to Generalized.
$ azure vm generalize MyResource MyCurrentVM --subscription MySubscription
info:    Executing command vm generalize
+ Looking up the VM "MyCurrentVM"                            
+ Generalizing the virtual machine "MyCurrentVM"            
info:    vm generalize command OK


$ azure vm capture MyResource MyCurrentVM MyImageID -t MyImageID-base.json --subscription MySubscription
info:    Executing command vm capture
+ Looking up the VM "MyCurrentVM"                            
+ Capturing the virtual machine "MyCurrentVM"                
info:    Saved template to file "MyImageID-base.json"
info:    vm capture command OK


接著,可以建立新開機器!只是開機器前又得好好管理"Resouce"建立,由於我已經有常用的 Resource 跟 Location 了,在此只需建立 IP 跟 NIC 即可!

$ azure network public-ip create MyResource MyImageID-ip-1 -l westus --subscription MySubscription
info:    Executing command network public-ip create
warn:    Using default --idle-timeout 4
warn:    Using default --allocation-method Dynamic
warn:    Using default --ip-version IPv4
+ Looking up the public ip "MyImageID-ip-1"                              
+ Creating public ip address "MyImageID-ip-1"                            
data:    Id                              : /subscriptions/MySubscription/resourceGroups/MyResource/providers/Microsoft.Network/publicIPAddresses/MyImageID-ip-1
data:    Name                            : MyImageID-ip-1
data:    Type                            : Microsoft.Network/publicIPAddresses
data:    Location                        : westus
data:    Provisioning state              : Succeeded
data:    Allocation method               : Dynamic
data:    IP version                      : IPv4
data:    Idle timeout in minutes         : 4
info:    network public-ip create command OK


$ azure network nic create MyResource MyImageID-nic-1 -k default -m MyResource -p MyImageID-ip-1 -l westus --subscription MySubscription
info:    Executing command network nic create
+ Looking up the network interface "MyImageID-nic-1"                    
+ Looking up the subnet "default"                                            
+ Looking up the public ip "MyImageID-ip-1"                              
+ Creating network interface "MyImageID-nic-1"                          
data:    Id                              : /subscriptions/MySubscription/resourceGroups/MyResource/providers/Microsoft.Network/networkInterfaces/MyImageID-nic-1
data:    Name                            : MyImageID-nic-1
data:    Type                            : Microsoft.Network/networkInterfaces
data:    Location                        : westus
data:    Provisioning state              : Succeeded
data:    Internal domain name suffix     : #############.dx.internal.cloudapp.net
data:    Enable IP forwarding            : false
data:    IP configurations:
data:      Name                          : default-ip-config
data:      Provisioning state            : Succeeded
data:      Private IP address            : 10.0.0.6
data:      Private IP version            : IPv4
data:      Private IP allocation method  : Dynamic
data:      Public IP address             : /subscriptions/MySubscription/resourceGroups/MyResource/providers/Microsoft.Network/publicIPAddresses/MyImageID-ip-1
data:      Subnet                        : /subscriptions/MySubscription/resourceGroups/MyResource/providers/Microsoft.Network/virtualNetworks/MyResource/subnets/default
data:  
info:    network nic create command OK


建立機器吧!

$ azure --version
0.10.2 (node: 4.2.4)


$ azure group deployment create MyResource -f MyImageID-base.json --subscription MySubscription
$ azure group deployment create MyResource -f MyImageID-base.json --subscription MySubscription -p '{"vmName":{"value":"MyVM"},"adminUserName":{"value":"ubuntu"},"adminPassword":{"value":"MyPassword"},"networkInterfaceId":{"value":"/subscriptions/MySubscription/resourceGroups/MyResource/providers/Microsoft.Network/networkInterfaces/MyImageID-nic-base"}}'


然而,因為預設產出的 template 定義了以下資訊,以至於開機器必須填寫以下資訊:

$ cat template.json | jq '.parameters'
{
  "vmName": {
    "type": "string"
  },
  "vmSize": {
    "type": "string",
    "defaultValue": "Standard_A1"
  },
  "adminUserName": {
    "type": "string"
  },
  "adminPassword": {
    "type": "securestring"
  },
  "networkInterfaceId": {
    "type": "string"
  }
}


用在這邊:

$ cat template.json | jq '.resources[0].properties.osProfile'
{
  "computerName": "[parameters('vmName')]",
  "adminUsername": "[parameters('adminUsername')]",
  "adminPassword": "[parameters('adminPassword')]"
}


接著,稍微修改來支援 ssh keypair 登入方式,將 template.json 中的 parameters 多增加個 adminPublicKey/adminPublicKeyPath:

$ cat template.json | jq '.parameters'
{
  "vmName": {
    "type": "string"
  },
  "vmSize": {
    "type": "string",
    "defaultValue": "Standard_A1"
  },
  "adminUserName": {
    "type": "string"
  },
  "adminPassword": {
    "type": "securestring",
    "defaultValue": null
  },
  "networkInterfaceId": {
    "type": "string"
  },
  "adminPublicKey": {
    "type": "array"
  },
  "adminPublicKeyPath": {
    "type": "string"
  }
}


並修改 properties.osProfile 區:

$ cat template.json | jq '.resources[0].properties.osProfile'
{
  "computerName": "[parameters('vmName')]",
  "adminUsername": "[parameters('adminUsername')]",
  "adminPassword": "[parameters('adminPassword')]",
  "linuxConfiguration": {
    "disablePasswordAuthentication": true,
    "ssh": {
      "publicKeys": [
         {
           "path": "[parameters('adminPublicKeyPath')]",
           "keyData": "[parameters('adminPublicKey')]"
         }
      ]
    }
  }
}


如此一來,就開機能用 keypair 登入機器:

$ azure group deployment create MyResource -f MyImageID-base.json --subscription MySubscription -p '{"adminPassword":{"value":""},"vmName":{"value":"MyVM"},"adminUserName":{"value":"ubuntu"},"adminPublicKey":{"value":"ssh-rsa ########"},"adminPublicKeyPath":{"value":"/home/ubuntu/.ssh/authorized_keys"},"networkInterfaceId":{"value":"/subscriptions/MySubscription/resourceGroups/MyResource/providers/Microsoft.Network/networkInterfaces/MyImageID-nic-base"}}'

2016年7月27日 星期三

Microsoft Azure 管理筆記 - 仿 AWS 使用 Load Balancer (Azure: Load Balancer/Availability Set)

以 AWS 來說,部署服務會想要用 Auto Scaling 搭配 Load Balancer 來達成 high availability 的架構,而 Load Balancer 扮演著將 requests 導向至一群機器。就 Azure 的服務情況,拆解後包括 Availability Set、Load Balancer 項目。

以把玩的流程來看,需要先搞懂 Availability Set,其建置流程包括 Fault domains 跟 Update domains 關鍵字(可以參考這篇完整介紹 Azure Exam Prep – Fault Domains and Update Domains )

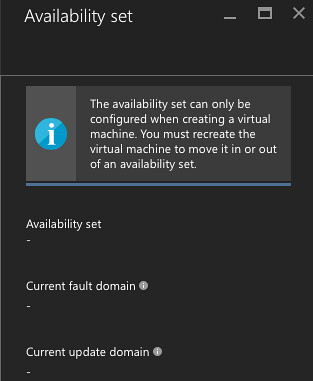
azure_try_to_move_into_aset

接著,在 Availability Set 中添加一台機器(沒機器時,Load balancer 無法設定),這步只能在新開機器時設定,不能對已經開啟的機器設定。

透過新增機器時,設定 Availability Set:
New -> Virtual machine -> Create -> 基本設定後, 在第三步 Settings - Availability 項目中,可以指定 Availability Set。
建置完後,緊接著建立 Load Balancer,建完後在其 Load Balancer -> Settings -> Backend pools -> Add a virtual machine -> Availability Set -> 挑選剛剛建立的 Availability Set(若 Set 裡沒機器,則會無法挑選!)-> 挑選裡頭的機器!

azure_lb_probes

azure_lb_rules

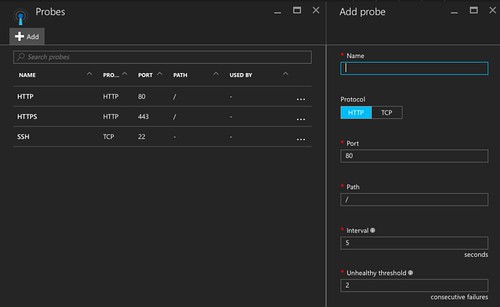
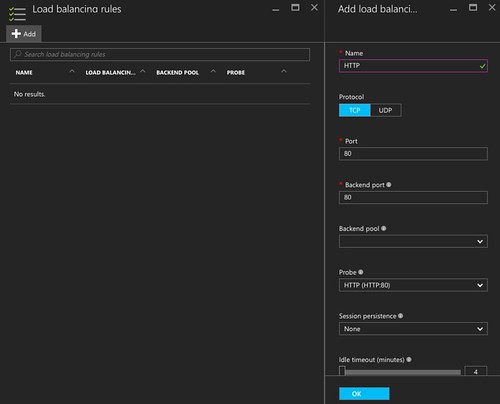
接著處理 requests 導向問題,例如開放 HTTP 80/443, TCP 22 port:
Load Balancer -> Settings -> Probes: 這就像 AWS Load Balancer 檢查某端口服務是否正常
Load Balancer -> Settings -> Load balancing rules: 正式把 requests 導向給後端機器群
azure_vm_network_security_group

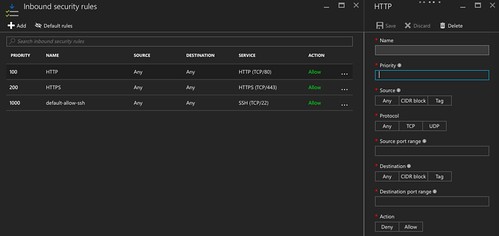
此外,別忘了對剛剛建立的 VM 設定好防火牆(Network security group, 如 VM -> VM Settings -> Network interface -> settings -> )
Network security group -> Settings -> Inbound security rules (有需要可以在設定 Outbound security group),例如預設有開通 22 port ,此時就只需再添加 80, 443 port
如此一來,當 Load balancer 的 probes 檢驗通常順暢後,就可以對 load balancer 送資料試試了。

檢驗流程:
  1. 先檢查 VM 是否運作正常,如有 public ip 就從外面測試 telnet vm_ip port 做檢查,可以先裝個 nginx 或用 sudo python -m SimpleHTTPServer 443 / sudo python -m SimpleHTTPServer 80 應急一下
  2. 對 Load balancer 檢驗,如 telnet load_balanacer_ip port
以上則完成 AWS Load balancer 建置。

Microsoft Azure 管理筆記 - 建立自訂的映像檔 (create a custom image)

最近一直沿用在 AWS 的維護經驗,對應到 Azure 的服務部署,不斷的產生概念上的衝突 XD
總之,太多用 AWS 了,還是從 AWS 的角度來寫個筆記吧。

首先,有些服務不能老是從一台乾淨的 linux server + script 部署出來,有時效的問題,因此就有了自建映像檔的需求,以 AWS 來說,就是 amazon machine image (AMI) 的部分。

然而,在 2016 年的夏天,Azure 的管理介面已經有分新舊版的差異 XD

新版:https://portal.azure.com
舊版:https://manage.windowsazure.com

其中在 Azure 開機器時,也會分 Virtual Machines 跟 Virtual machines (classic) 兩種,其中前者就是新一代的 resource 管理方式,資源管控設計是不錯的,可以做到很細微。但是,對於建立自訂的映像檔的部分,只有 Virtual machines (classic) 在新版選單上有。

Virtual machines (classic):
azure_vm_classic_create_image

Virtual machines:
azure_vm_without_create_image

根據與微軟技術傳教士的討論,據說新版有在開發了 Orz 希望能夠趕快提供這服務。

總之,若不想要用指令 create image 的話,可以先挑 Virtual machines (classic) 來使用。然而,建立完的 image 該怎樣叫出來開機器,新舊版操作介面都是可以處理的。

舊版 https://manage.windowsazure.com -> 新增 -> 運算 -> 虛擬機器 -> 從資源庫 -> 我的映像

auzre_vm_launch

新版 https://portal.azure.com -> 左下方 Browser -> VM image (classic) -> 挑選剛剛製作好的 Image -> 選 Create VM 即可。

以上就是初探 Azure 自訂映像檔、使用映像檔的流程。目前 Azure 頗像 2009 年的 AWS 服務,當年 AWS Web UI 也有很多功能還沒做出來,當時就是要 call api 做事,我想 Azure 新版 Portal 就是處於這個現狀。為了維護交接的成本,我會偏向盡可能用 Web UI 做事,因為不是每個人都願意去處理 command line 的。

此外,再提一下,新版 Virtual machines 則是以 create a custom template image 關鍵字去找,而大部分的自訂 image 包含常見的 VHD (Virtual Hard Disk) 字眼,只是這個領域比較偏 Windows 的用法。

2016年7月20日 星期三

NGNIX 與數個 PHP CodeIgniter 專案部署問題:使用虛擬目錄切該各個專案

最近處理某個老專案,裡頭有多個 PHP CI Project,配置在同一台 Web Server,原本採用 Apache Web Server 設定相安無事,直到搬到 Nginx 才發現頭很痛 XD 若使用 Nginx 部署一個 CI Project 是很容易的,但使用虛擬目錄則會面臨一些問題。

這個原因是建構在部署專案時,採用 Apache Alais 跟 Requests Rewrite 方式,非常便利 Requests URI 導向至指定的 PHP CI Project:

# Apache Web Server
Alias /prefix/project /path/ci/project
<Directory /path/ci/project>
Options FollowSymLinks
DirectoryIndex index.php
AllowOverride None
Require all granted
<IfModule mod_rewrite.c>
RewriteEngine On
RewriteBase /prefix/project
RewriteCond %{REQUEST_URI} ^system.*
RewriteRule ^(.*)$ /index.php?/$1 [L]
RewriteCond %{REQUEST_URI} ^application.*
RewriteRule ^(.*)$ /index.php?/$1 [L]
RewriteCond %{REQUEST_FILENAME} !-f
RewriteCond %{REQUEST_FILENAME} !-d
RewriteRule ^(.*)$ index.php?/$1 [L]
        </IfModule>
</Directory>


其中 /prefix 是個虛擬的目錄,然而,在 Nginx 環境中,若要採用類似的架構時,就會需要處理一些問題,包含要做 requests uri 或 php script filename 的更新等,若 PHP CI Project 有提供 Web UI 時,就還得處理 css/js/image 的 requests 導向。

最終的解法:

# static files
location ^~ /prefix/project/assets/ {
alias "/path/ci/project/assets/";
}

# php requests
location ^~ /prefix/project {
root "path/ci/project";
try_files $uri $uri/ /prefix/project/index.php?$query_string;

location ~ \.php$ {
fastcgi_pass unix:/var/run/php5-fpm.sock;
fastcgi_split_path_info ^(.+\.php)(.*)$;
fastcgi_read_timeout 180;
fastcgi_buffer_size 64k;
fastcgi_buffers 512 32k;
fastcgi_busy_buffers_size 128k;
fastcgi_temp_file_write_size 256k;
fastcgi_index  index.php;
include fastcgi_params;

set $target_fastcgi_script_name $fastcgi_script_name;
if ($target_fastcgi_script_name ~ ^/prefix/project/(.*)$) {
set $target_fastcgi_script_name /$1;
}
fastcgi_param SCRIPT_FILENAME $document_root$target_fastcgi_script_name;
}
}


此外,若想多了解 nginx location 的優先順序,可以參考這則: Nginx location priority - Stack Overflow

2016年7月4日 星期一

Bootstrap 筆記 - 讓 table 以 <tr> 為單位支援 click event

這功能其實不難,但順手筆記一下自己選的解法:

<table class="table table-striped table-hover">
<thead>
<tr>
<td cols="3">
<img class="img-responsive" src="something"/>
</td>
</tr>
</thead>
<tbody>
<tr data-href="link">
<td>Data1</td>
<td>Data2</td>
<td><a href="link">Data3</a></td>
</tr>
</tbody>
</table>


搭配 Javascript(jQuery):

<script>
$(document).ready(function() {
$(".table > tbody > tr").css('cursor', 'pointer').click(function() {
var link = $(this).data("href").trim();
if (link.length > 0)
window.document.location = link;
return false;
});
});
</script>


簡單的說,就是在某個 <td> 欄位裡埋入 <a> tag,但在 <tr> 裡的屬性多個 data-href 來記錄,最後再用 Javascript 埋入 <tr> click event。

看起來好像多埋了 <a> tag ,其主因是為了 SEO。

2016年7月2日 星期六

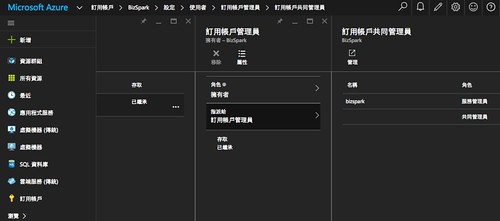
Microsoft Azure 管理筆記 - 建立共同管理者 (AWS IAM效果)

Azure帳號-共同管理1

太習慣用 AWS 了,開始用用 Azure 服務,其 UIUX 太潮了,操勞到眼眶快泛淚才挖到一些設定方式 XD 就筆記一下。

想要用 AWS IAM 的架構,設置多位共同管理者,需要先請其他管理者新註冊 Live account:

https://account.live.com/

接著,主帳號登入 Azure 畫面後,從左下方的訂用帳戶 -> 挑選訂用帳戶 -> 設定 -> 使用者 -> 選擇"訂用帳戶管理員" -> 指派給"訂用帳號管理員" -> 管理 ,就會跳轉到 https://manage.windowsazure.com 網頁

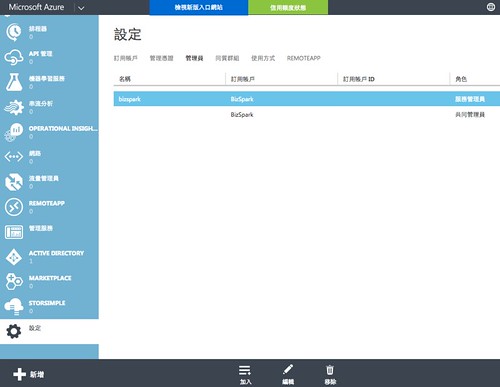
所以啊,若很懶走新的介面,就直接到 https://manage.windowsazure.com 頁面 -> 設定 -> 管理員 -> 點選下方的 "加入" 即可完成添加共同管理員的動作 Orz 並且返回 portal.azure.com 介面則會看到剛添加的共同管理員了。

Azure帳號-共同管理2

2016年6月30日 星期四

[Mac] 使用 Screen 與 RS232 裝置互動,進行 log 分析 @ Mac 10.11.5

今天又跑去偷看 embedded linux 的 console 了,用法(/dev/tty.usbserial 跟 driver 有關):

$ screen /dev/tty.usbserial 115200

若需要仔細看 screen output 時,可以把加大 screen output buffer 或是把 log 寫到檔案

加大 screen buffer size (支援200000 line 輸出) :

ctrl + a + : + scrollback 200000

若覺得還要用 ctrl + a + [ 去追 log 實在很不方便,就是試試把log寫出來吧

ctrl + a + H

如此就會蹦出個 screenlog.0 檔案,可以搭配 vim, tail -f + grep 來使用,例如追蹤 download、upgrade 字眼:

$ tail -f screenlog.0 | grep "download\|upgrade"

如此交叉使用,應該可以解 bug 吧...

[Linux] 系統時區設定與檢查 @ Ubuntu 14.04

習慣在 AWS EC2/RDS 採用 UTC +0 的時區,然後在自家 VMware ESXi server 架設機器沒留意(忘記是選了台北時區還是從台灣下載 Ubuntu ISO 的差別),導致開發與正式站的時區不同 :P 筆記一下驗證與處理方法。

查看系統現況時間
$ date

查看系統時區資訊
$ cat /etc/timezone
Asia/Taipei

設定時區: None of the above -> UTC
$ sudo dpkg-reconfigure tzdata


將相關服務都重啟,像是 Web server 有用到 PHP-FPM 就要重啟動,這樣 PHP 環境才會拿到正確的時間

2016年6月24日 星期五

人生閱歷的省思

近期發生不少事,心情不斷浮沉,稱不上好或壞,或許是最美好的壞時代?處理不少意外蹦出來的事件後,讓我深刻地感受到:人生不可能沒有煩擾。

貧困的時,憂心著下一餐在哪裡;略有小成時,憂心著工作是否有未來;略有口袋時,朝朝暮暮想著房子下落;有小孩時,擔憂著小孩的撫養、教育;小孩長大後,擔心考試、升學、伴侶、結婚、買房,再一次循環;有錢人,則擔心著投資報酬率不如預期。無論怎樣,總是會有一件事讓你掛心的。同理用在面對未來下一步時,到底準備好了嗎?答案是根本無法準備好 XD 只能以當下的資源評估,並朝期待的路線走下去。

當這些思索靜心後,沒有什麼安全路線 :P 安全的路線大概就是平淡的一生,在一間大企業做個安穩的上班族吧!我想,該開始朝著增加亂度的路線了。

2016年6月23日 星期四

[PHP] 使用 Google api client 操作 Google Spreadsheet API (Google Docs - Excel)

最近在整理資料,由於使用情境尚未明朗,想了一下就把資料塞到 Excel 來呈現,要排序、輸出跟轉 PDF 檔都 ok ,再加上有定期更新的需求,就來找一下 Google Spreadsheet API 來用用:https://developers.google.com/sheets/ ,程式擺在:

https://github.com/changyy/codeigniter-library-google-spreadsheet

由於同事比較熟 PHP ,就繼續挑 PHP 路線了 :P 沒想到 PHP 相關的 library 滿少的,大概都推薦 github.com/asimlqt/php-google-spreadsheet-client 這套了,但他採用的 API 所實作出來的有些侷限,但已經可以滿足八成的需求了!

最後為了達成自己想幹的事,在 k 完文件跟摸索後,還是自己下海包一份當作筆記(實在是官方文件都沒寫很清楚,只能自己追細節),包括的功能:

  • 支援單獨使用,以及和 PHP CodeIgniter 合用
  • 使用 composer.json 維護相依性:只有使用 google/apiclient: https://github.com/google/google-api-php-client
  • 使用  Google Spreadsheet API v4
  • 取得 Spreadsheet 清單 (使用 v3 API)
  • 建立 Spreadsheet
  • 修改 Spreadsheet name
  • 建立 Worksheet
  • 刪除 Worksheet
  • 可對 Worksheet 凍結視窗(frozenRow/frozenColumn)
  • 更新 Cells 資料
  • 搭配 Web server (如 CodeIgniter Controller 架構),可以完成 Google OAuth 流程,取得 Access Token 跟 Refresh Token
  • 搭配 Google OAuth offline 權限,可以自動 renew access_token

整體上,若不需要建立 Spreadsheet 跟 frozenRowColumn 的功能,建議直接用 asimlqt/php-google-spreadsheet-client 即可,我只先完成自己需要的部分。

2016年6月8日 星期三

使用 Azure 寄信方案 - SendGrid: Marketing & Transactional Email Service

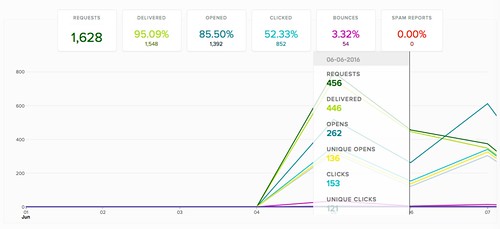
SendGridDashboard

上週出了個大包,原先採用 AWS SES 寄信時,因為綜合原因導致 bounce rate 上升,接著就被停權使用 AWS SES 服務了!這件事說小事也可以,說嚴重很嚴重,單就看你的服務營運跟面對的心態。我把它當很嚴重的事來處理 Orz 包含盡可能跟 AWS 業務互動,再來沒打通 AWS SES 服務前,就趕緊找找替代方案了!

除了用自家的 mail server 寄信撐外,就來找找其他家服務了,於是乎 Azure 就出現了、SendGrid 也出現了!

使用 SendGrid 真的還滿方便的,除了可以查詢寄了哪些信外,什麼都沒做還能提供使用者開信紀錄!真是太便利了。

只是談錢就傷感情了 XD
使用 Sendgrid 一個月發送 40k 封信,要價 9.95 歐元;假設一個月送 40k 封信,若每封 500kb,採用 AWS SES 則是 20GB 流量/month + 1333 封信/day ,總價不到3美金。

2016年4月25日 星期一

[PHP] Use iTunesConnect API to Add iOS App External Test User

其實,已經有 TestFlight 很方便了,但基於一些練習,就稍微仿別人做過的流程練習一下,原理不難:

  1. 使用 cURL + cookie 完成登入 iTunesConnect
  2. 切換至 App 頁面資訊,查看有多少 Test User
  3. 添加 Test User
  4. 刪除 Test User
如此而已 :P 於是乎,用 https://github.com/changyy/codeigniter-library-ios-test-user 紀錄一下。

2016年4月21日 星期四

[SQL] 計算資料比數所佔的比例 @ MySQL 5.6

這個需求好像滿常見的?例如有一張表記錄著許多操作的流水帳,例如:

CREATE TABLE `play_action` (
`id` int(11) unsigned NOT NULL AUTO_INCREMENT,
`timestamp` timestamp NULL DEFAULT CURRENT_TIMESTAMP,
`play_result` INT (10) NOT NULL
)


想要以天為單位:

SELECT DATE_FORMAT(timestamp, "%Y-%m-%d %a") AS d, play_result, count(*) FROM play_action GROUP BY d, play_result

就能得知一天當中,所有操作結果的次數,那如果是比例呢?只好要先 SUM 加總一下 XD 最後在 JOIN 一下即可。此例就用暫存表來處理,其中暫存表不予許同一個 SQL 內有多次存取,所以只好多開一張暫存表來處理,連續動作:

Step 1: 建立一張暫時表,以天為單位,根據播放後的狀態,依序是播放次數、播放日期、播放結果,其中播放結果 0 是正常的

CREATE TEMPORARY TABLE `play` (
`play_count` INT (10) NOT NULL,
`play_date` VARCHAR(32) NOT NULL,
`play_result` INT (10) NOT NULL,
UNIQUE KEY `play_date` (`play_date`, `play_result`)
);


Step 2: 從 play_action 撈資料來填補,此時可以用條件式挑選想要的資料,此例是 4 月之後的資料

INSERT INTO `play` (play_result, play_date, play_count) SELECT play_result, DATE_FORMAT(timestamp, "%Y-%m-%d %a") AS d, count(*) as c FROM play_action WHERE timestamp >= '2016-04-01 00:00:00' GROUP BY play_result, d ORDER BY d ON DUPLICATE KEY UPDATE play_count=VALUES(play_count);

Step 3: 建立另一張暫存表,單純以天記錄總播放次數

CREATE TEMPORARY TABLE `play_sum` (
`play_count` INT (10) NOT NULL,
`play_date` VARCHAR(32) NOT NULL,
UNIQUE KEY `play_date` (`play_date`)
);

INSERT INTO `play_sum` (play_date, play_count) SELECT play_date, SUM(play_count) AS play_total FROM play GROUP BY play_date;


Step 4: 簡易運算,輸出為日期、播放成功次數的比例,總播放次數

SELECT play.play_date, play.play_result, play.play_count / play_sum.play_count * 100, play_sum.play_count AS play_total FROM play, play_sum WHERE play.play_date = play_sum.play_date;

+----------------+-------------+---------------------------------------------+------------+
| play_date      | play_result | play.play_count / play_sum.play_count * 100 | play_total |
+----------------+-------------+---------------------------------------------+------------+
| 2016-04-01 Fri |           0 |                                     54.9398 |        687 |
| 2016-04-02 Sat |           0 |                                     68.9445 |        972 |
| 2016-04-03 Sun |           0 |                                     75.6607 |       1748 |
| 2016-04-04 Mon |           0 |                                     71.3967 |       1112 |
| 2016-04-05 Tue |           0 |                                     70.2852 |        886 |
| 2016-04-06 Wed |           0 |                                     49.8085 |        880 |
| 2016-04-07 Thu |           0 |                                     53.2239 |        596 |
+----------------+-------------+---------------------------------------------+------------+

2016年4月20日 星期三

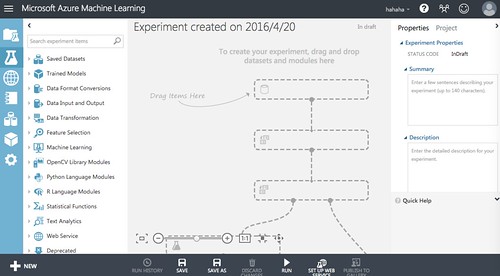
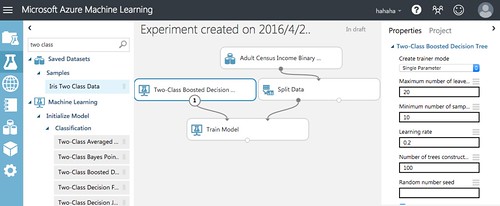
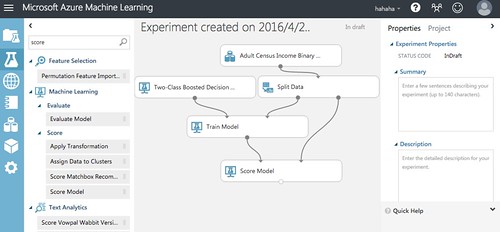
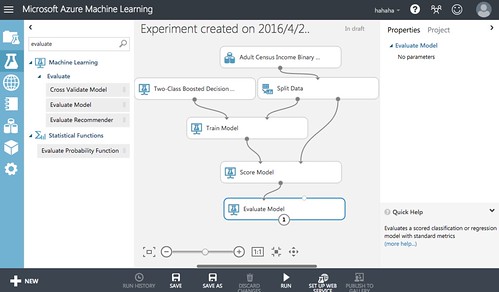
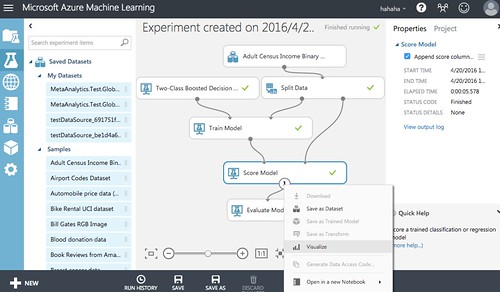
試用 Microsoft Azure Machine Learning / studio.azureml.net 服務

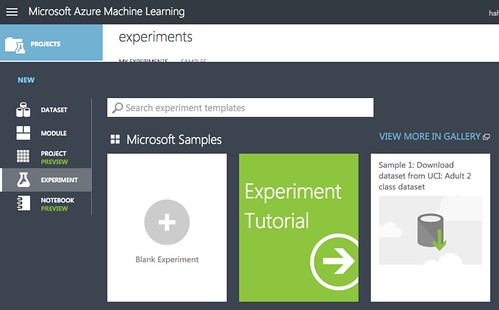
azureml01

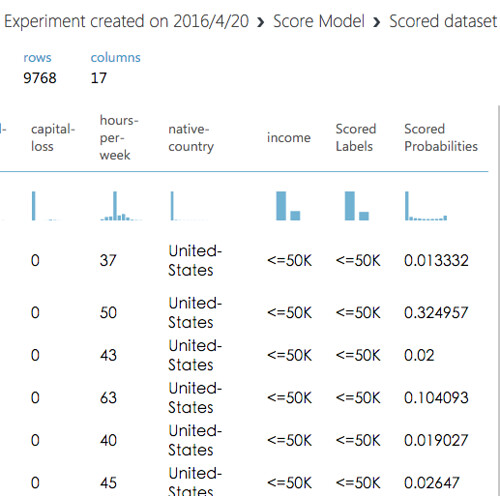
參加了 DevDays Asia 2016 活動,這次本來就看重於 Azure Machine learning 項目,雖然已經多少知道了,但看到講者或是導覽,只需將資料轉成 csv 以及在介面上拖拉一下就完成,還是滿驚豔的 :P
  • http://interopevents.com/taipei2016#taipei2016-speakers
  • https://www.microsoft.com/taiwan/events/devdays/agenda.htm
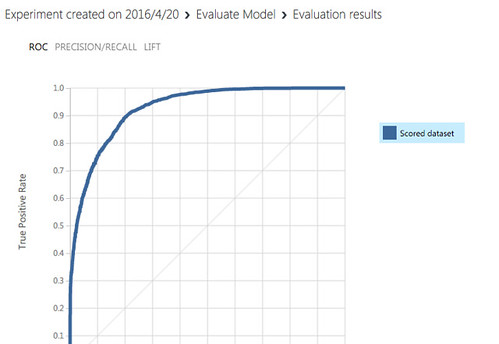
簡言之,使用者只需要將資料轉成 csv 格式(這邊其實是最多 know-how 的),接著完全用 http://studio.azureml.net/ 介面上傳資料、分割資料、挑選要用的演算法,在拉幾下,收工!

整個過程甚至可以方便地觀看 input 資料、觀看 traning 的結果,甚至在穿接成 web service api 來用都可以。這完全把資料分析中的:資料情境分析、資料科學家、資料工程師的工作,其中後兩者的工作都做完八九成了!

為何說資料情境分析還沒呢?當情境定義完後,而資料的前置處理才是最最重要的一塊,這幾乎還是無人能取代的,若真的說要有,大概就是用 AI 或是 try-and-error 把各種排列組合都自動化處理完,這樣也不是不可以啦 :P

筆記一下流程(建議直接上 studio.azureml.net 看導覽):

azureml02

azureml03

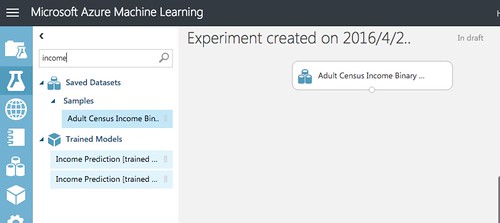
接著,隨意打一些關鍵字,可以找尋到測資:

azureml04

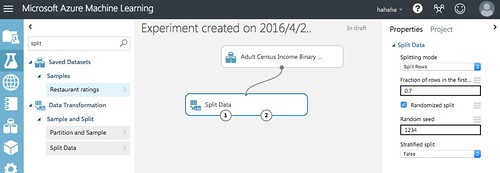
資料有了,接著就是分群,請用 split 關鍵字,依照填寫的比例,把一群拿去 train:

azureml05

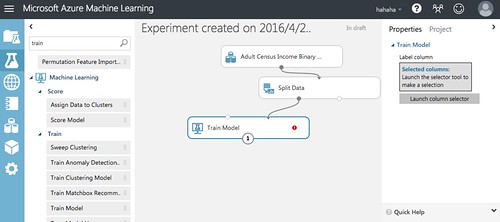
再來,就是要 train 了,可以挑選目標欄位:

azureml06

azureml07

接著,用 two class 關鍵字,可以找到一批免錢的演算法 XD

azureml08

最後,再用 score 關鍵字,可以安排後續的動作:

azureml09

azureml10

再按個 Run 就會跑,跑完就可以看資料囉:

azureml11

azureml12

azureml14

azureml15

你以為就這樣而已嗎?其實還可以在串成 Web service api ... 這段就請直接看完導覽就知道了,在此單純文字紀錄上述流程。

2016年4月4日 星期一

透過 Git Submodule 和 CMake 使用 GoogleTest

大概兩年前有練習一下 [CPP] Unit Test for C++ Usage via Google Test,連假來複習一下,著重在 CMakefile 的使用:

$ cd /path/project
$ git submodule add https://github.com/google/googletest/tree/master/googletest 3rdParty/googletest

$ vim CMakeLists.txt
...

add_subdirectory(3rdParty/googletest)
add_executable(your_unit_test
your_unit_test.cpp
)
add_dependencies(your_unit_test gtest)
include_directories(${gtest_SOURCE_DIR}/include)
target_link_libraries(your_unit_test
gtest
)

2016年3月22日 星期二

Nginx 筆記 - 對於 requests 重導與 request_uri 變數 encode/decode 問題

事情是這樣的,有個服務應用配置 web server (www.localhost) 跟 app server (api.localhost) 時,有這這樣的特性:

網站首頁:http://www.localhost/
前端API:http://www.localhost/api/
真正API:http://api.localhost/

例如有一則 API 服務 http://www.localhost/api/helloworld 必須重導至 http://api.localhost/helloworld 才行。由於 web server 主要服務 static files 而 app server 則是服務 api ,但所有入口點都是在 web server,因此就需要將 requests 導向給後方的 app server:

upstream backend_hosts { server api.localhost:80; }

set $request_url $request_uri;
if ($uri ~ ^/api(.*)$ ) {
set $request_url $1;
}
location ^~ /api/ {
proxy_read_timeout 300;
proxy_set_header Host $http_host; proxy_redirect off;
proxy_set_header X-Forwarded-For $proxy_add_x_forwarded_for;
proxy_pass http://backend_hosts$request_url$is_args$args;
proxy_buffering off;
}


這樣,看似無限美好,但是有個關鍵要留意,上頭有做一次字串處理:set $request_url $1; 這一步把 /api/helloworld 轉成 /helloworld 沒錯,但 $request_url 變數連帶處理了解碼的問題,當整個 requests 只是常見的英數符號時,都是一切正常的,但如果是帶有中文字等需要做 URLEncode/Decode 時,就會出包啦。

$ sudo apt-get install nginx
$ sudo vim /etc/nginx/conf.d/www.conf
upstream backend_hosts { server 127.0.0.1:8000; }

# Web Server
server {
        listen 3000;

        set $request_url $request_uri;
        if ($uri ~ ^/api(.*)$ ) {
                set $request_url $1;
        }
        location ^~ /api/ {
                proxy_read_timeout 300;
                proxy_set_header Host $http_host; proxy_redirect off;
                proxy_set_header X-Forwarded-For $proxy_add_x_forwarded_for;
                proxy_pass http://backend_hosts$request_url$is_args$args;
                proxy_buffering off;
        }

        location ^~ / {
                add_header X-WWW-Request-URL $request_url;
                add_header X-WWW-Request-URI $request_uri;
                return 200;
        }
}
# APP Server
server {
        listen 8000;

        location ^~ / {
                add_header X-API-Request-URI $request_uri;
                return 200;
        }
}
$ sudo service nginx configtest && sudo service nginx restart


接著,使用 curl 來驗證:

$ curl -s -D - 'http://127.0.0.1:3000/'
HTTP/1.1 200 OK
Server: nginx/1.4.6 (Ubuntu)
Content-Type: application/octet-stream
Content-Length: 0
Connection: keep-alive
X-WWW-Request-URL: /
X-WWW-Request-URI: /


看見 X-WWW-Request-URL 和 X-WWW-Request-URI 代表為 3000 port 服務。

$ curl -s -D - 'http://127.0.0.1:3000/api/helloworld?abc=123'
HTTP/1.1 200 OK
Server: nginx/1.4.6 (Ubuntu)
Content-Type: application/octet-stream
Content-Length: 0
Connection: keep-alive
X-API-Request-URI: /helloworld?abc=123


可以看到 X-API-Request-URI: /helloworld?abc=123 時,代表有將 requests 導向到 8000 port 的服務。

接著,試試看URLEncode吧!

$ curl -s -D - 'http://127.0.0.1:3000/%E4%BD%A0%E5%A5%BD%E5%97%8E%0D%0A'          
HTTP/1.1 200 OK
Server: nginx/1.4.6 (Ubuntu)
Content-Type: application/octet-stream
Content-Length: 0
Connection: keep-alive
X-WWW-Request-URL: /%E4%BD%A0%E5%A5%BD%E5%97%8E%0D%0A
X-WWW-Request-URI: /%E4%BD%A0%E5%A5%BD%E5%97%8E%0D%0A


在 3000 port 服務中,X-WWW-Request-URL 和 X-WWW-Request-URI 一致是非常正常,但是,換成 /api/%E4%BD%A0%E5%A5%BD%E5%97%8E%0D%0A 就會出包啦:

$ curl -s -D - 'http://127.0.0.1:3000/api/%E4%BD%A0%E5%A5%BD%E5%97%8E%0D%0A'
HTTP/1.1 200 OK
Server: nginx/1.4.6 (Ubuntu)
Content-Type: application/octet-stream
Content-Length: 0
Connection: keep-alive
X-API-Request-URI: /%e4%bd%a0%e5%a5%bd%e5%97%8e%0d


仔細看會發現 X-API-Request-URI 缺少 %0A 的資料,並且看到 request_uri 有點像是被重新組合過,從原本的大寫變小寫了,但最重要的是有缺資料!

而解法?就是改用 rewrite 來避開了,但是對於這種 URLEncode 的,還必須有前置處理,例如定義新的服務網址: /api/urlencode/%E4%BD%A0%E5%A5%BD%E5%97%8E%0D%0A 用法,接著更新 nginx 設定檔:

upstream backend_hosts { server 127.0.0.1:8000; }

server {
        listen 3000;

        set $request_url $request_uri;

        if ($request_uri ~ ^/api(.*)$ ) {
                rewrite ^ $request_uri;
                rewrite ^/api(.*)$ $1;
                set  $request_url $1;
        }

        location ^~ / {

                add_header X-WWW-Request-URL $request_url;
                add_header X-WWW-Request-URI $request_uri;
                return 200;
        }

        location ^~ /urlencode {
                proxy_read_timeout 300;
                proxy_set_header Host $http_host; proxy_redirect off;
                proxy_set_header X-Forwarded-For $proxy_add_x_forwarded_for;
                proxy_pass http://backend_hosts$request_url;
                proxy_buffering off;
        }
}

server {
        listen 8000;

        location ^~ / {
                add_header X-API-Request-URI $request_uri;
                return 200;
        }
}


如此一來,就會看到 URLENCODE 資訊是沒有被解析過,完整的 pass 到 8000 port 服務囉

$ curl -s -D - 'http://127.0.0.1:3000/api/urlencode/%E4%BD%A0%E5%A5%BD%E5%97%8E%0D%0A'
HTTP/1.1 200 OK
Server: nginx/1.4.6 (Ubuntu)
Content-Type: application/octet-stream
Content-Length: 0
Connection: keep-alive
X-API-Request-URI: /urlencode/%E4%BD%A0%E5%A5%BD%E5%97%8E%0D%0A