顯示具有 test 標籤的文章。 顯示所有文章

2018年5月9日 星期三

Alexa Skill 開發筆記 - 使用 AWS Lambda 與 OAUTH2 帳號連結

公司的產品是 WiFi Display 設備,結合智慧音箱後,透過音控請裝置執行動作,如播放影片。在此就順便紀錄這些開發過程。此處不會提及 OATUH2 開發項目。

首先,Alexa Skill 是個滿好玩的點子,說穿了就像 Apple TV 可以安裝 Apps 的概念,他是個市集,可以讓開發者提供更多智慧音箱的技能擴充,大約是 2015 年開始的。上頭也可以有簡單的變現機制,可以參考:Alexa開發者也可以賺錢了!看亞馬遜怎麼開啟語音應用的全新獲利模式

首先,沒有 Alexa device 也可以開發,善用模擬器即可。開發流程:

  1. 建立 Alexa Developer 帳號(過程就是建立 Amazon 帳號)
  2. 建立 AWS 帳號(綁定信用卡,有免費額度可善用)
  3. 使用模擬器服務 - https://echosim.io/


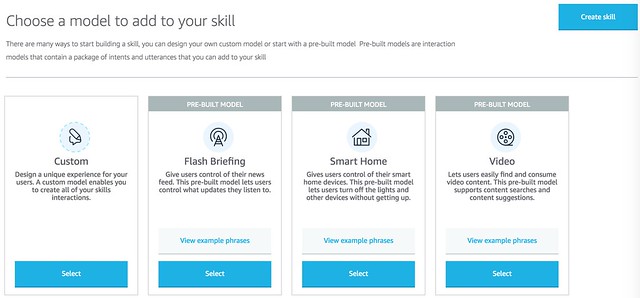
01-skill01

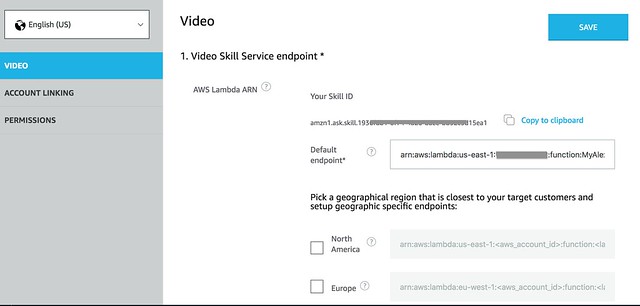
02-skill02

先在 Alexa Developer 先建立一個 Skill project,此例是 Video ,接著就要填寫 AWS Lambda 的位置,就切換到 AWS Lambda 創建流程,而 Alexa Skill 預設是提供 English (US) 的語系,參照 To create a Lambda function 第三步有強調 AWS Region 的部分:
Make sure you’ve selected the N.Virginia for English (US) skills or the EU (Ireland) region for English (UK) and German skills. The region is displayed in the upper right corner. Providing your Lambda function in the correct region prevents latency issues.
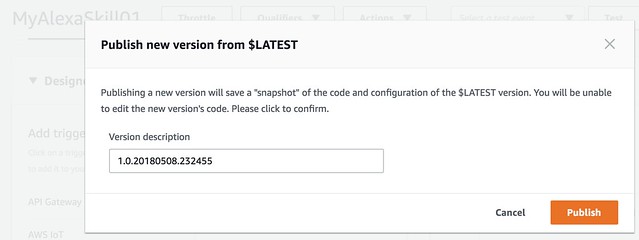
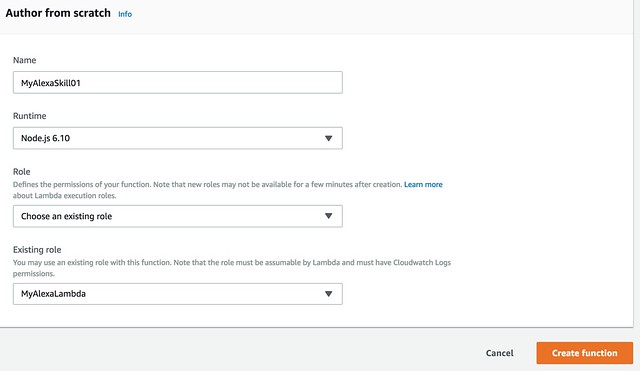
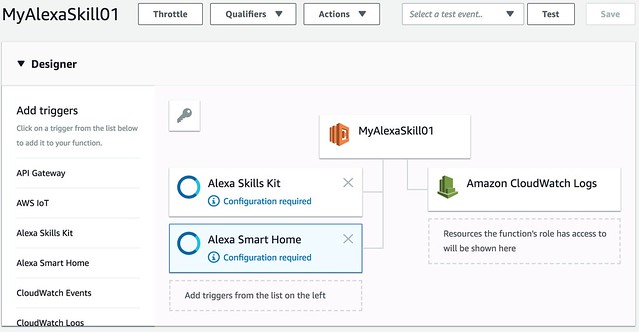
就要在 N.Virginia 創建 AWS Lambda function,不然亂建立根本無法互動。建立完 AWS Lambda function 後,替他增加 Alexa Skill Kit 和 Alexa Smart Home ,並且設定它的 Skill ID,並且把對應的程式碼上傳,且要記得發布出去!
03-aws01

04-aws02

05-aws03

如此一來,此 Skill 作者基本上已經可以測試了,而測試的條件包括要有一個 Alexa 音控裝置,這時就要靠模擬器,可以先到 https://echosim.io/ 登入 Amazon 帳號,即可獲得一台虛擬器。
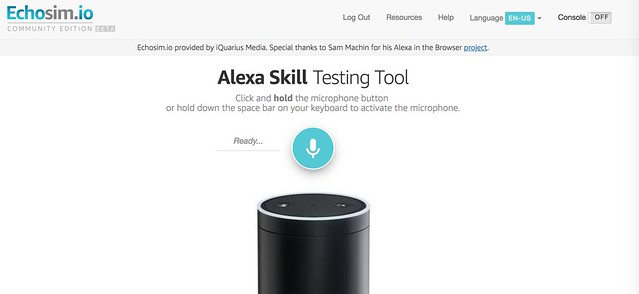
15-simulator

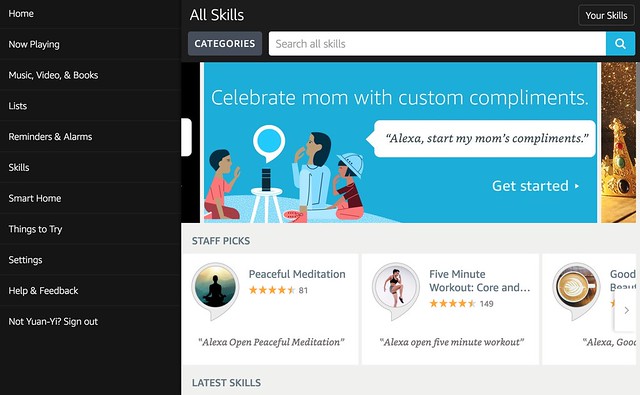
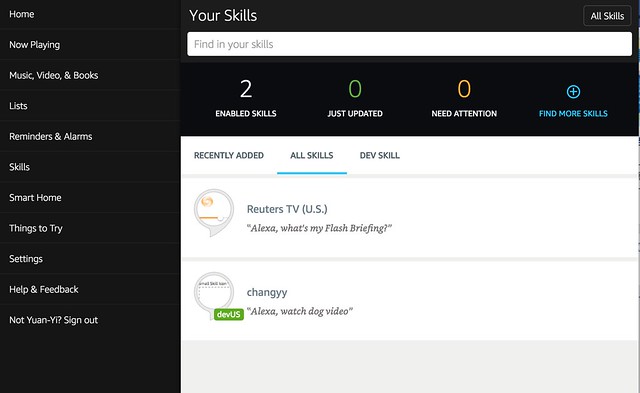
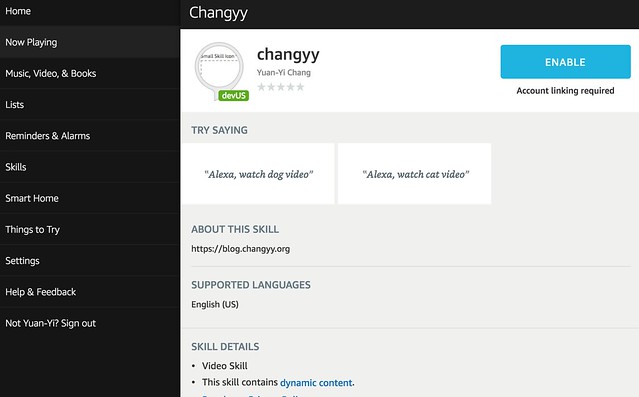
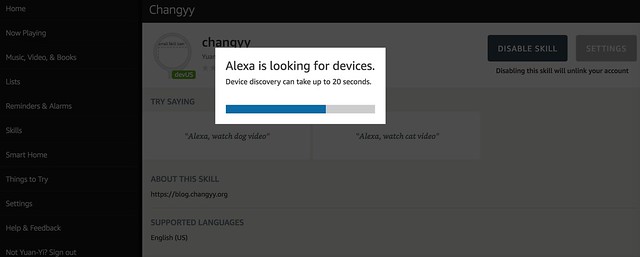
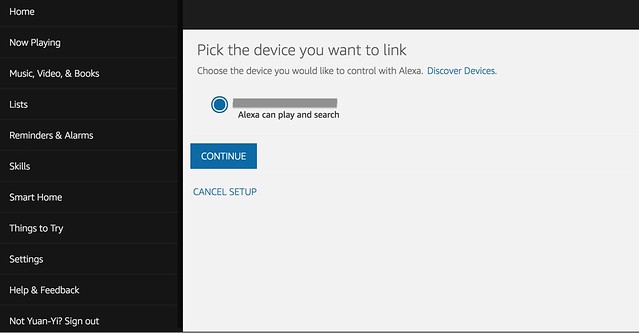
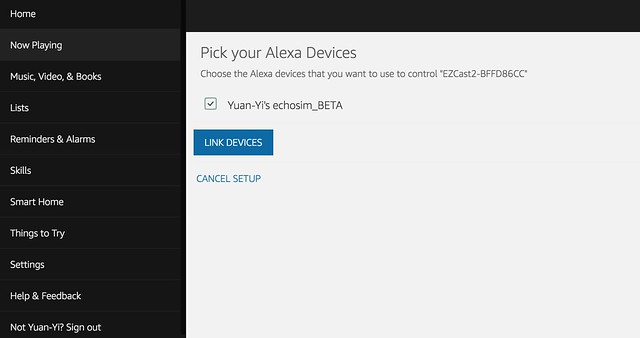
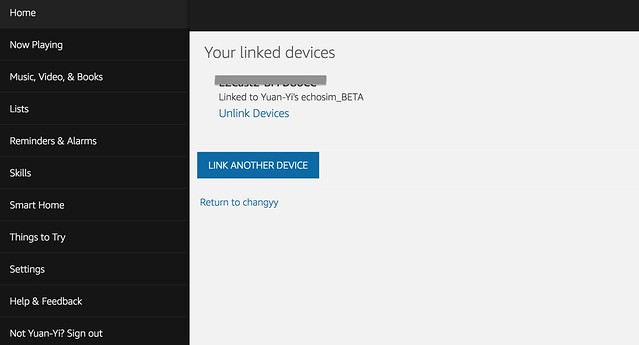
接著,若你人在美國或是擁有美國的 iTunes / Google play 帳號可以下載得到 Amazon Alexa app ,那就直接用,不然只好跟我一樣用用網頁版: https://alexa.amazon.com/spa/index.html ,只要有先把 Amazon 帳號配對過 Alexa 音箱就可以正常切換到 Skill 頁面,點選右上角的 Your skill 即可切換到 Dev skill 來查看,並把自己開發的 skill 給 enable,過程就會觸發 OAUTH2 服務帳號的綁定並授權 Skill 服務使用等等,後續的過程先挑選哪個硬體裝置要被智慧音箱控制(AWS Lambda 要實作 device discovery 等機制),接著再挑哪個智慧音箱來搭配,整個過程用瀏覽器開發工具查看到 api response:

  • https://alexa.amazon.com/api/phoenix/discovery
    • 得知哪些硬體裝置要被控制
  • https://alexa.amazon.com/api/devices-v2/device
    • 得知你的帳號有哪些智慧音箱裝置


06-skill03

07-skill04

08-skill05

09-skill06

10-skill07

11-skill08

12-skill09

最後,自己測試完後,可以再開啟 Beta Test 機制,邀請其他人來測試。而要開啟 Beta Test 只需要把資料填一填,並處於 ready for submission 即可(送審前一步),關鍵的地方就是補一補 icon、描述、甚至一些網址等等,若只要一直內測就可以先亂填
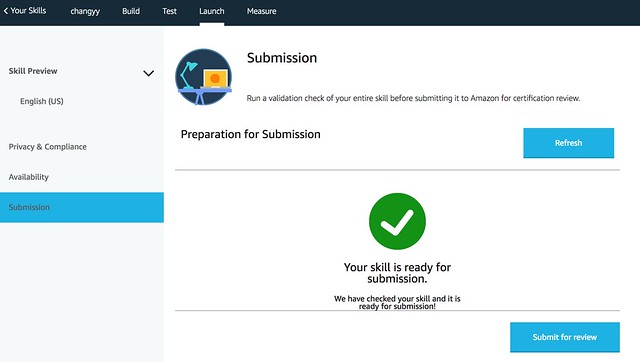
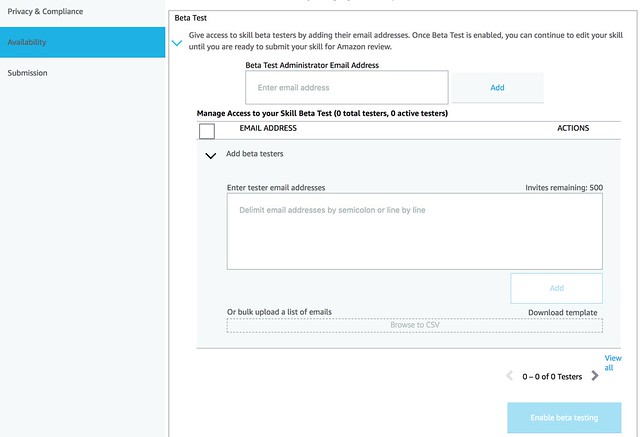
13-skill10

14-skill11

最後,有問題真的要好好看文件 XD 而 AWS Lambda 則可以善用 Cloud Watch 看 logs ,以此確保真的有連線

2018年1月27日 星期六

[PHP] 使用 PHP built-in web server 及 PHP CodeIgniter framework

回想起來,我大概斷斷續續用了 CodeIgniter 七年了,最近才準備在本地開發 XD 開發上就在想 node.js 都有 webpack 等工具了,為啥 PHP 開發上還要先架設個 Web server 而感到納悶。

然而,其實 PHP 早已有 built-in web server 了,雖然只是 single-thread 但在開發上已經非常夠用,就來摸一下怎樣整再一起

$ cd project_web_document_root
$ php -S localhost:8000


接著就在 http://localhost:8000 就可以運行了!
然而,許多 web framework 都靠 routing 把 requests 統一集中到一支程式判斷,似乎已經是個非常基本的設計概念,那在 php built-in web server 也是可以的,他可以設定 routing 機制

$ cd project/web
$ cat ../tools/routing.php
$BASE_DIR = __DIR__ . '/../web' ;
if (file_exists($BASE_DIR . $_SERVER['REQUEST_URI']))
return false;
$_SERVER['SCRIPT_NAME'] = '/index.php';
include_once ($BASE_DIR . '/index.php');
$ php -S localhost:8000 ../tools/routing.php
PHP 7.0.27 Development Server started at Tue Jan 23 12:31:32 2018
Listening on http://localhost:8000
Document root is C:\Users\user\Desktop\ci-project\web
Press Ctrl-C to quit.


更多筆記:changyy/codeiginiter-and-php-built-in-web-server

2016年4月25日 星期一

[PHP] Use iTunesConnect API to Add iOS App External Test User

其實,已經有 TestFlight 很方便了,但基於一些練習,就稍微仿別人做過的流程練習一下,原理不難:

  1. 使用 cURL + cookie 完成登入 iTunesConnect
  2. 切換至 App 頁面資訊,查看有多少 Test User
  3. 添加 Test User
  4. 刪除 Test User
如此而已 :P 於是乎,用 https://github.com/changyy/codeigniter-library-ios-test-user 紀錄一下。

2016年1月28日 星期四

Ansible 筆記 - 解決 selectattr('field_name','equalto','field_value') - TemplateRuntimeError: no test named 'equalto' @ Ubuntu 14.04

最近又再調整 Ansible 的使用架構,想要更多的彈性,勢必就會碰到抽資料出來的問題,接著就會踩到想要用 Jinja2 裡的 test equalto 用法。

目前環境:

$ ansible --version
ansible 2.0.0.2
  config file = /etc/ansible/ansible.cfg
  configured module search path = Default w/o overrides
$ pip show jinja2
---
Name: Jinja2
Version: 2.7.2
Location: /usr/lib/python2.7/dist-packages
Requires: markupsafe


而 equalto 的用法是 Jinja2 2.8 之後才支援的 Orz

只好硬解一下:

$ sudo pip install jinja2 --upgrade
$ pip show jinja2
---
Name: Jinja2
Version: 2.8
Location: /usr/local/lib/python2.7/dist-packages
Requires: MarkupSafe


接著,就沒事了 :P 來一個完整範例紀錄:


- hosts: localhost
  vars:
    rpm_list:
      - name: "my-service-package-1"
        install_dir: "/opt/my-service-package-1/"
      - name: "my-service-package-2"
        install_dir: "/opt/my-service-package-2/"

  task:
    - set_fact: x="{{rpm_list | selectattr('name','equalto','my-service-package-2') | map(attribute='install_dir') |list}}"
    - debug: var={{x}}


執行:

TASK [set_fact] ****************************************************************
ok: [localhost]

TASK [debug] *******************************************************************
ok: [localhost] => {
    "/opt/my-service-package-2/": "VARIABLE IS NOT DEFINED!"
}


---
更新:

$ cat echo.sh
#!/bin/sh
echo '{"all":["127.0.0.1"]}'

$ cat test.xml
---

- hosts: all 
  vars:
    rpm_list:
      - name: "my-service-package-1"
        install_dir: "/opt/my-service-package-1/"
      - name: "my-service-package-2"
        install_dir: "/opt/my-service-package-2/"
  tasks:
    - set_fact: x="{{rpm_list | selectattr('name','equalto','my-service-package-2') | map(attribute='install_dir') |list}}"
    - debug: var=x

$ ansible-playbook -i echo.sh test.xml 
PLAY [all] ***********************************************************************************************************************************************

TASK [Gathering Facts] ***********************************************************************************************************************************
ok: [127.0.0.1]

TASK [set_fact] ******************************************************************************************************************************************
ok: [127.0.0.1]

TASK [debug] *********************************************************************************************************************************************
ok: [127.0.0.1] => {
    "x": [

        "/opt/my-service-package-2/"
    ]
}

PLAY RECAP ***********************************************************************************************************************************************
127.0.0.1                  : ok=3    changed=0    unreachable=0    failed=0    skipped=0    rescued=0    ignored=0   


其他參考資料:

2014年11月25日 星期二

[PHP] 使用 CodeIgniter 和 codeigniter-restserver 建立 RESTful API 以及測試方式 @ Ubuntu 14.04

環境資訊:

  • Ubuntu 14.04 64 Bit (lsb_release -a)
  • PHP 5.5.9 (php -v)
  • CodeIgniter 2.2.0 (echo CI_VERSION)

接著,透過 github.com/chriskacerguis/codeigniter-restserver 擴充 CodeIgniter:

$ wget https://raw.githubusercontent.com/chriskacerguis/codeigniter-restserver/master/application/config/rest.php -O /path/ci_proj/application/config/rest.php

$ wget https://raw.githubusercontent.com/chriskacerguis/codeigniter-restserver/master/application/libraries/Format.php -O /path/ci_proj/application/libraries/Format.php

$ wget https://raw.githubusercontent.com/chriskacerguis/codeigniter-restserver/master/application/libraries/REST_Controller.php -O /path/ci_proj/application/libraries/REST_Controller.php


接著,請確認 application/config/rest.php 設定:

$config[rest_default_format] = 'json'; // 預設為 xml

之後,就可以撰寫簡單的 RESTful API 啦:

<?php if ( ! defined('BASEPATH')) exit('No direct script access allowed');
require(APPPATH.'/libraries/REST_Controller.php');

class Item extends REST_Controller {
        public function index_get() {
                $this->list_get();
        }
        public function index_post() {
                $this->add_post();
        }
        public function index_put() {
                $this->update_put();
        }
        public function index_delete() {
                $this->delete_delte();
        }

        public function list_get() {
                echo "list";
        }
        public function add_post() {
                echo "create";
        }
        public function update_put() {
                echo "put";
        }
        public function remove_delete() {
                echo "remove";
        }
}


測試方式:

取得清單(GET)

$ curl -X GET http://localhost/ci_proj/item/list
$ curl -X GET http://localhost/ci_proj/item/

新增資料(POST)

$ curl -X POST http://localhost/ci_proj/item/add
$ curl -X POST http://localhost/ci_proj/item/


更新資料(PUT)

$ curl -X PUT http://localhost/ci_proj/item/update
$ curl -X PUT http://localhost/ci_proj/item/


刪除資料(DELETE)

$ curl -X DELETE http://localhost/ci_proj/item/delete
$ curl -X DELETE http://localhost/ci_proj/item/


也可以用 wget --method GET/POST/PUT/DELETE 等進行測試。

至於 RESTful 常見的 HTTP STATUS CODE,可以參考 Using HTTP Methods for RESTful Services

例如:

取得清單成功回應 200 OK,失敗則為 404 NOT FOUND;新增資料成功 200 OK 或是 201 LOCATION 到新增項目的 URI,失敗為 404 NOT FOUND;更新資料成功為 200 OK,失敗為 404 NOT FOUND;刪除資料成功為 200 OK,失敗為 404 NOT FOUND。

接著,是設計每個 GET, POST, PUT, DELETE API 細節,可以分別使用 $this->get('param')、$this->post('param')、$this->put('param') 和 $this->delete('param') 取得對應資料,而回應時,需要的 HTTP Status Code 可以使用:

$this->response( array('status' => true), 200);
$this->response( array('status' => false, 'error' => 'error message'), 400);
$this->response( array('status' => false, 'error' => 'error message'), 404);


若要 debug 的話,大概可以用:

$this->response( array('status' => true, 'get' => $this->get(), 'post' => $this->post(), 'put' => $this->put(), 'delete' => $this->delete() ), 200);

搭配 curl -i -X GET|POST|PUT|DELETE -d 'key=value' 方式進行,除了可以看到 HTTP Response code 外,也能看到 get, post, put, delete 各種參數資訊:

$ curl -i -X DELETE -d "haha=hehe" CGI
HTTP/1.1 200 OK
Server: Apache/2.4.7 (Ubuntu)
X-Powered-By: PHP/5.5.9-1ubuntu4.5
Content-Length: 68
Content-Type: application/json; charset=utf-8

{"status":true,"get":[],"post":[],"put":[],"delete":{"haha":"hehe"}}

2014年7月22日 星期二

[CPP] Incremental Test Case for C++ Usage via Google Test @ Ubuntu 14.04

既然做了 Unit Test 了,就希望 Test Case 可以不斷地累積下來。昨晚跟總監級的高手閒聊工作瑣事,以 Python 跟 MongoDB 的互動為例,其實 PyMono 很多操作都還是撰寫 Javascript ,只是從 Python 發動罷了,這時候最佳的設計是讓 Javascript 獨立出來,如此一來可以切割工作出來,讓把玩 Javascript 就專心把玩,而不要每次要改 Javascript 時,還得去動 Python code。

這樣的情境跟 Test Case 有點類似,有沒有辦法讓 Test case 增加時,不必動到測試的邏輯程式?解法就是把 Test Case 用目錄管理,每次做 Unit Test 時,是去掃目錄的檔案出來即可。

片段程式碼:

#include <dirent.h>
bool getFiles(std::string dir, std::vector<std::string> &files) {
        DIR *dp;
        struct dirent *dirp;
        if((dp  = opendir(dir.c_str())) == NULL)
                return false;
        while ((dirp = readdir(dp)) != NULL)
                if(dirp->d_name && dirp->d_name[0] != '.')
                        files.push_back(dir+"/"+std::string(dirp->d_name));
        closedir(dp);
        return true;
}

const std::string testcase_dir_Func1 = "testcase_dir";
TEST(MyJob, testFunc1) {
        std::vector<std::string> testcase;
        std::string dirTarget = testcase_dir_Func1;
        ASSERT_EQ(getFiles(dirTarget,testcase), true);
        ASSERT_EQ(testcase.size() > 0, true);
        for(int i=0 ; i<testcase.size() ; ++i) {
                std::fstream input(testcase[i], std::fstream::binary|std::fstream::in);
                std::stringstream buffer;
                buffer << input.rdbuf();
                ASSERT_EQ(buffer.str().length() > 10, true);

// ...
        }
}

2014年7月21日 星期一

[CPP] Unit Test for C++ Usage via Google Test @ Ubuntu 14.04

跟友人閒聊把玩 CPP 的心得,就被推坑到 Google test 啦:Google C++ Testing Framework

看一下簡介就...準備跳槽了 XD

Who Is Using Google Test?

In addition to many internal projects at Google, Google Test is also used by the following notable projects:
  • The Chromium projects (behind the Chrome browser and Chrome OS)
  • The LLVM compiler
  • Protocol Buffers (Google's data interchange format)
安裝:

$ sudo apt-get install cmake libgtest-dev
$ mkdir gtest && cd gtest
$ cmake /usr/src/gtest/
-- The CXX compiler identification is GNU 4.8.2
-- The C compiler identification is GNU 4.8.2
-- Check for working CXX compiler: /usr/bin/c++
-- Check for working CXX compiler: /usr/bin/c++ -- works
-- Detecting CXX compiler ABI info
-- Detecting CXX compiler ABI info - done
-- Check for working C compiler: /usr/bin/cc
-- Check for working C compiler: /usr/bin/cc -- works
-- Detecting C compiler ABI info
-- Detecting C compiler ABI info - done
-- Found PythonInterp: /usr/bin/python (found version "2.7.6")
-- Looking for include file pthread.h
-- Looking for include file pthread.h - found
-- Looking for pthread_create
-- Looking for pthread_create - not found
-- Looking for pthread_create in pthreads
-- Looking for pthread_create in pthreads - not found
-- Looking for pthread_create in pthread
-- Looking for pthread_create in pthread - found
-- Found Threads: TRUE
-- Configuring done
-- Generating done
-- Build files have been written to: /path/gtest

$ make
Scanning dependencies of target gtest
[ 50%] Building CXX object CMakeFiles/gtest.dir/src/gtest-all.cc.o
Linking CXX static library libgtest.a
[ 50%] Built target gtest
Scanning dependencies of target gtest_main
[100%] Building CXX object CMakeFiles/gtest_main.dir/src/gtest_main.cc.o
Linking CXX static library libgtest_main.a
[100%] Built target gtest_main

$ sudo cp *.a /usr/lib


試用:

$ vim gtest.cpp
#include <gtest/gtest.h>

int main(int argc, char** argv) {
        testing::InitGoogleTest(&argc, argv);
        return RUN_ALL_TESTS();
}
$ g++ gtest.cpp -lgtest -lpthread
$ ./a.out
[==========] Running 0 tests from 0 test cases.
[==========] 0 tests from 0 test cases ran. (0 ms total)
[  PASSED  ] 0 tests.


測試失敗範例:

$ vim gtest.cpp
#include <gtest/gtest.h>

TEST(MyJob, Action1) {
    ASSERT_EQ(0, 1);
}

int main(int argc, char** argv) {
        testing::InitGoogleTest(&argc, argv);
        return RUN_ALL_TESTS();
}


$ g++ gtest.cpp -lgtest -lpthread
$ ./a.out

[==========] Running 1 test from 1 test case.
[----------] Global test environment set-up.
[----------] 1 test from MyJob
[ RUN      ] MyJob.Action1
gtest.cpp:4: Failure
Value of: 1
Expected: 0
[  FAILED  ] MyJob.Action1 (1 ms)
[----------] 1 test from MyJob (1 ms total)

[----------] Global test environment tear-down
[==========] 1 test from 1 test case ran. (1 ms total)
[  PASSED  ] 0 tests.
[  FAILED  ] 1 test, listed below:
[  FAILED  ] MyJob.Action1

 1 FAILED TEST


測試成功的範例:

$ vim gtest.cpp
#include <gtest/gtest.h>

TEST(MyJob, Action1) {
    ASSERT_EQ(0, 0);
}

int main(int argc, char** argv) {
        testing::InitGoogleTest(&argc, argv);
        return RUN_ALL_TESTS();
}


$ g++ gtest.cpp -lgtest -lpthread
$ ./a.out

[==========] Running 1 test from 1 test case.
[----------] Global test environment set-up.
[----------] 1 test from MyJob
[ RUN      ] MyJob.Action1
[       OK ] MyJob.Action1 (0 ms)
[----------] 1 test from MyJob (0 ms total)

[----------] Global test environment tear-down
[==========] 1 test from 1 test case ran. (1 ms total)
[  PASSED  ] 1 test.

2014年7月19日 星期六

[CPP] Unit Test for C++ Usage via CppUnit @ Ubuntu 14.04

隨著時間越來越少後,不知不覺更在意"成果"是否能夠年年累積。想了一會兒後,最佳的方式就是引進軟工管理,除了最基本的版本控制外,幫自己把玩的小玩意 open source 及增加 reuse 的機會也很重要,維護方面則是從簡易人眼的測試改成更制式的 unit test 架構,最好能夠定時批次測試等。只不過採用制式的 unit test 不見得適合 startup 環境,畢竟時間寶貴,有些 prototype 生命週期很短。

在此以 CppUnit 為例,筆記一下怎樣快速使用,更多簡介請參考 CppUnit 文件

安裝:

$ sudo apt-get install libcppunit-dev

$ vim t.cpp
#include <cppunit/ui/text/TestRunner.h>
#include <cppunit/extensions/HelperMacros.h>
#include <cppunit/TestResult.h>
#include <cppunit/CompilerOutputter.h>
#include <cppunit/TestResultCollector.h>
#include <cppunit/BriefTestProgressListener.h>

class SampleTest : public CppUnit::TestFixture {
private:
int a;
public:
void setUp() {
a = 0;
}
void tearDown() {
a = 0;
}
static CppUnit::Test *suite() {
CppUnit::TestSuite *suiteOfTests = new CppUnit::TestSuite( "SampleTest" );
suiteOfTests->addTest( new CppUnit::TestCaller<SampleTest>(
"testSample",
&SampleTest::testSample
));
return suiteOfTests;
}
void testSample() {
CPPUNIT_ASSERT( a == 10 );
}
};

int main() {
std::cout << "\n\n=== Style 1 ===\n\n";
{
CppUnit::TestCaller<SampleTest> test ( "testSample", &SampleTest::testSample );

CppUnit::BriefTestProgressListener progress;
CppUnit::TestResultCollector collectedresults;
CppUnit::TestResult result;
result.addListener(&progress);
test.run( &result );

CppUnit::CompilerOutputter outputter( &collectedresults, std::cerr );
}

std::cout << "\n\n=== Style 2 ===\n\n";
{
CppUnit::TestSuite suite;
suite.addTest( new CppUnit::TestCaller<SampleTest>(
"testSample",
&SampleTest::testSample
));

CppUnit::BriefTestProgressListener progress;
CppUnit::TestResultCollector collectedresults;
CppUnit::TestResult result;
result.addListener(&progress);
suite.run( &result );

CppUnit::CompilerOutputter outputter( &collectedresults, std::cerr );
}

std::cout << "\n\n=== Style 3 ===\n\n";
{
CppUnit::TextUi::TestRunner runner;
runner.addTest( SampleTest::suite() );
runner.run();
}
return 0;
}


測試成功:

=== Style 1 ===

testSample : OK


=== Style 2 ===

testSample : OK


=== Style 3 ===

.


OK (1 tests)


測試失敗:

=== Style 1 ===

testSample : assertion


=== Style 2 ===

testSample : assertion


=== Style 3 ===

.F


!!!FAILURES!!!
Test Results:
Run:  1   Failures: 1   Errors: 0


1) test: testSample (F) line: 27 t.cpp
assertion failed
- Expression: a == 10


目前大概打算對自定的 class 編寫一些偏邏輯層面的 unit test,例如 bool testFunc1(); 的方式,成功就回傳 true,但不套用任何 unit test framework,如此一來純邏輯的驗證更可以適用在不同平台,而要再加上特定的 unit test framework (如 CppUnit) 時,只需簡易套用,可以直接 reusable 而不必重頭寫。

2014年6月27日 星期五

[PHP] 使用 CURL 測試 Remote Resource Availability @ Ubuntu 14.04

有些程式跑在對岸,就該測測網路是否可取得啦

<?php
function checkRemoteResourceAvailability($target_url) {
        $ch = curl_init($target_url);
        curl_setopt($ch, CURLOPT_NOBODY, true);
        $status = curl_exec($ch) !== false && curl_getinfo($ch, CURLINFO_HTTP_CODE) == 200;
        curl_close($ch);
        return $status;
}

echo checkRemoteResourceAvailability('http://tw.yahoo.com/favicon.ico') ? "ok" : "not available";

2014年6月6日 星期五

[Linux] 使用 nc 測試 TCP Port 是否正常 @ Ubuntu 12.04

最近在構想一個架構,在遠方 Data Center 架一個 MySQL Server ,但又在本地端架一個備份機制。當連不到遠端時,改連本地機器,所以,就需要偵測遠方 MySQL Server 的狀態。

於是乎...就是用 nc 指令來達成:

$ nc -z -w 3 remote_server 3306 && echo "OK"

其中 -w timeout 機制。