顯示具有 nginx 標籤的文章。 顯示所有文章

2024年8月7日 星期三

Python 開發筆記 - 使用 Nginx / WSGI / Gunicorn / Flask 進行 Python API 服務的上線整合 @ Ubuntu

近期工作上在 node.js 服務上,多開了一個 python api 服務做整合應用,目前先試著混合架構來擠擠機器資源而不是 micorservice 架構。

實作就是 Nginx 擋在前面,接著有些 requests 交給 node.js 運作,有些 requests 交給 python api 服務,整體上就是透過 Proxy Pass 架構:

$ cat /etc/nginx/conf.d/service.conf | grep location
    location / {

    location /node/ { rewrite ^/node/(.*)$ /$1 break; proxy_set_header X-Real-IP $remote_addr; proxy_set_header X-Forwarded-For $proxy_add_x_forwarded_for; proxy_redirect off; proxy_http_version 1.1; proxy_read_timeout 60; proxy_pass http://localhost:3000; }

    location /python/ { rewrite ^/python/(.*)$ /$1 break; proxy_set_header X-Real-IP $remote_addr; proxy_set_header X-Forwarded-For $proxy_add_x_forwarded_for; proxy_redirect off; proxy_http_version 1.1; proxy_read_timeout 60; proxy_pass http://unix:/var/run/service-py.sock; }

其中 node.js 是跑在 3000 port 服務,而 python api 跑在 unix:/var/run/service-py.sock ,上述 Nginx 設定檔剛好可以作為筆記,屬於兩種不同的設計方式,此外,這邊收到 requests 導向到 node.js 或 python api 時,都會刻意再去掉一些 prefix ,讓後面的服務開發比較多彈性。

回到 python api ,此次採用 Flask framework,他的運行很簡單:

```
% cat app.py
...
if __name__ == '__main__':
    app.run(host='localhost', port=3001)
```

直接執行法:

% python3 app.py 
 * Serving Flask app 'app' (lazy loading)
 * Environment: production
   WARNING: This is a development server. Do not use it in a production deployment.
   Use a production WSGI server instead.
 * Debug mode: off
WARNING: This is a development server. Do not use it in a production deployment. Use a production WSGI server instead.
 * Running on http://localhost:3001
Press CTRL+C to quit

使用 Flask 指令執行:

$ FLASK_APP=app.py flask run --host 0.0.0.0 --port 3001
 * Serving Flask app 'app.py' (lazy loading)
 * Environment: production
   WARNING: This is a development server. Do not use it in a production deployment.
   Use a production WSGI server instead.
 * Debug mode: off
WARNING: This is a development server. Do not use it in a production deployment. Use a production WSGI server instead.
 * Running on all addresses (0.0.0.0)
 * Running on http://127.0.0.1:3001
 * Running on http://x.x.x.x:3001
Press CTRL+C to quit

最後則是為了穩定性,採用 Nginx + WSGI 整合方式,透過 Gunicorn 來工作:

$ cat wsgi.py 
from app import app

if __name__ == "__main__":
    app.run()

$ sudo gunicorn --workers 4 --bind unix:/var/run/service-py.sock -m 777 wsgi:app
[2024-08-07] [1701223] [INFO] Starting gunicorn 20.0.4
[2024-08-07] [1701223] [INFO] Listening at: unix:/var/run/service-py.sock (1701223)
[2024-08-07] [1701223] [INFO] Using worker: sync
[2024-08-07] [1701225] [INFO] Booting worker with pid: 1701225
[2024-08-07] [1701226] [INFO] Booting worker with pid: 1701226
[2024-08-07] [1701227] [INFO] Booting worker with pid: 1701227
[2024-08-07] [1701228] [INFO] Booting worker with pid: 1701228

如果要把運行也包裝系統指令方便處理,就只需:

$ cat /etc/systemd/system/my-py.service 
[Unit]
Description=my-py-service
After=network.target

[Service]
Type=simple
User=root
WorkingDirectory=/path/project
#ExecStart=/usr/bin/python3 app.py
#Environment=FLASK_APP=app.py
#ExecStart=/usr/bin/python3 -m flask run --port 3001 --host 0.0.0.0
ExecStart=/usr/bin/gunicorn --workers 4 --bind unix:/var/run/service-py.sock -m 777 wsgi:app
Restart=on-failure

[Install]
WantedBy=multi-user.target

後續就可以透過以下方式管理:

$ sudo systemctl status my-py.service
$ sudo systemctl stop my-py.service
$ sudo systemctl start my-py.service
$ sudo systemctl restart my-py.service

2024年2月16日 星期五

Docker 開發筆記 - 使用 Docker Compose 架設 Gitlab 服務 / 處理自訂 Ports / HTTPS SSL 憑證 @ macOS 14.2.1


延續上一篇 Docker 開發筆記 - 使用 Docker Compose 架設 Jenkins 服務 @ macOS 14.2.1 活動,該寫一下 gitlab 架設筆記。其實過年期間有播空試試,但是處理很不順,再加上跑去玩樂就荒廢了。昨晚終於可以收尾一下,把一些使用過程列一下。當時踩坑的原因是自己沒有把環境清乾淨,花了大把時間除錯。

先來個環境簡介:

% docker version 

Client:

 Cloud integration: v1.0.35+desktop.10

 Version:           25.0.3

 API version:       1.44

 Go version:        go1.21.6

 Git commit:        4debf41

 Built:             Tue Feb  6 21:13:26 2024

 OS/Arch:           darwin/arm64

 Context:           desktop-linux


Server: Docker Desktop 4.27.2 (137060)

 Engine:

  Version:          25.0.3

  API version:      1.44 (minimum version 1.24)

  Go version:       go1.21.6

  Git commit:       f417435

  Built:            Tue Feb  6 21:14:22 2024

  OS/Arch:          linux/arm64

  Experimental:     false

 containerd:

  Version:          1.6.28

  GitCommit:        ae07eda36dd25f8a1b98dfbf587313b99c0190bb

 runc:

  Version:          1.1.12

  GitCommit:        v1.1.12-0-g51d5e94

 docker-init:

  Version:          0.19.0

  GitCommit:        de40ad0


清乾淨後再重啟:

% docker-compose down -v
% rm -rf ~/docker-gitlab
% docker-compose up

總之先來為回顧官網的 docker 教學吧!依照 gitlab 官網的安裝簡介 可以很快速地裝起來 :

% cat /etc/hosts | grep gitlab
127.0.0.1 gitlab.example.com
% cat docker-compose.yml 
# https://docs.docker.com/compose/compose-file/compose-versioning/
version: '3.8' 
services:
  gitlab:
    image: gitlab/gitlab-ee:latest
    container_name: gitlab
    restart: always
    hostname: 'gitlab.example.com'
    environment:
      GITLAB_OMNIBUS_CONFIG: |
        external_url 'http://gitlab.example.com:8929'
        gitlab_rails['gitlab_shell_ssh_port'] = 2424
    ports:
      - '8929:8929'
      - '2424:2424'
    volumes:
      - '~/docker-gitlab/config:/etc/gitlab'
      - '~/docker-gitlab/logs:/var/log/gitlab'
      - '~/docker-gitlab/data:/var/opt/gitlab'
    shm_size: '256m'

% docker-compose up
...

% docker container ls                   
CONTAINER ID   IMAGE                     COMMAND             CREATED         STATUS                   PORTS                                                             NAMES
XXXXXXXXXXXX   gitlab/gitlab-ee:latest   "/assets/wrapper"   3 minutes ago   Up 3 minutes (healthy)   22/tcp, 443/tcp, 0.0.0.0:20080->80/tcp, 0.0.0.0:20022->2424/tcp   gitlab

主要是看到 docker container 狀態要顯示 healthy ,接著就可以去瀏覽 http://gitlab.example.com:8929 位置了(註:gitlab.example.com被我設定成 127.0.0.1)。

接著我還在惡搞切換 nginx port,以及碰到 chrome browser 的 ERR_UNSAFE_PORT,最後延宕了好一陣子 :P 就把剩下的流水帳心得都記錄一下:
  • 關於 gitlab/gitlab-ee:latest 和 gitlab/gitlab-ce:latest ,據說 gitlab/gitlab-ee:latest 沒有序號啟動時,就等同於 gitlab/gitlab-ce:latest ,就統一用 gitlab/gitlab-ee:latest 即可
  • 記得初次使用時,登入帳號是 root ,密碼躲在 /etc/gitlab/initial_root_password
% docker container ls
CONTAINER ID   IMAGE                     COMMAND             CREATED          STATUS                    PORTS                                                              NAMES
XXXXXXXX   gitlab/gitlab-ee:latest   "/assets/wrapper"   20 minutes ago   Up 18 minutes (healthy)   80/tcp, 443/tcp, 0.0.0.0:20443->20443/tcp, 0.0.0.0:20022->22/tcp   gitlab

% docker exec -it XXXXXXXX cat /etc/gitlab/initial_root_password
# WARNING: This value is valid only in the following conditions
#          1. If provided manually (either via `GITLAB_ROOT_PASSWORD` environment variable or via `gitlab_rails['initial_root_password']` setting in `gitlab.rb`, it was provided before database was seeded for the first time (usually, the first reconfigure run).
#          2. Password hasn't been changed manually, either via UI or via command line.
#
#          If the password shown here doesn't work, you must reset the admin password following https://docs.gitlab.com/ee/security/reset_user_password.html#reset-your-root-password.

Password: yNRnhTRu9IZ/eBvlC3BCDeuK6zn6BUBmGB+a89SMpn0=

# NOTE: This file will be automatically deleted in the first reconfigure run after 24 hours.
  • 使用 GITLAB_OMNIBUS_CONFIG 可以便利的完成絕大部分的設定
  • 自訂的 port 請避開 chrome browser 定義的 ERR_UNSAFE_PORT 清單,這個雷不小心會耗掉非常多時間的,例如我偷懶把 80 增加個 10000 變成 10080 ...就中招,讓我以為有什麼服務沒啟動成功
  • 善用 external_url 設定外部連進去的資訊,並且把 HOST:CONTAINER Ports 都填寫一樣是最輕鬆的方式:
    environment:
      GITLAB_OMNIBUS_CONFIG: |
        external_url 'http://gitlab.example.com:20080'
        gitlab_rails['gitlab_shell_ssh_port'] = 20022
    ports:
      - '20080:20080'
      - '20022:20022'
  • 想要來惡搞讓 nginx 聽在不同 port ,那就要設定更多東西
    environment:
      GITLAB_OMNIBUS_CONFIG: |
        external_url 'http://gitlab.example.com:20080'
        nginx['listen_port'] = 80
        gitlab_rails['gitlab_shell_ssh_port'] = 22
    ports:
      - '20080:80'
      - '20022:22'
  • 想要啟用加密連線,單靠 external_url 更新成 `https://` 的描述也會默認啟動 SSL 加密連線服務,但下一刻還得處理憑證問題,連續動作:
% mkdir -p ssl
% test -e ./ssl/localhost.key || openssl genpkey -algorithm RSA -out ./ssl/localhost.key
% test -e ./ssl/localhost.crt || openssl req -x509 -nodes -days 365 -newkey rsa:2048 -keyout ./ssl/localhost.key -out ./ssl/localhost.crt -subj '/C=US/ST=State/L=City/O=Organization/OU=Unit/CN=localhost'
% tree ssl 
ssl
├── localhost.crt
└── localhost.key

1 directory, 2 files 
 
% cat docker-compose.yml
 ...
     environment:
       GITLAB_OMNIBUS_CONFIG: |
         external_url 'https://gitlab.example.com:20443'
         #nginx['listen_port'] = 443
         nginx['ssl_certificate'] = "/etc/gitlab-ssl-usage/localhost.crt"
         nginx['ssl_certificate_key'] = "/etc/gitlab-ssl-usage/localhost.key"
         gitlab_rails['gitlab_shell_ssh_port'] = 22

     ports:
       - '20443:20443'
       - '20022:22'

     volumes:
       - './ssl:/etc/gitlab-ssl-usage'
  • 若不想靠 volumes 掛進來,也可以改用 command 來發動
     command: ["sh", "-c", "mkdir -p /etc/gitlab-ssl-usage && (test -e /etc/gitlab-ssl-usage/localhost.key || openssl genpkey -algorithm RSA -out /etc/gitlab-ssl-usage/localhost.key ) && ( test -e /etc/gitlab-ssl-usage/localhost.crt || openssl req -x509 -nodes -days 365 -newkey rsa:2048 -keyout /etc/gitlab-ssl-usage/localhost.key -out /etc/gitlab-ssl-usage/localhost.crt -subj '/C=US/ST=State/L=City/O=Organization/OU=Unit/CN=localhost' ) && /assets/wrapper "]
     #command: ["sh", "-c", "/tmp/config/setup.sh"]
     environment:
       GITLAB_OMNIBUS_CONFIG: |
         external_url 'https://gitlab.example.com:20443'
         nginx['ssl_certificate'] = "/etc/gitlab-ssl-usage/localhost.crt"
         nginx['ssl_certificate_key'] = "/etc/gitlab-ssl-usage/localhost.key"
         gitlab_rails['gitlab_shell_ssh_port'] = 22

     ports:
       - '20443:20443'
       - '20022:22'

  • 最初實驗時還曾碰過 redis 跟 postgres 無法跑起來的問題 ( /var/opt/gitlab/postgresql/ , /var/opt/gitlab/redis/ ),以至於變成非常臭長的架構,我想沒事都可以不用這樣惡搞了,在此順便留戀一下

# https://docs.docker.com/compose/compose-file/compose-versioning/
version: '3.8' 
services:
  redis:
    restart: unless-stopped 
    image: redis:latest
    container_name: gitlab-redis
    volumes:
      - ~/docker_gitlab_home/redis:/data
      - ~/docker_gitlab_home/socket-redis:/var/run/redis
  postgres:
    image: postgres:latest
    container_name: gitlab-postgres
    restart: unless-stopped
    environment:
      POSTGRES_USER: gitlab
      POSTGRES_PASSWORD: gitlabAdmin
    volumes:
      - ~/docker_gitlab_home/postgres:/var/lib/postgresql/data
      - ~/docker_gitlab_home/socket-postgresql:/var/run/postgresql
  gitlab:
    # https://docs.gitlab.com/ee/install/docker.html#install-gitlab-using-docker-compose
    # https://hub.docker.com/r/gitlab/gitlab-ee/
    # https://hub.docker.com/r/gitlab/gitlab-ce
    image: gitlab/gitlab-ee:latest
    container_name: gitlab-main
    depends_on:
      - postgres
      - redis
    # https://docs.docker.com/config/containers/start-containers-automatically/#use-a-restart-policy
    restart: unless-stopped 
    hostname: 'localhost'
    command: ["sh", "-c", "mkdir -p /etc/gitlab-ssl-usage && (test -e /etc/gitlab-ssl-usage/localhost.key || openssl genpkey -algorithm RSA -out /etc/gitlab-ssl-usage/localhost.key ) && ( test -e /etc/gitlab-ssl-usage/localhost.crt || openssl req -x509 -nodes -days 365 -newkey rsa:2048 -keyout /etc/gitlab-ssl-usage/localhost.key -out /etc/gitlab-ssl-usage/localhost.crt -subj '/C=US/ST=State/L=City/O=Organization/OU=Unit/CN=localhost' ) && /assets/wrapper "]
    environment:
      GITLAB_OMNIBUS_CONFIG: |
        # Add any other gitlab.rb configuration here, each on its own line
        #external_url 'http://localhost:20080'
        #nginx['listen_port'] = 80
        external_url 'https://localhost:20443'
        gitlab_rails['gitlab_shell_ssh_port'] = 22
        nginx['listen_port'] = 443
        nginx['listen_https'] = true
        nginx['ssl_certificate'] = "/etc/gitlab-ssl-usage/localhost.crt"
        nginx['ssl_certificate_key'] = "/etc/gitlab-ssl-usage/localhost.key"
        #letsencrypt['enable'] = false
        gitlab_rails['db_username'] = "gitlab"
        gitlab_rails['db_password'] = "gitlabAdmin"
    ports:
      # note: ERR_UNSAFE_PORT - https://chromium.googlesource.com/chromium/src.git/+/refs/heads/main/net/base/port_util.cc#27
      # HOST:CONTAINER
      - 20443:443
      #- 20080:80
      - 20022:22
    volumes:
      - ~/docker_gitlab_home/config:/etc/gitlab
      - ~/docker_gitlab_home/logs:/var/log/gitlab
      - ~/docker_gitlab_home/data:/var/opt/gitlab
      - ~/docker_gitlab_home/redis:/var/opt/gitlab/data/redis
      - ~/docker_gitlab_home/postgresql:/var/opt/gitlab/postgresql
      - ~/docker_gitlab_home/socket-postgresql:/var/opt/gitlab/postgresql/
      - ~/docker_gitlab_home/socket-redis:/var/opt/gitlab/redis/ 

2017年6月15日 星期四

透過 Nginx proxy_pass 架構,進行 Service migration

有一個舊網站已活了數年,改造的方向不外乎提升 SEO、移除不需要的檔案、增加系統安全、架構拆分,或是基本的 Web Framework 的抽換使用等等。對於一個 IoT 產業來說,包袱多多,像是 device 不見得會更新到新版,更別說會跟隨 HTTP 301/302 去取得新資源,甚至新網站的開發還沒辦法一步到位全部切換,只好透過 Nginx proxy_pass 架構去處理相容並扛流量了。

在此使用 upstream 管理舊機器們,並且添加新的 log format 多紀錄 $upstream_addr 資訊以便後續維護:

log_format add_proxy_pass '$remote_addr - $remote_user [$time_local] [=$upstream_addr=] "$request" ' '$status $body_bytes_sent "$http_referer" ' '"$http_user_agent" "$http_x_forwarded_for"';

resolver 8.8.8.8;
upstream oldserver {
hostname1;
hostname2;
hostname3;
}


後續,都是在 nginx server {} 定義範圍下。

更改 log 記錄格式:

access_log  /var/log/nginx/access.log add_proxy_pass;

預期 http client 能處理 HTTP 301/302 的服務位置,給予更佳的 SEO URL:

location ~ old_page\.php$ {
return 301 $scheme://$host/new/page/;
}


對於不能用 HTTP 301/302 的,則改用 proxy_pass 機制:

location ~ ^/old/resource {
proxy_pass http://oldserver$uri;
}


對於,有些文件很清楚要更改內文關鍵字的,可以善用 ngx_http_sub_module:

location /old/resource/file\.json {
proxy_pass http://oldserver$uri;
sub_filter_types *;
sub_filter_once off;
sub_filter '//old.hostname/' '//cdn.hostname/';
}


也可以順順換成 CDN 架構囉。

2017年6月14日 星期三

AWS 筆記 - AWS ELB 與 Nginx 之 DOS 惡意攻擊者的處理方式

這個緣由是這樣的,有一台 Server 被狂打,但架構是:

Remote client <-> AWS ELB <-> Web server (Nginx) <-> Application

當有用戶非常好心地發大量 request 來檢查機器漏洞,若 Nginx 預設都沒多做設定,那 access.log 都會只記錄到 AWS ELB IP ,也就是不能把 access.log 紀錄的 IP 拿來 ban ,會變成 ban 掉 ELB。

而 AWS 提供的 Security group 預設是從 Allow 的角度,若要特意 ban 掉某個 IP 會有點難搞,例如要改寫防火牆規則,因此,最後就改成從實體 server 去阻擋遠端 client request 了。

步驟一:先讓 Nginx 可以記錄到真實的 remote ip

/etc/nginx/nginx.conf

http {
    # ...
    real_ip_header X-Forwarded-For;
    set_real_ip_from 0.0.0.0/0;

    log_format  main  '$remote_addr - $remote_user [$time_local] "$request" '
                      '$status $body_bytes_sent "$http_referer" '
                      '"$http_user_agent" "$http_x_forwarded_for"';
    # ...
}


如此一來,access.log 的 remote_addr 就可以不是 AWS ELB IP 了。

步驟二:用 Nginx 去 deny ip

/etc/nginx/conf.d/your-service.conf

server {
  # ...
  deny RemoteIP;
  # ...
}


這樣設定後,在用 sudo nginx -t 檢查語法後,就可以啟用了

在此不用 iptables 去阻擋的主因是封包進來的 IP 都是 AWS ELB ,所以才改從 Nginx/App 這層取阻擋。缺點就是 access.log 還是一直肥,好處是可以觀察 access.log 看看對方是不是放棄攻擊了?XD

未來若碰到 DDOS 就...

2016年9月8日 星期四

Ansible 筆記 - 設定 Nginx 啟用 ngx_http_geoip_module.so 片段程式 @ Ubuntu 14.0

其實該寫成 Ansible Role 的,但一時之間有點懶,先把練習的片段紀錄一下。

安裝 nginx-module-geoip:

$ cat geoip-nginx.yml
---
    - name: install geoip packages
      apt: name={{ item }} update_cache=yes state=latest
      with_items:
        - nginx-module-geoip
      when: install_package is defined and install_package

    - name: check maxmind db - http://geolite.maxmind.com/download/geoip/database/GeoLiteCountry/GeoIP.dat.gz
      command: bash -c 'test -e /data/GeoIP.dat || curl http://geolite.maxmind.com/download/geoip/database/GeoLiteCountry/GeoIP.dat.gz | gunzip - > /data/GeoIP.dat'

    - name: check maxmind db - http://geolite.maxmind.com/download/geoip/database/GeoLiteCity.dat.gz
      command: bash -c 'test -e /data/GeoLiteCity.dat || curl http://geolite.maxmind.com/download/geoip/database/GeoLiteCity.dat.gz | gunzip - > /data/GeoLiteCity.dat'


設定 nginx.conf:

$ cat server-deploy.yml
...
  tasks:
    ...
    - include: geoip-nginx.yml
    - name: setup nginx config file - add modules/ngx_http_geoip_module.so
      lineinfile:
        dest: /etc/nginx/nginx.conf
        insertbefore: '^user '
        line: 'load_module "modules/ngx_http_geoip_module.so";'

    - name: setup nginx config file - setup geoip resource path
      lineinfile:
        dest: /etc/nginx/nginx.conf
        insertafter: '^http {'
        line: '    geoip_country /data/GeoIP.dat; geoip_proxy 192.168.0.0/16; geoip_proxy 10.0.0.0/24; geoip_proxy_recursive on;'
        #line: '    geoip_city    /data/GeoLiteCity.dat;'

    - name: setup nginx file to enable geoip - update log format
      lineinfile:
        dest: /etc/nginx/nginx.conf
        regexp: ".*?http_user_agent.*?http_x_forwarded_for"
        line: "                      '\"$http_user_agent\" \"$http_x_forwarded_for\"' $geoip_country_code \"$geoip_country_name\" ;"

    - name: setup nginx file to enable geoip - add GEOIP_COUNTRY_CODE for FastCGI
      lineinfile:
        dest: /etc/nginx/fastcgi_params
        insertbefore: "^fastcgi_param QUERY_STRING"
        line: "fastcgi_param     GEOIP_COUNTRY_CODE $geoip_country_code;"


如此一來,產生的 nginx.conf 如下:

$ cat /etc/nginx/nginx.conf && sudo nginx -t

load_module "modules/ngx_http_geoip_module.so";
user www-data;
worker_processes  1;

error_log  /var/log/nginx/error.log warn;
pid        /var/run/nginx.pid;


events {
    worker_connections  1024;
}


http {
    geoip_country /data/GeoIP.dat; geoip_proxy 192.168.0.0/16; geoip_proxy 10.0.0.0/24; geoip_proxy_recursive on;
    include       /etc/nginx/mime.types;
    default_type  application/octet-stream;

    log_format  main  '$remote_addr - $remote_user [$time_local] "$request" '
                      '$status $body_bytes_sent "$http_referer" '
                      '"$http_user_agent" "$http_x_forwarded_for"' $geoip_country_code "$geoip_country_name" ;

    access_log  /var/log/nginx/access.log  main;

    sendfile        on;
    #tcp_nopush     on;

    keepalive_timeout  65;

    #gzip  on;

    include /etc/nginx/conf.d/*.conf;
}
nginx: the configuration file /etc/nginx/nginx.conf syntax is ok
nginx: configuration file /etc/nginx/nginx.conf test is successful


查看 /var/log/nginx/access.log 就可以看到類似的範例:

.... CN,CHN,"China"
.... US,USA,"United States"


更多變數定義,請參考:http://nginx.org/en/docs/http/ngx_http_geoip_module.html

2016年9月7日 星期三

[Linux] Nginx 啟用 nginx-module-geoip @ Ubuntu 14.04

Nginx 從 1.9.1 起,支援 Dynamic Modules 囉,此例是想要使用 MaxMind 來進行 IP 反查,接著想說有沒有方便的整合方式,像是寫 PHP 就用 MaxMind PHP library 等。

接著,就先查一下自己的 nginx 情況吧!

$ nginx -V
nginx version: nginx/1.10.1
... 找關鍵字 ...
--with-http_geoip_module=dynamic
...


很 OK ,接著再裝一下 ngx_http_geoip_module.so 吧!

$ apt-cache search nginx-module-geoip
nginx-module-geoip - geoip module
$ sudo apt-get install nginx-module-geoip
...
The GeoIP dynamic module for nginx has been installed.
To enable this module, add the following to /etc/nginx/nginx.conf
and reload nginx:

    load_module modules/ngx_http_geoip_module.so;

Please refer to the module documentation for further details:
http://nginx.org/en/docs/http/ngx_http_geoip_module.html
...


下載 MaxMind 資料:

$ curl http://geolite.maxmind.com/download/geoip/database/GeoLiteCountry/GeoIP.dat.gz | gunzip - > /data/GeoIP.dat
$ curl http://geolite.maxmind.com/download/geoip/database/GeoLiteCity.dat.gz | gunzip - > /data/GeoLiteCity.dat


設置 Nginx,把 load_module 擺在最前頭
$ sudo vim /etc/nginx/nginx.conf
load_module "modules/ngx_http_geoip_module.so";
...

http {
    #geoip_country /data/GeoIP.dat;
    geoip_city    /data/GeoLiteCity.dat;
    ...

    log_format  main  '$remote_addr - $remote_user [$time_local] "$request" '
                      '$status $body_bytes_sent "$http_referer" '
                      '"$http_user_agent" "$http_x_forwarded_for" '
                      'GeoCountry[ "$geoip_country_name" "$geoip_country_code" "$geoip_country_code3" ] '
                      'GeoCity[ "$geoip_city_country_code" "$geoip_city_country_code3" "$geoip_city_country_name" ] '
                      'GeoLocation[ "$geoip_latitude" "$geoip_longitude" "$geoip_region" "$geoip_region_name" "$geoip_city" "$geoip_postal_code" ] '
    ;

    access_log  /var/log/nginx/access.log  main;
...

$ sudo service nginx reload


如此一來,就可以翻 /var/log/nginx/access.log 看看豐富的 GeoInfo 啦

2016年7月20日 星期三

NGNIX 與數個 PHP CodeIgniter 專案部署問題:使用虛擬目錄切該各個專案

最近處理某個老專案,裡頭有多個 PHP CI Project,配置在同一台 Web Server,原本採用 Apache Web Server 設定相安無事,直到搬到 Nginx 才發現頭很痛 XD 若使用 Nginx 部署一個 CI Project 是很容易的,但使用虛擬目錄則會面臨一些問題。

這個原因是建構在部署專案時,採用 Apache Alais 跟 Requests Rewrite 方式,非常便利 Requests URI 導向至指定的 PHP CI Project:

# Apache Web Server
Alias /prefix/project /path/ci/project
<Directory /path/ci/project>
Options FollowSymLinks
DirectoryIndex index.php
AllowOverride None
Require all granted
<IfModule mod_rewrite.c>
RewriteEngine On
RewriteBase /prefix/project
RewriteCond %{REQUEST_URI} ^system.*
RewriteRule ^(.*)$ /index.php?/$1 [L]
RewriteCond %{REQUEST_URI} ^application.*
RewriteRule ^(.*)$ /index.php?/$1 [L]
RewriteCond %{REQUEST_FILENAME} !-f
RewriteCond %{REQUEST_FILENAME} !-d
RewriteRule ^(.*)$ index.php?/$1 [L]
        </IfModule>
</Directory>


其中 /prefix 是個虛擬的目錄,然而,在 Nginx 環境中,若要採用類似的架構時,就會需要處理一些問題,包含要做 requests uri 或 php script filename 的更新等,若 PHP CI Project 有提供 Web UI 時,就還得處理 css/js/image 的 requests 導向。

最終的解法:

# static files
location ^~ /prefix/project/assets/ {
alias "/path/ci/project/assets/";
}

# php requests
location ^~ /prefix/project {
root "path/ci/project";
try_files $uri $uri/ /prefix/project/index.php?$query_string;

location ~ \.php$ {
fastcgi_pass unix:/var/run/php5-fpm.sock;
fastcgi_split_path_info ^(.+\.php)(.*)$;
fastcgi_read_timeout 180;
fastcgi_buffer_size 64k;
fastcgi_buffers 512 32k;
fastcgi_busy_buffers_size 128k;
fastcgi_temp_file_write_size 256k;
fastcgi_index  index.php;
include fastcgi_params;

set $target_fastcgi_script_name $fastcgi_script_name;
if ($target_fastcgi_script_name ~ ^/prefix/project/(.*)$) {
set $target_fastcgi_script_name /$1;
}
fastcgi_param SCRIPT_FILENAME $document_root$target_fastcgi_script_name;
}
}


此外,若想多了解 nginx location 的優先順序,可以參考這則: Nginx location priority - Stack Overflow

2016年3月22日 星期二

Nginx 筆記 - 對於 requests 重導與 request_uri 變數 encode/decode 問題

事情是這樣的,有個服務應用配置 web server (www.localhost) 跟 app server (api.localhost) 時,有這這樣的特性:

網站首頁:http://www.localhost/
前端API:http://www.localhost/api/
真正API:http://api.localhost/

例如有一則 API 服務 http://www.localhost/api/helloworld 必須重導至 http://api.localhost/helloworld 才行。由於 web server 主要服務 static files 而 app server 則是服務 api ,但所有入口點都是在 web server,因此就需要將 requests 導向給後方的 app server:

upstream backend_hosts { server api.localhost:80; }

set $request_url $request_uri;
if ($uri ~ ^/api(.*)$ ) {
set $request_url $1;
}
location ^~ /api/ {
proxy_read_timeout 300;
proxy_set_header Host $http_host; proxy_redirect off;
proxy_set_header X-Forwarded-For $proxy_add_x_forwarded_for;
proxy_pass http://backend_hosts$request_url$is_args$args;
proxy_buffering off;
}


這樣,看似無限美好,但是有個關鍵要留意,上頭有做一次字串處理:set $request_url $1; 這一步把 /api/helloworld 轉成 /helloworld 沒錯,但 $request_url 變數連帶處理了解碼的問題,當整個 requests 只是常見的英數符號時,都是一切正常的,但如果是帶有中文字等需要做 URLEncode/Decode 時,就會出包啦。

$ sudo apt-get install nginx
$ sudo vim /etc/nginx/conf.d/www.conf
upstream backend_hosts { server 127.0.0.1:8000; }

# Web Server
server {
        listen 3000;

        set $request_url $request_uri;
        if ($uri ~ ^/api(.*)$ ) {
                set $request_url $1;
        }
        location ^~ /api/ {
                proxy_read_timeout 300;
                proxy_set_header Host $http_host; proxy_redirect off;
                proxy_set_header X-Forwarded-For $proxy_add_x_forwarded_for;
                proxy_pass http://backend_hosts$request_url$is_args$args;
                proxy_buffering off;
        }

        location ^~ / {
                add_header X-WWW-Request-URL $request_url;
                add_header X-WWW-Request-URI $request_uri;
                return 200;
        }
}
# APP Server
server {
        listen 8000;

        location ^~ / {
                add_header X-API-Request-URI $request_uri;
                return 200;
        }
}
$ sudo service nginx configtest && sudo service nginx restart


接著,使用 curl 來驗證:

$ curl -s -D - 'http://127.0.0.1:3000/'
HTTP/1.1 200 OK
Server: nginx/1.4.6 (Ubuntu)
Content-Type: application/octet-stream
Content-Length: 0
Connection: keep-alive
X-WWW-Request-URL: /
X-WWW-Request-URI: /


看見 X-WWW-Request-URL 和 X-WWW-Request-URI 代表為 3000 port 服務。

$ curl -s -D - 'http://127.0.0.1:3000/api/helloworld?abc=123'
HTTP/1.1 200 OK
Server: nginx/1.4.6 (Ubuntu)
Content-Type: application/octet-stream
Content-Length: 0
Connection: keep-alive
X-API-Request-URI: /helloworld?abc=123


可以看到 X-API-Request-URI: /helloworld?abc=123 時,代表有將 requests 導向到 8000 port 的服務。

接著,試試看URLEncode吧!

$ curl -s -D - 'http://127.0.0.1:3000/%E4%BD%A0%E5%A5%BD%E5%97%8E%0D%0A'          
HTTP/1.1 200 OK
Server: nginx/1.4.6 (Ubuntu)
Content-Type: application/octet-stream
Content-Length: 0
Connection: keep-alive
X-WWW-Request-URL: /%E4%BD%A0%E5%A5%BD%E5%97%8E%0D%0A
X-WWW-Request-URI: /%E4%BD%A0%E5%A5%BD%E5%97%8E%0D%0A


在 3000 port 服務中,X-WWW-Request-URL 和 X-WWW-Request-URI 一致是非常正常,但是,換成 /api/%E4%BD%A0%E5%A5%BD%E5%97%8E%0D%0A 就會出包啦:

$ curl -s -D - 'http://127.0.0.1:3000/api/%E4%BD%A0%E5%A5%BD%E5%97%8E%0D%0A'
HTTP/1.1 200 OK
Server: nginx/1.4.6 (Ubuntu)
Content-Type: application/octet-stream
Content-Length: 0
Connection: keep-alive
X-API-Request-URI: /%e4%bd%a0%e5%a5%bd%e5%97%8e%0d


仔細看會發現 X-API-Request-URI 缺少 %0A 的資料,並且看到 request_uri 有點像是被重新組合過,從原本的大寫變小寫了,但最重要的是有缺資料!

而解法?就是改用 rewrite 來避開了,但是對於這種 URLEncode 的,還必須有前置處理,例如定義新的服務網址: /api/urlencode/%E4%BD%A0%E5%A5%BD%E5%97%8E%0D%0A 用法,接著更新 nginx 設定檔:

upstream backend_hosts { server 127.0.0.1:8000; }

server {
        listen 3000;

        set $request_url $request_uri;

        if ($request_uri ~ ^/api(.*)$ ) {
                rewrite ^ $request_uri;
                rewrite ^/api(.*)$ $1;
                set  $request_url $1;
        }

        location ^~ / {

                add_header X-WWW-Request-URL $request_url;
                add_header X-WWW-Request-URI $request_uri;
                return 200;
        }

        location ^~ /urlencode {
                proxy_read_timeout 300;
                proxy_set_header Host $http_host; proxy_redirect off;
                proxy_set_header X-Forwarded-For $proxy_add_x_forwarded_for;
                proxy_pass http://backend_hosts$request_url;
                proxy_buffering off;
        }
}

server {
        listen 8000;

        location ^~ / {
                add_header X-API-Request-URI $request_uri;
                return 200;
        }
}


如此一來,就會看到 URLENCODE 資訊是沒有被解析過,完整的 pass 到 8000 port 服務囉

$ curl -s -D - 'http://127.0.0.1:3000/api/urlencode/%E4%BD%A0%E5%A5%BD%E5%97%8E%0D%0A'
HTTP/1.1 200 OK
Server: nginx/1.4.6 (Ubuntu)
Content-Type: application/octet-stream
Content-Length: 0
Connection: keep-alive
X-API-Request-URI: /urlencode/%E4%BD%A0%E5%A5%BD%E5%97%8E%0D%0A

2016年3月4日 星期五

設定 Nginx 透過 proxy_pass 存取 Apache web server + SVN + DAV 服務 @ Ubuntu 14.04

這個故事是這樣的,當所有的 server deploy 都用預設用 nginx 後,有個成員跳出來說要用 SVN over HTTP 服務時,就發現必須架設 Apache Web server ,因為 SVN over HTTP 的相關模組就只有 Apache Web server 才有,所以就變成此況的窘境了。

總之,架設 Apache web server 很容易,而安裝 mod_dav_svn 也差不多:

$ sudo apt-get install subversion libapache2-mod-svn apache2
$ sudo vim /etc/apache2/ports.conf
從 Listen 80 改成 Listen 8000,避開跟 Nginx 預設 80 port 衝到
$ sudo vim /etc/apache2/sites-available/000-default.conf
從 <VirtualHost *:80> 改成 <VirtualHost *:8000>
$ sudo a2enmod dav_svn authz_svn
$ sudo vim /etc/apache2/conf-available/svn.conf
<Location /svn>
        DAV svn
        SVNParentPath /path/svn
        AuthzSVNAccessFile /path/svn_access
        AuthType Basic
        AuthName "Web svn"
        AuthUserFile /path/svn_auth
        Require valid-user
</Location>
$ sudo service apache2 restart


接著設定 Nginx:

location /svn/ {
proxy_pass http://127.0.0.1:8000/svn/;
}

# 更新:假設 svn repo 裡有 .ht 開頭的檔案,可能會被 nginx 條件擋下
location ~ /svn/.*\.ht {
proxy_pass http://127.0.0.1:8000/;
}


如此一來即可搞定。

2016年1月28日 星期四

Nginx 支援多網域 Access-Control-Allow-Origin 設定方式

原先 Access-Control-Allow-Origin 只能支援一個指定網域或 "*" 的設定,想要支持多網域設定時,就來用一下 nginx 的變數吧!

set $access_control_allow_origin "www.changyy.org";
if ($http_host ~ ^(.*\.changyy\.org)$ ) {
set $access_control_allow_origin $1;
}
if ($http_referer ~ ^(https*\:\/\/.*\.changyy\.org)\/ ) {
set $access_control_allow_origin $1;
}
add_header Access-Control-Allow-Origin $access_control_allow_origin;
add_header Access-Control-Allow-Methods "GET, OPTIONS, POST, HEAD, DELETE, PUT";
add_header Access-Control-Allow-Headers "Authorization, X-Requested-With, Content-Type, Origin, Accept";
add_header Access-Control-Allow-Credentials "true";
add_header Access-Control-Max-Age: 86400;


如此一來,只要是 *.changyy.org 的都可以支援啦!同理就可以用在多網域得設置。

若需要支援不同網域以及非預設的 web port ,則要把規則改成:

set $access_control_allow_origin "www.changyy.org";
if ($http_host ~ ^(.*\.changyy\.org(:[0-9]+)*)$ ) {
set $access_control_allow_origin $1;
}
if ($http_referer ~ ^(https*\:\/\/.*\.changyy\.org(:[0-9]+)*)\/ ) {
set $access_control_allow_origin $1;
}

2016年1月17日 星期日

試試 Let's Encrypt 免費的 HTTPS/SSL 憑證服務 @ Ubuntu 14.04、Nginx

之前有一台機器不小心誤裝 Ubuntu 14.10 ,然後 Ubuntu 15.10 一出現就沒得更新了!一直晾在那邊!終於把它清乾淨,重新開始,還是裝個 Ubuntu 14.04 吧。以前在 Namecheap 買 domain name,當時是有很便宜的 SSL 方案(一年兩美金),但我連自己產生 key 的密碼都忘了,懶得再重新產生,就試試 Let's Encrypt 吧!由於 Nginx 尚未有配套措施,一切純手工處理:

$ git clone https://github.com/letsencrypt/letsencrypt /opt/letsencrypt
$ cd /opt/letsencrypt && ./letsencrypt-auto certonly -a manual --rsa-key-size 4096 --email admin@your-email-domain -d your-domain


接著會要求你設置驗證方式,例如在 Web server document root 埋一個檔案,讓 Let's Encrypt 可以驗證 domain 真的是屬於你的。驗證後就搞定,呈現也下資訊:

IMPORTANT NOTES:
 - If you lose your account credentials, you can recover through
   e-mails sent to admin@your-email-domain.
 - Congratulations! Your certificate and chain have been saved at
   /etc/letsencrypt/live/your-domain/fullchain.pem. Your cert will
   expire on 2016-04-16. To obtain a new version of the certificate in
   the future, simply run Let's Encrypt again.
 - Your account credentials have been saved in your Let's Encrypt
   configuration directory at /etc/letsencrypt. You should make a
   secure backup of this folder now. This configuration directory will
   also contain certificates and private keys obtained by Let's
   Encrypt so making regular backups of this folder is ideal.
 - If you like Let's Encrypt, please consider supporting our work by:

   Donating to ISRG / Let's Encrypt:   https://letsencrypt.org/donate
   Donating to EFF:                    https://eff.org/donate-le


接著,就來試試 nginx ssl 設定:

$ sudo vim /etc/nginx/conf.d/default.conf
server {
    listen       80;

    listen  443 ssl;
    ssl_certificate /etc/letsencrypt/live/your-domain/fullchain.pem;
    ssl_certificate_key /etc/letsencrypt/live/your-domain/privkey.pem;
    ssl_session_cache shared:SSL:1m;
    ssl_session_timeout  5m;
    ssl_ciphers  HIGH:!aNULL:!MD5;
    ssl_prefer_server_ciphers   on;

    server_name  localhost;
...

$ sudo service nginx restart


搞定

2016年1月2日 星期六

[PHP] 架設 Phabricator - Open Source tools code for review, task management, and project communication @ Ubuntu 14.04

這原本是 Facebook 內部的工具,負責開發的工程師離開 FB 後成立公司來維護它,我對他的感覺就像 Redmine 這類工具。第一次接觸是在 2015 年秋天,但直到年底我才自己架設它,其實過程不會很複雜,但不是 apt-get 就能安裝完的,多少還是筆記一下吧。此外,想要快速把玩可以試試官方提供的 script - install_ubuntu.sh ,更多安裝簡介:Installation Guide

這邊只簡單紀錄自己安裝的過程,其中 MySQL DB server 採用 AWS RDS,而 web server 使用 nginx 跟 php5-fpm:

$ cat /etc/apt/sources.list.d/nginx_org_packages_ubuntu.list
deb http://nginx.org/packages/ubuntu/ trusty nginx
deb-src http://nginx.org/packages/ubuntu/ trusty nginx
$ wget -O - http://nginx.org/keys/nginx_signing.key | sudo apt-key add -
$ sudo apt-get -qq update && sudo apt-get install git dpkg-dev php5 php5-mysql php5-gd php5-dev php5-curl php-apc php5-cli php5-json php5-fpm
$ sudo apt-get install nginx
$ lsb_release -a
No LSB modules are available.
Distributor ID:    Ubuntu
Description:    Ubuntu 14.04.2 LTS
Release:    14.04
Codename:    trusty
$ php -v
PHP 5.5.9-1ubuntu4.14 (cli) (built: Oct 28 2015 01:34:46)
Copyright (c) 1997-2014 The PHP Group
Zend Engine v2.5.0, Copyright (c) 1998-2014 Zend Technologies
    with Zend OPcache v7.0.3, Copyright (c) 1999-2014, by Zend Technologies

$ mkdir /opt && cd /opt
$ git clone https://github.com/phacility/libphutil.git
$ git clone https://github.com/phacility/arcanist.git
$ git clone https://github.com/phacility/phabricator.git


設定 https web server & php 環境:

$ cat /etc/nginx/conf.d/phabricator.conf
server {
listen       443;
server_name  localhost;
client_max_body_size 8M;

location / {
root   /opt/phabricator/webroot;
index  index.php;
rewrite ^/(.*)$ /index.php?__path__=/$1 last;
}
location = /favicon.ico {
try_files $uri =204;
}
location /index.php {
root "/opt/phabricator/webroot";
fastcgi_pass unix:/var/run/php5-fpm.sock;
fastcgi_split_path_info ^(.+\.php)(.*)$;
fastcgi_index index.php;
include fastcgi_params;
fastcgi_param SCRIPT_FILENAME $document_root$fastcgi_script_name;
}
ssl on;
ssl_certificate /etc/ssl/nginx/server.crt ;
ssl_certificate_key /etc/ssl/nginx/server.key ;
}

$ cat /etc/nginx/nginx.conf
user www-data;
...

$ cat /etc/php5/fpm/pool.d/www.conf
user = www-data
group = www-data
listen = /var/run/php5-fpm.sock
listen.owner = www-data
listen.group = www-data
...

$ cat /etc/php5/fpm/php.ini
upload_max_filesize = 60M
memory_limit = 512M
post_max_size = 60M
date.timezone = Asia/Taipei
opcache.validate_timestamps=false
...


設定 Phabricator 部分:

$ sudo /opt/phabricator/bin/config set mysql.host server-name.ap-northeast-1.rds.amazonaws.com
$ sudo /opt/phabricator/bin/config set mysql.user root
$ sudo /opt/phabricator/bin/config set mysql.pass password
$ sudo /opt/phabricator/bin/storage upgrade

Fix these schema issues? [y/N] Y
Fixing schema issues...
Done.                                                                      
Completed fixing all schema issues.

$ sudo /opt/phabricator/bin/config set phabricator.base-uri 'https://my-domain-name/'
$ sudo /opt/phabricator/bin/config set security.alternate-file-domain https://my-domain-name/
$ sudo /opt/phabricator/bin/config set phpmailer.smtp-user my-smtp-user
$ sudo /opt/phabricator/bin/config set phpmailer.smtp-password my-smtp-password
$ sudo /opt/phabricator/bin/config set phpmailer.smtp-port 25
$ sudo /opt/phabricator/bin/config set phpmailer.smtp-host my-domain-name
$ sudo /opt/phabricator/bin/phd start
$ cat /etc/rc.local
sudo /opt/phabricator/bin/phd start
$ sudo mkdir /var/repo && sudo chown www-data /var/repo
$ cat /opt/phabricator/conf/local/local.json
{
  "phpmailer.smtp-user": "my-smtp-user",
  "phpmailer.smtp-password": "my-smtp-password",
  "phpmailer.smtp-port": 25,
  "phpmailer.smtp-host": "my-domain-name",
  "security.alternate-file-domain": "https://my-domain-name/",
  "phabricator.base-uri": "https://my-domain-name/",
  "mysql.pass": "password",
  "mysql.user": "root",
  "mysql.host": "server-name.ap-northeast-1.rds.amazonaws.com"
}


剩下的可以從網頁上設定,網頁管理做得很不錯的,例如 metamta.default-address、metamta.domain 等,有些 issue 是 MySQL DB server 的,只是 AWS RDB 並不能修改。整體上架設還算輕鬆啦,唯一的缺點是在 DB server 內會開很多資料庫,建議可以專門用一個 DB server 來維護。

2015年12月25日 星期五

[Linux] 解決 PHP CodeIgniter 在 Nginx 環境中 $_REQUEST 永遠為空

這塊只是 Nginx 的 try_files 的地方未補好引起的,我有點忘了當初是在哪邊找到的 XD 剛看一下 Nginx 的官網的確也是這樣寫:

https://www.nginx.com/resources/wiki/start/topics/recipes/codeigniter/
location / {
# Check if a file or directory index file exists, else route it to index.php.
try_files $uri $uri/ /index.php;
}


這樣的環境下,在 PHP CodeIgniter 裡頭,每次想要從 $_REQUEST 取資料都會為空

<?php
print_r($_REQUEST);


解法就是將 $query_string 資訊帶入即可:

location / {
# Check if a file or directory index file exists, else route it to index.php.
try_files $uri $uri/ /index.php?$query_string;
}

2015年11月13日 星期五

Ansible 筆記 - 建立自己的 roles ,以架設 Nginx 為例 @ Ubuntu 14.04

目前的目錄結構:

$ tree
.
├── add_authorized_key.yml
├── ansible-deploy.pem
├── ansible-deploy.pub
├── etc
│   └── ansible
│       └── hosts
└── mysite.yml

$ mkdir -p roles && cd roles && ansible-galaxy init nginx && cd - && tree .
- nginx was created successfully
.
├── add_authorized_key.yml
├── ansible-deploy.pem
├── ansible-deploy.pub
├── etc
│   └── ansible
│       └── hosts
├── roles
│   └── nginx
│       ├── defaults
│       │   └── main.yml
│       ├── files
│       ├── handlers
│       │   └── main.yml
│       ├── meta
│       │   └── main.yml
│       ├── README.md
│       ├── tasks
│       │   └── main.yml
│       ├── templates
│       └── vars
│           └── main.yml
└── mysite.yml

11 directories, 11 files


開始撰寫 mysite.yml 跟 nginx 相關資料:

$ cat mysite.yml
---
- hosts: mysite
  remote_user: ubuntu
  sudo: yes

  roles:
    - nginx

  tasks:
    - name: ubuntu system upgrade
      apt: upgrade=dist

$ ansible-playbook mysite.yml -i etc/ansible/hosts --private-key=ansible-deploy.pem

PLAY [mysite] **************************************************

GATHERING FACTS ***************************************************************
ok: [XX.XX.XX.XX]

TASK: [ubuntu system upgrade] *************************************************
ok: [XX.XX.XX.XX]

PLAY RECAP ********************************************************************
XX.XX.XX.XX             : ok=2    changed=0    unreachable=0    failed=0


代表目標機器已經更新好系統了,而剛剛添加的 roles/nginx 目前還是個空殼所以沒有任何動作。

接著要研究一下 Nginx 官方安裝位置:http://nginx.org/packages 和 http://nginx.org/en/linux_packages.html 對照表。此例需要添加官方 repo 的原始指令方式:

$ vim /etc/apt/sources.list
deb http://nginx.org/packages/ubuntu/ trusty nginx
deb-src http://nginx.org/packages/ubuntu/ trusty nginx


指令方式:

$ echo "deb http://nginx.org/packages/ubuntu/ trusty nginx" | sudo tee -a /etc/apt/sources.list
$ echo "deb-src http://nginx.org/packages/ubuntu/ trusty nginx" | sudo tee -a /etc/apt/sources.list
$ sudo apt-get update


而在 ansible 則是透過:

- name: Add Nginx Official Repo - deb
  apt_repository: repo='deb http://nginx.org/packages/ubuntu/ {{ ansible_distribution_release }} nginx' state=present

- name: Add Nginx Official Repo - deb-src
  apt_repository: repo='deb-src http://nginx.org/packages/ubuntu/ {{ ansible_distribution_release }} nginx' state=present

# http://docs.ansible.com/ansible/apt_key_module.html
- name: Add Nginx Official Repo - package signing key
  apt_key: url=http://nginx.org/packages/keys/nginx_signing.key state=present

#- name: Add Nginx Official Repo - ppa:nginx/stable
#  apt_repository: repo='ppa:nginx/stable'

- name: Update cache
  apt: update_cache=yes

- name: Install Nginx
  apt:
    pkg: nginx
    state: installed


到現在為止,整個 nginx role 的安裝設定:

$ tree .
.
├── defaults
│   └── main.yml
├── files
├── handlers
│   └── main.yml
├── meta
│   └── main.yml
├── README.md
├── tasks
│   ├── main.yml
│   └── task-Ubuntu.yml
├── templates
└── vars
    └── main.yml

7 directories, 7 files

$ cat tasks/main.yml
---
# tasks file for nginx

- include: task-Ubuntu.yml
  when: ansible_distribution == 'Ubuntu'

$ cat tasks/task-Ubuntu.yml
---
# http://docs.ansible.com/ansible/apt_repository_module.html
- name: Add Nginx Official Repo - deb
  apt_repository: repo='deb http://nginx.org/packages/ubuntu/ {{ ansible_distribution_release }} nginx' state=present

- name: Add Nginx Official Repo - deb-src
  apt_repository: repo='deb-src http://nginx.org/packages/ubuntu/ {{ ansible_distribution_release }} nginx' state=present

# http://docs.ansible.com/ansible/apt_key_module.html
# $ curl -s 'http://nginx.org/packages/keys/nginx_signing.key' | sudo apt-key add -
- name: Add Nginx Official Repo - package signing key
  apt_key: url=http://nginx.org/packages/keys/nginx_signing.key state=present

#- name: Add Nginx Official Repo - ppa:nginx/stable
#  apt_repository: repo='ppa:nginx/stable'

- name: Update cache
  apt: update_cache=yes

- name: Install Nginx
  apt:
    pkg: nginx
    state: installed


其中 ansible_distribution_release, ansible_distribution 環境變數,可以透過 ansible -i host mysite -m setup 得知。接著再次執行 ansible-playbook ,過程就會安裝 nginx 啦(changed=4 都落在 nginx role 動作) :

$ ansible-playbook mysite.yml -i etc/ansible/hosts --private-key=ansible-deploy.pem

PLAY [mysite] **************************************************

GATHERING FACTS ***************************************************************
ok: [XX.XX.XX.XX]

TASK: [nginx | Add Nginx Official Repo - deb] *********************************
changed: [XX.XX.XX.XX]

TASK: [nginx | Add Nginx Official Repo - deb-src] *****************************
changed: [XX.XX.XX.XX]

TASK: [nginx | Add Nginx Official Repo - package signing key] *****************
changed: [XX.XX.XX.XX]

TASK: [nginx | Update cache] **************************************************
ok: [XX.XX.XX.XX]

TASK: [nginx | Install Nginx] *************************************************
changed: [XX.XX.XX.XX]

TASK: [ubuntu system upgrade] *************************************************
ok: [XX.XX.XX.XX]

PLAY RECAP ********************************************************************
XX.XX.XX.XX             : ok=7    changed=4    unreachable=0    failed=0


最後要客製化 Nginx 的話,就變成要改寫設定檔了,改寫設定檔前,當然要來個設定檔測試,這時規劃在 roles/nginx/handlers/main.yml 設定一些事件處理:

$ cat handlers/main.yml
---
# handlers file for nginx

- name: set nginx auto start
  service: name=nginx state=started enabled=yes

- name: restart nginx
  service: name=nginx state=restarted

- name: test nginx config
  shell: service nginx configtest
  register: result
  changed_when: "result.rc != 0"
  always_run: yes


接著回到 mysite.yml 設定檔,可以添加:

- hosts: mysite
  remote_user: ubuntu
  sudo: yes

  roles:
    - nginx

  tasks:
    - name: ubuntu system upgrade
      apt: upgrade=dist update_cache=yes

    - name: ensure nginx auto start
      service: name=nginx state=started enabled=yes

    - name: test webserver configure files
      always_run: yes
      shell: date
      notify: test nginx config


如此一來,除了安裝 nginx 、更新系統外,還會多了測試 nginx configure files:

$ ansible-playbook mysite.yml -i etc/ansible/hosts --private-key=ansible-deploy.pem

PLAY [mysite] **************************************************

GATHERING FACTS ***************************************************************
ok: [XX.XX.XX.XX]

TASK: [nginx | Add Nginx Official Repo - deb] *********************************
ok: [XX.XX.XX.XX]

TASK: [nginx | Add Nginx Official Repo - deb-src] *****************************
ok: [XX.XX.XX.XX]

TASK: [nginx | Add Nginx Official Repo - package signing key] *****************
ok: [XX.XX.XX.XX]

TASK: [nginx | Update cache] **************************************************
ok: [XX.XX.XX.XX]

TASK: [nginx | Install Nginx] *************************************************
ok: [XX.XX.XX.XX]

TASK: [ubuntu system upgrade] *************************************************
ok: [XX.XX.XX.XX]

TASK: [ensure nginx auto start] ***********************************************
ok: [XX.XX.XX.XX]

TASK: [test webserver configure files] ****************************************
changed: [XX.XX.XX.XX]

NOTIFIED: [nginx | test nginx config] *****************************************
ok: [XX.XX.XX.XX]

PLAY RECAP ********************************************************************
XX.XX.XX.XX             : ok=10   changed=1    unreachable=0    failed=0


這邊發動測試 nginx 測試檔是綁定在一個 date 指令上,因為 date 每次結果都不一樣,將導致永遠都是 changed=1 結果。以上就完成了建立一個 role 並且納入使用的方式。

接著試試設定的部分吧!把一些設定檔那來做模板(templates),未來可以透過引入 nginx role 時,搭配指定參數後,即可產生客製化的設定檔:

先將機器上的 nginx 設定檔搬到 roles/nginx/templates 中,且檔案結尾改成 .j2 ,這是因為 ansible template 採用 Jinja2 方案。

$ scp -r -i ansible-deploy.pem ubuntu@XX.XX.XX.XX:/etc/nginx/conf.d  roles/nginx/templates/
$ cp roles/nginx/templates/conf.d/default.conf roles/nginx/templates/default.conf.j2
$ tree roles/nginx/templates/
roles/nginx/templates/
├── conf.d
│   ├── default.conf
│   └── example_ssl.conf
└── default.conf.j2


之後就是把機器上的 default.conf 覆蓋掉或是刪掉並搭配新增一則 mysite.conf 來啟用 nginx 了,在此先沿用覆蓋方式。

接著在 mysite.yml 或是 roles/nginx/task/task-Ubuntu.yml 中,就可以引入從 template 取得資料來蓋掉系統檔案,若在 mysite.yml 中:

- name: Update Nginx configure files
  template: src=roles/nginx/templates/default.conf.j2 dest=/etc/nginx/conf.d/default.conf


在 roles/nginx/task/task-Ubuntu.yml:

- name: Update Nginx configure files
  template: src=default.conf.j2 dest=/etc/nginx/conf.d/default.conf


通常都會寫在 roles/nginx/task/main.yml 為多,而上述是因為有偵測系統狀況決定 nginx 設定檔位置,因此我一樣寫在 task-Ubuntu.yml 中。接下來可以朝改寫 default.conf.j2 內變數地用法,將一些常見數值改成變動的,並且在 roles/nginx/defaults/main.yml 定義好,如此一來,在 mysite.yml 引用 roles nginx 時,也就可達成動態變動的方式。

例如:

$ tree .
.
├── ansible-deploy.pem
├── ansible-deploy.pub
├── etc
│   └── ansible
│       └── hosts
├── roles
│   └── nginx
│       ├── defaults
│       │   └── main.yml
│       ├── files
│       ├── handlers
│       │   └── main.yml
│       ├── meta
│       │   └── main.yml
│       ├── README.md
│       ├── tasks
│       │   ├── main.yml
│       │   └── task-Ubuntu.yml
│       ├── templates
│       │   ├── conf.d
│       │   │   ├── default.conf
│       │   │   └── example_ssl.conf
│       │   └── default.conf.j2
│       └── vars
│           └── main.yml
└── mysite.yml

$ cat roles/nginx/templates/default.conf.j2
server {
    listen       {{ nginx_listen }};
    server_name  {{ nginx_server_name }};

    #charset koi8-r;
    #access_log  /var/log/nginx/log/host.access.log  main;

    location / {
        root   {{ nginx_document_root }};
        index  index.html index.htm;
    }
    error_page   500 502 503 504  /50x.html;
    location = /50x.html {
        root   /usr/share/nginx/html;
    }
}


提供了 nginx_listen、nginx_server_name 和 nginx_document_root 三個變數,並且定義預設數值:

$ cat roles/nginx/defaults/main.yml
---
# defaults file for nginx
nginx_listen: 80
nginx_server_name: localhost
nginx_document_root: /usr/share/nginx/html


如此一來,在 mysite.yml 中,引入 roles 可以改成:

$ cat mysite.yml
---
- hosts: mysite
  remote_user: ubuntu
  sudo: yes

  roles:
    - { role: 'nginx', nginx_listen: 8080 }

  tasks:
    - name: ubuntu system upgrade
      apt: upgrade=dist update_cache=yes

    - name: test webserver configure files
      always_run: yes
      shell: date
      notify: test nginx config

    - name: reload webserver configure files
      always_run: yes
      shell: date
      notify: restart nginx


透過 ansible-playbook mysite.yml 後,可以去該 server:/etc/nginx/conf.d/default.conf 觀看到數值啦

$ ansible-playbook mysite.yml -i etc/ansible/hosts --private-key=ansible-deploy.pem
PLAY [mysite] **************************************************

GATHERING FACTS ***************************************************************
ok: [XX.XX.XX.XX]

TASK: [nginx | Add Nginx Official Repo - deb] *********************************
ok: [XX.XX.XX.XX]

TASK: [nginx | Add Nginx Official Repo - deb-src] *****************************
ok: [XX.XX.XX.XX]

TASK: [nginx | Add Nginx Official Repo - package signing key] *****************
ok: [XX.XX.XX.XX]

TASK: [nginx | Update cache] **************************************************
ok: [XX.XX.XX.XX]

TASK: [nginx | Install Nginx] *************************************************
ok: [XX.XX.XX.XX]

TASK: [nginx | Update Nginx configure files] **********************************
ok: [XX.XX.XX.XX]

TASK: [ubuntu system upgrade] *************************************************
ok: [XX.XX.XX.XX]

TASK: [ensure nginx auto start] ***********************************************
ok: [XX.XX.XX.XX]

TASK: [test webserver configure files] ****************************************
changed: [XX.XX.XX.XX]

TASK: [reload webserver configure files] **************************************
changed: [XX.XX.XX.XX]

NOTIFIED: [nginx | restart nginx] *********************************************
changed: [XX.XX.XX.XX]

NOTIFIED: [nginx | test nginx config] *****************************************
ok: [XX.XX.XX.XX]

PLAY RECAP ********************************************************************
XX.XX.XX.XX             : ok=13   changed=3    unreachable=0    failed=0

2015年11月2日 星期一

[Linux] 透過 yum 安裝 Nginx 官方版 @ CentOS 6.6、nginx-1.8.0

最近在整理 yum server 才驚覺 nginx 沒有在 CentOS package 裡頭,同理 tmux 也是 Orz

$ vim /etc/yum.repos.d/nginx.repo
name=nginx repo
baseurl=http://nginx.org/packages/centos/6/$basearch/
gpgcheck=0
enabled=1

$ yum update
$ yum search nginx
Loaded plugins: security
============================================================= N/S Matched: nginx =============================================================
nginx-debug.x86_64 : debug version of nginx
nginx-debuginfo.x86_64 : Debug information for package nginx
nginx-nr-agent.noarch : New Relic agent for NGINX and NGINX Plus
nginx.x86_64 : High performance web server

$ yum install nginx
$ yum info nginx
Installed Packages
Name        : nginx
Arch        : x86_64
Version     : 1.8.0
Release     : 1.el6.ngx
Size        : 872 k
Repo        : installed
From repo   : nginx
Summary     : High performance web server
URL         : http://nginx.org/
License     : 2-clause BSD-like license
Description : nginx [engine x] is an HTTP and reverse proxy server, as well as
            : a mail proxy server.


對照 nginx.org 官方版本公告,其中 nginx-1.8.0 是 2015/04/21 釋放出的穩定版。

2015年10月6日 星期二

[PHP] 處理 PHP CodeIgniter 與 apache web server、nginx 的 Rewrite Rules

之前比較常用 Apache Web server ,在使用 PHP CodeIngiter 時,常常設定 Rewrite Rules 時,需要做一些手腳,例如:http://hostname/ci 想要瀏覽到 PHP CodeIgniter Project,而 ci 這個並非實體目錄,且 PHP CI Project 並非擺在 DocumentRoot 裡,這時就有很多環境變數需處理。

由於要符合 PHP CodeIgniter 的 routing rules,必須把 /ci 這個 path 給去掉,在 Apache Web server 透過 RewriteBase 處理,而 Nginx 又更麻煩一點,需處理 fastcgi_param REQUEST_URI 跟 fastcgi_param SCRIPT_FILENAME 資訊。

Apache 的設定:

Alias /ci /data/ci-project
<Directory /data/ci-project>
       Options FollowSymLinks
       DirectoryIndex index.php
       AllowOverride None

       Require all granted
       <IfModule mod_rewrite.c>
               RewriteEngine On
               RewriteBase /ci

               RewriteCond %{REQUEST_URI} ^system.*
               RewriteRule ^(.*)$ /index.php?/$1 [L]
 
               RewriteCond %{REQUEST_URI} ^application.*
               RewriteRule ^(.*)$ /index.php?/$1 [L]

               RewriteCond %{REQUEST_FILENAME} !-f
               RewriteCond %{REQUEST_FILENAME} !-d
               RewriteRule ^(.*)$ index.php?/$1 [L]
       </IfModule>
</Directory>


Nginx 設定:

        set $request_prefix '/ci/';
        set $ci_sys_dir '/opt/actions-channel-api/';

        location /ci/ {
                alias $ci_sys_dir;
                index  index.php index.html index.htm;

                try_files $uri $uri/ /ci/index.php?$query_string;
        }
        location ~* \.php$ {
                fastcgi_pass 127.0.0.1:9000;
                fastcgi_index index.php;
                fastcgi_split_path_info ^(.+\.php)(.*)$;
                include fastcgi_params;

                set $target_request_uri $request_uri;
                if ($target_request_uri ~ ^/ci/(.*)$ ) {
                        set $target_request_uri /$1;
                }
                fastcgi_param REQUEST_URI $target_request_uri;

                set $target_fastcgi_script_name $fastcgi_script_name;
                if ($target_fastcgi_script_name ~ ^/ci/(.*)$ ) {
                        set $target_fastcgi_script_name $1;
                }
                fastcgi_param SCRIPT_FILENAME $ci_sys_dir$target_fastcgi_script_name;
        }


其他 Nginx 筆記:

  • alias 的數值記得要補上最後的 "/" ;alias 跟 root 的最大差別是 alias 的位置不需要在 document root  裡頭
  • 在 try_files 流程中,一旦符合條件後,就不會再執行該 nginx location 底部項目,因此還是把 php handler 拉到最外層,而不要全部都寫在 location /ci/ 此區塊裡頭
  • nginx 可定義很多環境變數,若想要看它就寫到 log 即可:
    • http {
          log_format proxy ' "$request"  "$status"  "$http_referer"  "$http_user_agent"  $request_time  $upstream_response_time "$ci_sys_dir" "$target_fastcgi_script_name"  "$target_request_uri"  '
      }

2014年2月27日 星期四

[Linux] 申請 Godaddy Wildcard Certificate 和設定 Nginx Web Server @ Ubuntu 12.04

ssl-01

在 Godaddy 購買 Domain Name,接著就來申請 SSL 憑證,依據需求就買了 wildcard certificate 版本。自簽憑證的經驗不少,但是還沒設定過 wildcard 版本 XD

ssl-03

首先先完成 Godaddy 的購買,可以參考 [筆記] SSL 憑證購買記

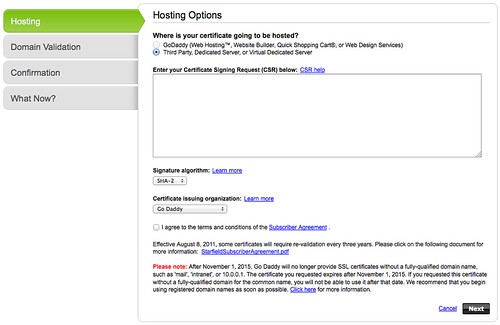
接著,很快就進入 Godaddy SSL 設定界面,並要求貼上 Certificate Signing Request(CSR) 資料。這邊需留意的是建立 CSR 的過程中,以前在 Common Name 總是輸入完整的 hostname (如 blog.changyy.org),現在要改輸入成 * 開頭(如: *.changyy.org),算是關鍵之處。

$ openssl req -new -newkey rsa:2048 -nodes -keyout wildcard.domainname.key -out wildcard.domainname.csr

最後再把 wildcard.domainname.csr 打開後,複製內文貼上即可進行。

ssl-04

由於是購買 wildcard 版本,如果 common name 不是輸入 * 開頭,會看到錯誤訊息,也是個不錯的防呆。

ssl-06

接著,再切換到下載頁面,就可以挑選屬於自己的 web server 資料。

對於 nginx 的部分,下載回來共有兩個 csr 檔案,對 apache web server 而言,可以分開設定剛剛好,但 nginx 只有 ssl_certificate 跟 ssl_certificate_key 兩個啊,因此,只要把 godaddy 給你的兩個 crt 串起來使用即可:

$ cp xxxx.crt hostname.crt
$ cat gd_bundle-g2-g1.crt >> hostname.crt


接著在 nginx 設定檔中,把 ssl_certificate 填 hostname.crt 而 ssl_certificate_key 則是最早建立 crt 的 key (此例 wildcard.domainname.key)