2016年10月9日 星期日

iOS 開發筆記 - 建立/更新 Apple Push Notification Service (APNs) 憑證、P12轉PEM、驗證 PEM、PHP 範例程式

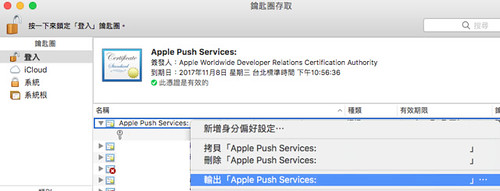
APNs_export_key

以前寫過幾篇 APNs 筆記,但好像都沒很完整,結果每年要更新憑證時,都要再找資料複習一次 Orz 所以就把它筆記下來吧!
首先,在 iOS Developer 網站上可以維護 APNs 憑證,然而,一旦過期,其實會自動消失 Orz 而 APNs 這服務滿像開發一次後就一直擺在那,沒用行事曆紀錄肯定忘掉。

如果,當初的 Certificate Signing Request (CSR) 以及 private key(.p12) 還留著的話,可以繼續拿來用,若沒有的話,就重新建立。整個就像第一次建立一樣 :P

Step 1:

iOS Developer Website -> Certificate -> All -> [+] -> Production -> Apple Push Notification service SSL (Sandbox & Production) -> App ID: -> Your App ID -> About Creating a Certificate Signing Request (CSR) -> Upload CRS file

若之前的 CSR 跟 p12 都還在,就可以省去製作 CSR,直接拿舊的上傳;若要新建立就從 Keychain -> 憑證輔助程式 -> 從憑證授權要求憑證 -> 輸入 email -> 預設將產生 CertificateSigningRequest.certSigningRequest 檔案,把他拿去上傳吧。另外,記得要把下載到的 aps.cer 點擊匯入至 keychain 中。

Step 2:

在 keychain -> 類別 -> 我的憑證 -> 可以看到 Apple Push Service 資訊,展開後,點擊專用密鑰,在點擊上方的憑證後,可以以憑證為單位輸出 p12 資料,這是跟 APN server 溝通的通行證。

Step 3:

使用 openssl 將通行證轉檔,從 p12 成 pem 檔

$ openssl pkcs12 -in App.p12 -out App.pem -nodes

轉換後,可以用文字編輯器打開 App.pem 檔案,會看到兩段:

-----BEGIN CERTIFICATE-----
...
-----END CERTIFICATE-----
-----BEGIN PRIVATE KEY-----
...
-----END PRIVATE KEY-----


而 CERTIFICATE 上頭也會標記是哪個 App ID 的,未來忘記都可以翻來看

Step 4:

做簡單的 pem 驗證即可。

Production:

$ openssl s_client -connect gateway.push.apple.com:2195 -cert App.pem

Sandbox:

$ openssl s_client -connect gateway.sandbox.push.apple.com:2195 -cert App.pem

若 pem 是正常的,應該連線完就停在那邊:

...
---
SSL handshake has read 3385 bytes and written 2515 bytes
---
New, TLSv1/SSLv3, Cipher is AES256-SHA
Server public key is 2048 bit
Secure Renegotiation IS supported
Compression: NONE
Expansion: NONE
No ALPN negotiated
SSL-Session:
    Protocol  : TLSv1.2
    Cipher    : AES256-SHA
    Session-ID:
    Session-ID-ctx:
    Master-Key: #######
    Key-Arg   : None
    PSK identity: None
    PSK identity hint: None
    SRP username: None
    Start Time: 1476026971
    Timeout   : 300 (sec)
    Verify return code: 0 (ok)
---
^C


Step 5:

可以拿 pem 跟 APNs 互動了!以下是片段 PHP 程式碼,有興趣可再試試 changyy/codeigniter-library-notification 包好的 library。

<?php

$ssl_ctx = stream_context_create();
stream_context_set_option($ssl_ctx, 'ssl', 'local_cert', $pem_file_path);

if( is_resource( $fp = stream_socket_client(
$use_sansbox ? 'ssl://gateway.sandbox.push.apple.com:2195' : 'ssl://gateway.push.apple.com:2195',
$err,
$errstr,
60,
STREAM_CLIENT_CONNECT|STREAM_CLIENT_PERSISTENT,
$ssl_ctx
) ) ) {

//$payload = array(
// 'aps' => array(
// 'alert' => array(
// 'title' => $title,
// 'body' => $message,
// )
// )
//);

$packed_data =
// Command (Simple Notification Format)
chr(0)
// device token
. pack('n', 32) . pack('H*', $notification_token)
// payload
//. pack('n', strlen($raw_cmd)) . $raw_cmd;
. $raw_data;

if( @fwrite($fp, $packed_data, strlen($packed_data)) !== false ) {
echo "SUCCESS";
} else {
echo "FAILURE";
}

fclose($fp);
}

2016年10月4日 星期二

查看 APK 裡頭的 Package Name @ Mac OS 10.11.6

透過 aapt 工具,以 Mac OS 來說,大概落於 ~/Library/Android/sdk/build-tools/xxxx/aapt,用法:

$ ~/Library/Android/sdk/build-tools/23.0.2/aapt dump badging app-release.apk | grep package:\ name
package: name='aa.bb.cc' versionCode='###' versionName='######' platformBuildVersionName='#.#.#.####'

2016年9月8日 星期四

Ansible 筆記 - 設定 Nginx 啟用 ngx_http_geoip_module.so 片段程式 @ Ubuntu 14.0

其實該寫成 Ansible Role 的,但一時之間有點懶,先把練習的片段紀錄一下。

安裝 nginx-module-geoip:

$ cat geoip-nginx.yml
---
    - name: install geoip packages
      apt: name={{ item }} update_cache=yes state=latest
      with_items:
        - nginx-module-geoip
      when: install_package is defined and install_package

    - name: check maxmind db - http://geolite.maxmind.com/download/geoip/database/GeoLiteCountry/GeoIP.dat.gz
      command: bash -c 'test -e /data/GeoIP.dat || curl http://geolite.maxmind.com/download/geoip/database/GeoLiteCountry/GeoIP.dat.gz | gunzip - > /data/GeoIP.dat'

    - name: check maxmind db - http://geolite.maxmind.com/download/geoip/database/GeoLiteCity.dat.gz
      command: bash -c 'test -e /data/GeoLiteCity.dat || curl http://geolite.maxmind.com/download/geoip/database/GeoLiteCity.dat.gz | gunzip - > /data/GeoLiteCity.dat'


設定 nginx.conf:

$ cat server-deploy.yml
...
  tasks:
    ...
    - include: geoip-nginx.yml
    - name: setup nginx config file - add modules/ngx_http_geoip_module.so
      lineinfile:
        dest: /etc/nginx/nginx.conf
        insertbefore: '^user '
        line: 'load_module "modules/ngx_http_geoip_module.so";'

    - name: setup nginx config file - setup geoip resource path
      lineinfile:
        dest: /etc/nginx/nginx.conf
        insertafter: '^http {'
        line: '    geoip_country /data/GeoIP.dat; geoip_proxy 192.168.0.0/16; geoip_proxy 10.0.0.0/24; geoip_proxy_recursive on;'
        #line: '    geoip_city    /data/GeoLiteCity.dat;'

    - name: setup nginx file to enable geoip - update log format
      lineinfile:
        dest: /etc/nginx/nginx.conf
        regexp: ".*?http_user_agent.*?http_x_forwarded_for"
        line: "                      '\"$http_user_agent\" \"$http_x_forwarded_for\"' $geoip_country_code \"$geoip_country_name\" ;"

    - name: setup nginx file to enable geoip - add GEOIP_COUNTRY_CODE for FastCGI
      lineinfile:
        dest: /etc/nginx/fastcgi_params
        insertbefore: "^fastcgi_param QUERY_STRING"
        line: "fastcgi_param     GEOIP_COUNTRY_CODE $geoip_country_code;"


如此一來,產生的 nginx.conf 如下:

$ cat /etc/nginx/nginx.conf && sudo nginx -t

load_module "modules/ngx_http_geoip_module.so";
user www-data;
worker_processes  1;

error_log  /var/log/nginx/error.log warn;
pid        /var/run/nginx.pid;


events {
    worker_connections  1024;
}


http {
    geoip_country /data/GeoIP.dat; geoip_proxy 192.168.0.0/16; geoip_proxy 10.0.0.0/24; geoip_proxy_recursive on;
    include       /etc/nginx/mime.types;
    default_type  application/octet-stream;

    log_format  main  '$remote_addr - $remote_user [$time_local] "$request" '
                      '$status $body_bytes_sent "$http_referer" '
                      '"$http_user_agent" "$http_x_forwarded_for"' $geoip_country_code "$geoip_country_name" ;

    access_log  /var/log/nginx/access.log  main;

    sendfile        on;
    #tcp_nopush     on;

    keepalive_timeout  65;

    #gzip  on;

    include /etc/nginx/conf.d/*.conf;
}
nginx: the configuration file /etc/nginx/nginx.conf syntax is ok
nginx: configuration file /etc/nginx/nginx.conf test is successful


查看 /var/log/nginx/access.log 就可以看到類似的範例:

.... CN,CHN,"China"
.... US,USA,"United States"


更多變數定義,請參考:http://nginx.org/en/docs/http/ngx_http_geoip_module.html

2016年9月7日 星期三

[Linux] Nginx 啟用 nginx-module-geoip @ Ubuntu 14.04

Nginx 從 1.9.1 起,支援 Dynamic Modules 囉,此例是想要使用 MaxMind 來進行 IP 反查,接著想說有沒有方便的整合方式,像是寫 PHP 就用 MaxMind PHP library 等。

接著,就先查一下自己的 nginx 情況吧!

$ nginx -V
nginx version: nginx/1.10.1
... 找關鍵字 ...
--with-http_geoip_module=dynamic
...


很 OK ,接著再裝一下 ngx_http_geoip_module.so 吧!

$ apt-cache search nginx-module-geoip
nginx-module-geoip - geoip module
$ sudo apt-get install nginx-module-geoip
...
The GeoIP dynamic module for nginx has been installed.
To enable this module, add the following to /etc/nginx/nginx.conf
and reload nginx:

    load_module modules/ngx_http_geoip_module.so;

Please refer to the module documentation for further details:
http://nginx.org/en/docs/http/ngx_http_geoip_module.html
...


下載 MaxMind 資料:

$ curl http://geolite.maxmind.com/download/geoip/database/GeoLiteCountry/GeoIP.dat.gz | gunzip - > /data/GeoIP.dat
$ curl http://geolite.maxmind.com/download/geoip/database/GeoLiteCity.dat.gz | gunzip - > /data/GeoLiteCity.dat


設置 Nginx,把 load_module 擺在最前頭
$ sudo vim /etc/nginx/nginx.conf
load_module "modules/ngx_http_geoip_module.so";
...

http {
    #geoip_country /data/GeoIP.dat;
    geoip_city    /data/GeoLiteCity.dat;
    ...

    log_format  main  '$remote_addr - $remote_user [$time_local] "$request" '
                      '$status $body_bytes_sent "$http_referer" '
                      '"$http_user_agent" "$http_x_forwarded_for" '
                      'GeoCountry[ "$geoip_country_name" "$geoip_country_code" "$geoip_country_code3" ] '
                      'GeoCity[ "$geoip_city_country_code" "$geoip_city_country_code3" "$geoip_city_country_name" ] '
                      'GeoLocation[ "$geoip_latitude" "$geoip_longitude" "$geoip_region" "$geoip_region_name" "$geoip_city" "$geoip_postal_code" ] '
    ;

    access_log  /var/log/nginx/access.log  main;
...

$ sudo service nginx reload


如此一來,就可以翻 /var/log/nginx/access.log 看看豐富的 GeoInfo 啦

2016年8月28日 星期日

[Mac] TOTO LINK N150UA @ MacOSX 10.11.6

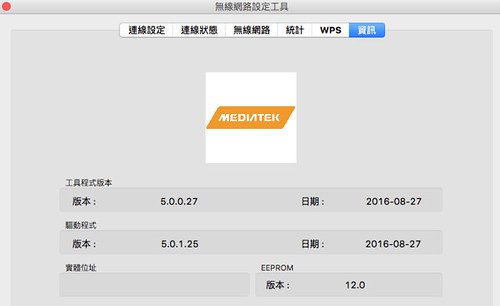
MTK Wireless Utility

經過黃色鬼屋買了一張 USB 無線網卡,結果就是一場災難的開始 XD (買的比網路上貴外,設定又如此搞剛)回來用 MacOSX 來測試,然後附贈的安裝 CD 跟 TOTO LINK (Ralink) 官網下載都無法成功設定,且文件上都說只支援 10.6 ~ 10.10 ,看來文件所敘無誤。

接著,開始翻他的硬體資訊,發現有 MediaTek 字樣!追了一下原來是 MediaTek 產出啊,網路上也看了幾篇 MTK 跨入無線網卡的新聞介紹,原來我 lag 那麼久 :P

最後,就是跑去 MediaTek 網站下載驅動程式(內含 Wireless Utility):MT7612_7610U_D5.0.1.25_SDK1.0.2.18_UI5.0.0.27_20151209
總之,裝了 MTK 的那包後,終於可以成功設定網路了 Orz 最大的缺點是安裝軟體時,還得自行閉上眼默認沒有簽署認證的程式包。

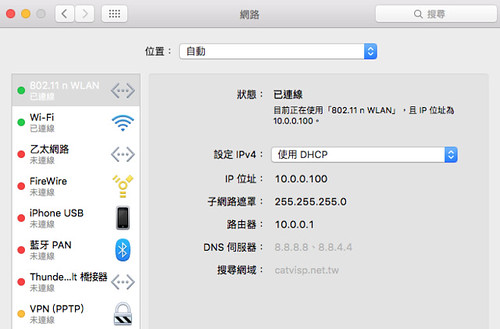
透過這次我也才明瞭在 MacOSX 設置 USB 無線網卡時,基本上都是透過第三方軟體設置的,且在 MacOSX 自身的網路偏好設定只能觀看而無法設定

MacOSX Wireless Utility