顯示具有 server 標籤的文章。 顯示所有文章

2026年5月13日 星期三

[Windows] 設置 OpenSSH 預設使用 PowerShell 7 環境 @ Windows 11

最近在處理 AI 自動化工作,開發了一些 claude skills ,發現最後需要在 Windows 11 運行 Claude Code CLI ,發現不同筆電的環境容易有問題,研究一陣子後,就決定統一都用 PowerShell 7 吧,也可以把 Windows 11 內建的 OpenSSH server 的 shell 也更換過去。

需要先理解 Windows 11 內建有 Powershell 5 ,但他不能拿來當 ssh 登入使用。這是預設採用 cmd 環境,改壞無法 ssh 登入 Windows 11 可以用這段還原,這是在 Powershell 運行:

New-ItemProperty `
  -Path "HKLM:\SOFTWARE\OpenSSH" `
  -Name DefaultShell `
  -Value "C:\Windows\System32\cmd.exe" `
  -PropertyType String `
  -Force

Restart-Service sshd

運行完,可用 Get-ItemProperty HKLM:\SOFTWARE\OpenSSH | Select-Object DefaultShell 查看預設的情況。

連續動作:

```
Windows PowerShell
著作權(C) Microsoft Corporation。保留擁有權利。

安裝最新的 PowerShell 以取得新功能和改進功能!https://aka.ms/PSWindows

PS C:\WINDOWS\system32> New-ItemProperty `
>>   -Path "HKLM:\SOFTWARE\OpenSSH" `
>>   -Name DefaultShell `
>>   -Value "C:\Windows\System32\cmd.exe" `
>>   -PropertyType String `
>>   -Force

DefaultShell : C:\Windows\System32\cmd.exe
PSPath       : Microsoft.PowerShell.Core\Registry::HKEY_LOCAL_MACHINE\SOFTWARE\OpenSSH
PSParentPath : Microsoft.PowerShell.Core\Registry::HKEY_LOCAL_MACHINE\SOFTWARE
PSChildName  : OpenSSH
PSDrive      : HKLM
PSProvider   : Microsoft.PowerShell.Core\Registry

PS C:\WINDOWS\system32>
PS C:\WINDOWS\system32> Restart-Service sshd
PS C:\WINDOWS\system32> Get-ItemProperty HKLM:\SOFTWARE\OpenSSH | Select-Object DefaultShell

DefaultShell
------------
C:\Windows\System32\cmd.exe
```

後續安裝完 Powershell 7 且更正確是要安裝 PowerShell 7 MSI 套件,直接在 MS Store 安裝會是另一個:

winget install --id Microsoft.PowerShell --installer-type wix

這時安裝完路徑會顯示在 `C:\Program Files\PowerShell\7\pwsh.exe` ,這版就可以當 ssh shell 來用了:

```
PS C:\WINDOWS\system32> Get-Command pwsh

CommandType     Name                                               Version    Source
-----------     ----                                               -------    ------
Application     pwsh.exe                                           7.6.1.0    C:\Program Files\PowerShell\7\pwsh.exe


PS C:\WINDOWS\system32> New-ItemProperty `
>>   -Path "HKLM:\SOFTWARE\OpenSSH" `
>>   -Name DefaultShell `
>>   -Value "C:\Program Files\PowerShell\7\pwsh.exe" `
>>   -PropertyType String `
>>   -Force

DefaultShell : C:\Program Files\PowerShell\7\pwsh.exe
PSPath       : Microsoft.PowerShell.Core\Registry::HKEY_LOCAL_MACHINE\SOFTWARE\OpenSSH
PSParentPath : Microsoft.PowerShell.Core\Registry::HKEY_LOCAL_MACHINE\SOFTWARE
PSChildName  : OpenSSH
PSDrive      : HKLM
PSProvider   : Microsoft.PowerShell.Core\Registry

PS C:\WINDOWS\system32>
PS C:\WINDOWS\system32> Restart-Service sshd
```

如此遠端到 Windows 11 時,登入後會看到版本資訊:

```
PowerShell 7.6.1
PS C:\Users\user> 
```

2024年7月2日 星期二

Linux 開發維護 - OpenSSH Server 資安漏洞補強,資安事件代號:CVE-2024-6387 @ Ubuntu 22.04

2024.07.02 一早就看到了 OpenSSH Server 漏洞,到處都在講,可參考 iThome 的文章:

iThome 2024.07.02 - OpenSSH含有可遠端攻陷伺服器的回歸漏洞

其中文章最後有提到:

OpenSSH團隊亦於本周一釋出了OpenSSH 9.8/9.8p1, 以修補CVE-2024-6387及另一個邏輯漏洞。該團隊亦說明,在實驗室環境下,要攻陷CVE-2024-6387需要不斷建立連結並持續6~8小時,直至達到伺服器極限,目前已於具備ASLR的32位元Linux系統上成功展現。

因此,除了修正外,也可以安裝一些阻擋 retry ssh 登入的行為,以前學生時代裝 denyhosts ,現在問 ChatGPT 得到 fail2ban 套件,在 Ubuntu 22.04 快速上手:

$ sudo apt-get update
$ sudo apt-get install fail2ban
$ sudo cp /etc/fail2ban/jail.conf /etc/fail2ban/jail.local
$ sudo systemctl restart fail2ban

建議還是要去看一下 /etc/fail2ban/jail.local 設定,像是 sshd retry 幾次會阻擋,以此評估是不是適合自己(常打錯密碼擋到自己也很無奈的)。裝完就可以用以下指令得知資訊:

$ sudo fail2ban-client status sshd 
Distributor ID: Ubuntu 
Description: Ubuntu 22.04.4 LTS 
Release: 22.04 
Codename: jammy 
Status for the jail: sshd 
|- Filter 
| |- Currently failed: 4 
| |- Total failed: 13 
| `- File list: /var/log/auth.log 
`- Actions 
|- Currently banned: 0 
|- Total banned: 0 
`- Banned IP list: 

不過,回到 CVE-2024-6387 資安事件,其實只要單純把 Ubuntu 系統更新,Ubuntu TLS 都給你傳便便:


Ubuntu 24.04
openssh-client - 1:9.6p1-3ubuntu13.3
openssh-server - 1:9.6p1-3ubuntu13.3

Ubuntu 23.10
openssh-client - 1:9.3p1-1ubuntu3.6
openssh-server - 1:9.3p1-1ubuntu3.6

Ubuntu 22.04
openssh-client - 1:8.9p1-3ubuntu0.10
openssh-server - 1:8.9p1-3ubuntu0.10

例如 Ubuntu 22.04 openssh 1:8.9p1-3ubuntu0.10 內容:


openssh 1:8.9p1-3ubuntu0.10 source package in Ubuntu
Changelog
openssh (1:8.9p1-3ubuntu0.10) jammy-security; urgency=medium

  * SECURITY UPDATE: remote code execution via signal handler race
    condition (LP: #2070497)
    - debian/patches/CVE-2024-6387.patch: don't log in sshsigdie() in log.c.
    - CVE-2024-6387

 -- Marc Deslauriers <email address hidden>  Wed, 26 Jun 2024 09:11:55 -0400

而自己的系統就只要查一下是否有更新至此版即可:

$ sudo apt upgrade && sudo apt upgrade && lsb_release -a && sudo apt policy openssh-server && ssh -V
...
Distributor ID: Ubuntu
Description: Ubuntu 22.04.4 LTS
Release: 22.04
Codename: jammy

openssh-server:
  Installed: 1:8.9p1-3ubuntu0.10
  Candidate: 1:8.9p1-3ubuntu0.10
  Version table:
 *** 1:8.9p1-3ubuntu0.10 500
        500 http://archive.ubuntu.com/ubuntu jammy-updates/main amd64 Packages
        500 http://security.ubuntu.com/ubuntu jammy-security/main amd64 Packages
        100 /var/lib/dpkg/status
     1:8.9p1-3 500
        500 http://archive.ubuntu.com/ubuntu jammy/main amd64 Packages

OpenSSH_8.9p1 Ubuntu-3ubuntu0.10, OpenSSL 3.0.2 15 Mar 2022

2023年9月14日 星期四

Docker 開發筆記 - 建立私有的 DockerHub 服務 / My Private Docker Registry

對於公司內的 Docker 使用,當然就不能把一堆程式碼都擺在外頭的 dockerhub 來管理,所幸的 Docker Registry 也可以透過 Docker 快速建立,並且把資料儲存那段跟指定的機器儲存結合,瞬間立馬建置完畢:

Docker Registry - docs.docker.com/registry/

操作:

% docker run -d -p 5000:5000 -v /tmp/registry-stoarge:/var/lib/registry --name registry registry:2 
Unable to find image 'registry:2' locally
2: Pulling from library/registry
...: Pull complete 

% docker container list
CONTAINER ID   IMAGE        COMMAND                  CREATED          STATUS          PORTS                    NAMES
1ab332dd4bb5   registry:2   "/entrypoint.sh /etc…"   21 seconds ago   Up 20 seconds   0.0.0.0:5000->5000/tcp   registry

將 image 發佈到指定的 Docker Registry server:

% docker image list
REPOSITORY             TAG       IMAGE ID       CREATED        SIZE
my/test                1.0.0     9b400be021d8   25 hours ago   457MB
registry               2         0030ba3d620c   5 weeks ago    24.1MB

% docker tag my/test:1.0.0 localhost:5000/my/test
% docker push localhost:5000/my/test
Using default tag: latest
The push refers to repository [localhost:5000/my/test]
............: Pushed 
latest: digest: sha256:...........
 size: ...

列出指定的 Docker Registry server 上的 image list:

% curl localhost:5000/v2/_catalog
{"repositories":["my/test"]}

列出指定的 Docker Registry server 上的 image 上的 tag list:

% curl localhost:5000/v2/my/test/tags/list
{"name":"my/test","tags":["latest"]}

查看一下 /tmp/registry-stoarge 內已經儲存的資料結構:

% tree -L 7 /tmp/registry-stoarge
/tmp/registry-stoarge
└── docker
    └── registry
        └── v2
            ├── blobs
            │   └── sha256
            │       ├── ...
            │       │   └── ...
            │       └── ...
            │           └── ...
            └── repositories
                └── my
                    └── test
                        ├── _layers
                        ├── _manifests
                        └── _uploads

30 directories, 0 files

最後,使用 Docker Registry server 上的 image 做事:

% docker run -it localhost:5000/my/test
root@.....:/# ls

2018年1月27日 星期六

[PHP] 使用 PHP built-in web server 及 PHP CodeIgniter framework

回想起來,我大概斷斷續續用了 CodeIgniter 七年了,最近才準備在本地開發 XD 開發上就在想 node.js 都有 webpack 等工具了,為啥 PHP 開發上還要先架設個 Web server 而感到納悶。

然而,其實 PHP 早已有 built-in web server 了,雖然只是 single-thread 但在開發上已經非常夠用,就來摸一下怎樣整再一起

$ cd project_web_document_root
$ php -S localhost:8000


接著就在 http://localhost:8000 就可以運行了!
然而,許多 web framework 都靠 routing 把 requests 統一集中到一支程式判斷,似乎已經是個非常基本的設計概念,那在 php built-in web server 也是可以的,他可以設定 routing 機制

$ cd project/web
$ cat ../tools/routing.php
$BASE_DIR = __DIR__ . '/../web' ;
if (file_exists($BASE_DIR . $_SERVER['REQUEST_URI']))
return false;
$_SERVER['SCRIPT_NAME'] = '/index.php';
include_once ($BASE_DIR . '/index.php');
$ php -S localhost:8000 ../tools/routing.php
PHP 7.0.27 Development Server started at Tue Jan 23 12:31:32 2018
Listening on http://localhost:8000
Document root is C:\Users\user\Desktop\ci-project\web
Press Ctrl-C to quit.


更多筆記:changyy/codeiginiter-and-php-built-in-web-server

2018年1月20日 星期六

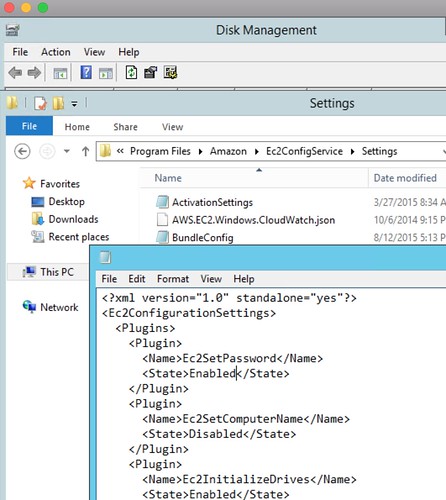
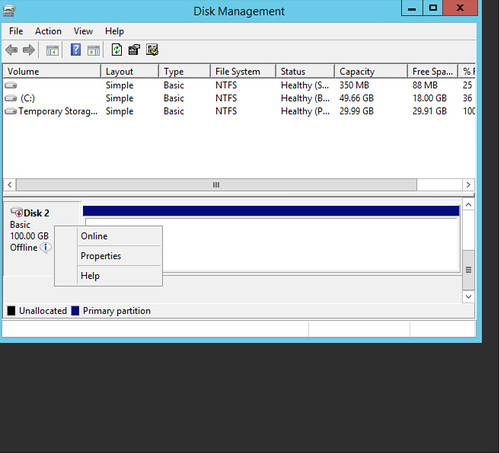
AWS 筆記 - 使用 Ubuntu server 更換 Windows server 2012 帳號狀態

AWS Windows server

公司在三年前在 AWS Beijing 開了一台 Windows server 2012 運行一些套裝軟體,然而,負責的 IT 在整理系統帳號時,把 guest 關閉了。接著發生很多奇妙事件,最恐怖的是機器無法遠端登入了 Orz

一開始想朝更換 Administrator 密碼試試,結果一看過程步驟也不少:
使用 EC2Config 重置 Windows 管理员密码 -
https://docs.aws.amazon.com/zh_cn/AWSEC2/latest/WindowsGuide/ResettingAdminPassword_EC2Config.html
接著,反而朝惡搞的方式進去研究,例如:如何修改機碼啟用 guest 帳號


最後,使用了前一份(一年前版本)的全系統備份,開了一台機器,把他的 C:/Windows/System32/config/SAM 複製出來,覆蓋掉無法登入的機器上,如此一來就搞定了!

情況簡介:
A server: 壞掉的 Windows server 2012
B server: 從 A server 現狀建置 AMI 而開啟的機器
C server: 前一版次備份的 Windows server
D server: Ubuntu 14.04 server
A 計畫:
將 B server 的 C 槽卸下,並掛到 C server 上進行 B server 的 C槽 資料修改,改完後再卸下,重裝到 B server,把 B server 重新啟動,看看是否正常

然而,A 計劃失敗了,在 AWS console 可以看到系統無法正常通過檢驗,於是啟動了 B 計畫

B 計畫:
再次建置乾淨的 B server,將 B server 的 C 槽卸下,也把 C server - C 槽卸下,並一起掛到 D server 上,拿著 C server - C 槽關鍵資訊,直接覆蓋掉 B server - C 槽 資料,修改完後再卸下,重裝到 B server,再把 B server 重新啟動
果真 B 計劃成功了 :p 猜測 A方案 可能因為修改的是 Windows OS level 資訊,修改完可能也改變了 B server - C 槽狀態,以至於重新啟用時反而資訊對不上而無法開機。

AWS Windows server

其他筆記:

  1. Windows 需要 stop 機器,才能卸下指定硬碟,請開啟 “終止保護“ 避免不小心做錯事
  2. Windows 的系統碟(C:)根设备用 /dev/sda1 資訊,卸下後要重新裝上時,記得要用原本的 /dev/sda1 才行
  3. 在 EC2 - EBS 管理介面要卸下某硬碟時,建議把 Name 帶點原本的機器資訊,方便找尋
  4. 在 Ubuntu 要 mount NTFS 都還算簡單,sudo mount /dev/xsgf1 /mnt/Win2012CDisk 
  5. Windows 的帳號資訊擺在 C:\Windows\System32\config\SAM 檔案,可以單純做 cp /mnt/C_server_c_diskt/Windows/System32/config/SAM /mnt/B_server_c_diskt/Windows/System32/config/SAM 
  6. 驗證完畢後,就可以安心地把 A server 先暫停 -> 把系統槽卸下 -> 掛到 Ubuntu server -> mount 起來 -> 覆蓋掉 SAM -> 卸下 -> 掛回 A server -> A server 重新開機

2017年6月15日 星期四

透過 Nginx proxy_pass 架構,進行 Service migration

有一個舊網站已活了數年,改造的方向不外乎提升 SEO、移除不需要的檔案、增加系統安全、架構拆分,或是基本的 Web Framework 的抽換使用等等。對於一個 IoT 產業來說,包袱多多,像是 device 不見得會更新到新版,更別說會跟隨 HTTP 301/302 去取得新資源,甚至新網站的開發還沒辦法一步到位全部切換,只好透過 Nginx proxy_pass 架構去處理相容並扛流量了。

在此使用 upstream 管理舊機器們,並且添加新的 log format 多紀錄 $upstream_addr 資訊以便後續維護:

log_format add_proxy_pass '$remote_addr - $remote_user [$time_local] [=$upstream_addr=] "$request" ' '$status $body_bytes_sent "$http_referer" ' '"$http_user_agent" "$http_x_forwarded_for"';

resolver 8.8.8.8;
upstream oldserver {
hostname1;
hostname2;
hostname3;
}


後續,都是在 nginx server {} 定義範圍下。

更改 log 記錄格式:

access_log  /var/log/nginx/access.log add_proxy_pass;

預期 http client 能處理 HTTP 301/302 的服務位置,給予更佳的 SEO URL:

location ~ old_page\.php$ {
return 301 $scheme://$host/new/page/;
}


對於不能用 HTTP 301/302 的,則改用 proxy_pass 機制:

location ~ ^/old/resource {
proxy_pass http://oldserver$uri;
}


對於,有些文件很清楚要更改內文關鍵字的,可以善用 ngx_http_sub_module:

location /old/resource/file\.json {
proxy_pass http://oldserver$uri;
sub_filter_types *;
sub_filter_once off;
sub_filter '//old.hostname/' '//cdn.hostname/';
}


也可以順順換成 CDN 架構囉。

2017年6月14日 星期三

AWS 筆記 - AWS ELB 與 Nginx 之 DOS 惡意攻擊者的處理方式

這個緣由是這樣的,有一台 Server 被狂打,但架構是:

Remote client <-> AWS ELB <-> Web server (Nginx) <-> Application

當有用戶非常好心地發大量 request 來檢查機器漏洞,若 Nginx 預設都沒多做設定,那 access.log 都會只記錄到 AWS ELB IP ,也就是不能把 access.log 紀錄的 IP 拿來 ban ,會變成 ban 掉 ELB。

而 AWS 提供的 Security group 預設是從 Allow 的角度,若要特意 ban 掉某個 IP 會有點難搞,例如要改寫防火牆規則,因此,最後就改成從實體 server 去阻擋遠端 client request 了。

步驟一:先讓 Nginx 可以記錄到真實的 remote ip

/etc/nginx/nginx.conf

http {
    # ...
    real_ip_header X-Forwarded-For;
    set_real_ip_from 0.0.0.0/0;

    log_format  main  '$remote_addr - $remote_user [$time_local] "$request" '
                      '$status $body_bytes_sent "$http_referer" '
                      '"$http_user_agent" "$http_x_forwarded_for"';
    # ...
}


如此一來,access.log 的 remote_addr 就可以不是 AWS ELB IP 了。

步驟二:用 Nginx 去 deny ip

/etc/nginx/conf.d/your-service.conf

server {
  # ...
  deny RemoteIP;
  # ...
}


這樣設定後,在用 sudo nginx -t 檢查語法後,就可以啟用了

在此不用 iptables 去阻擋的主因是封包進來的 IP 都是 AWS ELB ,所以才改從 Nginx/App 這層取阻擋。缺點就是 access.log 還是一直肥,好處是可以觀察 access.log 看看對方是不是放棄攻擊了?XD

未來若碰到 DDOS 就...

2015年10月24日 星期六

[Linux] 調校 Apache Web server 筆記 ab、systcl.conf、limits.conf、mpm_prefork.conf @ Ubuntu 14.04

最近又播空出來處理一下,之前機器在規劃時,幾乎都用系統預設的資源,接著就直接上 AWS Auto scaling,整體上進入 m3.medium 都還堪用,直到要上到 m3.large 規模時,開始發現當初設置的 Auto scaling rules 不是很適當。於是乎把 CPU 靈敏度下調,例如 CPU 只要衝到 15% 使用率就開新機器,反正大部分的時間都夠用 :P

而現在就老老實實先用 apache benchmark 試試! 首先操作環境都是 AWS EC2,先替機器上 Elastic IP 吧!因為 想測不同規格的機器,這時用個 Elastic IP 會方便一點,避免機器 IP 被換掉,此外,建議發動 ab 的機器規格要好於壓力測試的機器。

當發動 ab 測試的機器得到 apr_socket_recv: Connection reset by peer (104) 而被壓力測試的機器 dmesg 出現 TCP: TCP: Possible SYN flooding on port 80. Dropping request.  Check SNMP counters. 時,請調整壓力測試機器。

$ sudo vim /etc/sysctl.conf
net.ipv6.conf.all.disable_ipv6 = 1
net.ipv4.tcp_tw_reuse = 1
net.ipv4.tcp_tw_recycle = 1
net.ipv4.tcp_syncookies = 0
net.ipv4.tcp_synack_retries = 1
net.ipv4.tcp_max_syn_backlog = 102400
net.ipv4.tcp_max_tw_buckets = 102400
$ sudo sysctl -p


其中 tcp_tw 代表 TCP Socket Time-Wait,而 syncookies 為 SYN Cookies 機制,而 syn_backlog 跟 tw_buckets 的數量,調大就是允許讓系統花多一點資源讓 client 等待而非直接 reject client。

而發動機器 file open 數量太小時,會出現 socket: Too many open files (24) 資訊,這時就先用 root 角色,並用 ulimit -n 8000 調高限制,若要保持其資源限制,就修改 /etc/security/limits.conf

$ sudo vim /etc/security/limits.conf
* soft nofile 12345
* hard nofile 23456

此例就是允許任何人開 12345 個檔案。

接著 ab 常用指令:

$ ab -c 300 -n 50000 http://ip/

記得若測試的 IP 位置在首頁,要有 "/" 結尾 :P 接著關注報表,例如 Requests per second 跟 Time per request 數字,若 requests per second 比 concurrent 數字還要大,那就調大 -c 的參數試試,去尋找一個合適的點即可。

另外,由於 Apache web server 預設採用 prefork MPM 模式,那邊也有些資源上限要調整:

$ sudo vim /etc/apache2/mods-enabled/mpm_prefork.conf
# prefork MPM
# StartServers: number of server processes to start
# MinSpareServers: minimum number of server processes which are kept spare
# MaxSpareServers: maximum number of server processes which are kept spare
# MaxRequestWorkers: maximum number of server processes allowed to start
# MaxConnectionsPerChild: maximum number of requests a server process serves

<IfModule mpm_prefork_module>
ServerLimit 7500
StartServers 20
MinSpareServers 15
MaxSpareServers 50
MaxRequestWorkers 7500
MaxConnectionsPerChild 0
</IfModule>

$ sudo service apache2 reload


最後心得...在 AWS EC2 m3.large 的機器上,大多每秒就是處理一千五附近的連線,也就同時可處理 1500 連線。可以用 ab -k -c 1500 -n 5000000 測試看看。

2015年5月19日 星期二

GAE 筆記 - 在 Ubuntu Server 上傳 Google App Engine 程式碼 @ Ubuntu 14.04

最近嘗試在 Ubuntu server 開發,以前常在 Windows 、 Ubuntu Desktop 和 Mac OSX 等視窗介面,最近 Google App engine 也把認證的部分換了,以前是在 Google App engine tools 上輸入帳號密碼,現在都改用 OAuth 認證方式,實在方便。

若要在 Ubuntu server 上運行 Google App Engine ,透過 Command line 即可完成測試跟發佈:

測試:

$ cd /path/gae/project
$ python -m py_compile *.py && dev_appserver.py --port=8080 .


發佈:

$ cd /path/gae/project
$ python -m py_compile *.py && appcfg.py --oauth2 --noauth_local_webserver -A YourGAEProjectID update .

過程只需再用 browser 瀏覽指定的 link 以及完成 oauth 的認證即可發布啦!

2015年5月14日 星期四

AWS 筆記 - 關於 Amazon EC2、Elastic Load Balancer (ELB)、Auto Scaling 與 CPU loading 過低問題 @ Ubuntu 14.04, Apache 2.4

使用 ELB + Auto Scaling 好一陣子了,最近因為服務量變大導致 Web Server 變多,然而,在部署程式方面就累了許多,因此朝 Scaling up 來進行一下,限縮機器數量並提升機器規格。

在這個過程中,從 m3.medium 改到 m3.large 或 m3.xlarge 等,卻發現越高級的機器,其 CPU Loading 衝不上去,並且限縮機器後導致服務極為不穩,連 Health check 也發現。但明明機器都不忙啊?!

接著因為非常忙,拖了兩個禮拜才正視這個問題。追了許多後,發現...只是 Apache Multi-Processing Module (MPM) 設定未同步拉高 XD 好蠢的一件事啊。此外,由於服務眾多,尚未有空最佳化,就先繼續用 prefork 架構了。

$ apache2 -v
Server version: Apache/2.4.7 (Ubuntu)
Server built:   Mar 10 2015 13:05:59
$ sudo vim /etc/apache2/mods-enabled/mpm_prefork.conf
<IfModule mpm_prefork_module>
        ServerLimit                7500 # 預設才 256
        StartServers               20
        MinSpareServers           15
        MaxSpareServers            50
        MaxRequestWorkers          7500 # 預設才 256
        MaxConnectionsPerChild     0
</IfModule>


總之,ServerLimit 跟 MaxRequestWorkers 就看當下的機器資訊,例如記憶體等等。

透過 Web server 執行的環境調整,機器的負載度自然可以提升,接著 Auto Scaling 的機制就可用啦!原先在 m3.medium 的機器是單核,而在 m3.large 開始就是多核心了!效能就能更往上衝囉。很妙地用系統預設的 prefork.conf 在 m3.medium 還混的不錯 :P 包含 CPU 會依照 requests 量變化,不像同樣的設定檔搬到多核心後就失效了,CPU 衝不起來,導致 Auto Scaling 也失效!

整體上,這次碰到 service 不穩的主因:

total requests 一直保持一個數量,而原先開 m3.medium x N ,想說機器提升成 m3.large 就把數量調整成一半,結果 web server 數量降低,再加上 prefork.conf 的設定,導致能服務的 requests 量也降低!而 Health check 無法正常被驗證,接著 AWS Scaling 會判斷機器出事要下線,甚至 requests 不導過去,頻頻出現:

503 Service Unavailable: Back-end server is at capacity

如今終於解掉了 :P Health check requests 也能被服務到,機器自然就不會被判斷成有問題,自然就解掉 503 Service Unavailable 現象。

最後,如果要追蹤網路流量,可以試試 nload 這個指令,看整體流量還滿方便的。

2015年4月8日 星期三

PHP CodeIgniter - 透過 Apache RewriteRule 限制 CGI 功能

基於一些開發需求,想要侷限網站的功能。剛好這個網站服務是用 PHP CodeIgniter 開發的,整套都是走 RewriteRule 來進行,例如一個 URL 位置,都一律導向到 PHP CodeIgniter Project 的 index.php?/path 來分析。

假設原本網站有 3 個主要網址,分別是 /api, /shopping, / 等,假設想要讓此網站只開啟 /api 時,這時就可以透過 Apache RewriteRule 來限制:

<VirtualHost *:80>
DocumentRoot /ci-project/
DirectoryIndex index.html index.php index.htm

# empty page
Alias /empty     /var/www/html/

<Directory />
Options FollowSymLinks
AllowOverride None
</Directory>

<Directory /var/www/html/>
Options FollowSymLinks
AllowOverride None
DirectoryIndex index.html index.php index.htm
Require all granted
Satisfy Any
</Directory>

<Directory /ci-project>
Options FollowSymLinks
DirectoryIndex index.php
AllowOverride None
#AllowOverride All
Require all granted
Satisfy Any

<IfModule mod_rewrite.c>
RewriteEngine On
#LogLevel alert rewrite:trace6
RewriteBase /

# disable index.php with empty QUERY_STRING
RewriteCond %{QUERY_STRING} ^$
RewriteRule ^index\.php$ /empty/ [L]

RewriteCond $1 !^(index\.php|images|css|js|favicon\.ico)
# enable /api only
RewriteCond $1 ^api.*$
RewriteCond %{REQUEST_FILENAME} !-f
RewriteCond %{REQUEST_FILENAME} !-d
RewriteRule ^(.*)$ ./index.php?/$1 [L,QSA]
</IfModule>
</Directory>
</VirtualHost>


如此一來,只要使用者逛 / 位置,則會顯示 /var/www/html 的資料,而逛 /api 系列時,則是可以正常引導到 PHP CodeIgniter 相關程式碼來處理。

2015年1月24日 星期六

[Linux] 快速安裝 Gitlab 及簡易設定 @ Ubuntu 14.04

感覺近年來幾套出色的管理套件都是 Ruby 派的,例如 Redmine 等,然而有許多安裝瑣事要處理 Orz 所幸 Gitlab 官方有打包一個 debian package 讓初學者可以快速上手:

$ wget https://downloads-packages.s3.amazonaws.com/ubuntu-14.04/gitlab_7.6.2-omnibus.5.3.0.ci.1-1_amd64.deb
$ sudo apt-get install openssh-server
$ sudo apt-get install postfix # Select 'Internet Site'
$ sudo dpkg -i gitlab_7.6.2-omnibus.5.3.0.ci.1-1_amd64.deb
$ sudo gitlab-ctl reconfigure


如此一來,預設 http://localhost/ 就可以登入查看了。然而,預設環境比較適合體驗啦,我又多做了幾個動作,包含也在系統裝上 Ruby2.0 方便未來的相關使用。

更新 Gitlab 環境:
$ sudo vim /etc/gitlab/gitlab.rb

# 對外 Web 資訊
external_url = 'http://YourPublicDomainName'
# 對外 SSH 資訊
gitlab_rails['gitlab_ssh_host'] = 'YourPublicDomainName'
# 時區
gitlab_rails['time_zone'] = 'Asia/Taipei'
# 開啟 https 服務, 以及強制使用 https
nginx['redirect_http_to_https'] = true
nginx['redirect_http_to_https_port'] = 80
nginx['ssl_certificate'] = "/etc/gitlab/ssl/YourPublicDomainName.crt"
nginx['ssl_certificate_key'] = "/etc/gitlab/ssl/YourPublicDomainName.key"

$ sudo gitlab-ctl reconfigure
$ sudo gitlab-ctl restart


更新 Postfix 環境:

$ sudo vim /etc/postfix/main.cf
myhostname = YourPublicDomainName
$ sudo postfix reload


安裝 Ruby 2.0 (非必要):

$ sudo apt-get update
$ sudo apt-get install ruby2.0 ruby2.0-dev
$ ruby -v
ruby 1.9.3p484 (2013-11-22 revision 43786) [x86_64-linux]
$ gem -v
1.8.23
$ sudo ln -sf /usr/bin/ruby2.0 /usr/bin/ruby
$ sudo ln -sf /usr/bin/gem2.0 /usr/bin/gem
$ ruby -v
ruby 2.0.0p384 (2014-01-12) [x86_64-linux-gnu]
$ gem -v
2.0.14


以上則是稍微完整一點的調整。

然而,有時為了確保服務長久性,會有一些變動方式,例如 gitlab 資料儲存在於 /var/opt/gitlab ,可以給予一個獨立空間維護,因此,在安裝 gitlab 軟體前,先自行把 /var/opt/gitlab 擺在額外的 partition (此例是 AWS EC2 管理,給予一個 64GB 空間: http://docs.aws.amazon.com/AWSEC2/latest/UserGuide/ebs-using-volumes.html ):

$ lsblk
NAME    MAJ:MIN RM SIZE RO TYPE MOUNTPOINT
xvda    202:0    0  20G  0 disk
└─xvda1 202:1    0  20G  0 part /
xvdb    202:16   0   4G  0 disk /mnt
xvdc    202:32   0  64G  0 disk
$ sudo mkfs -t ext4  /dev/xvdc
$ sudo mkdir /64GB
$ sudo mount /dev/xvdc /64GB
$ sudo mkdir -p /64GB/gitlab /var/opt
$ sudo ln -s /64GB/gitlab /var/opt/gitlab


接著再跑安裝 gitlab 流程...如果已經安裝了,那就是配置好 /64GB 後:

$ sudo gitlab-ctl stop
ok: down: logrotate: 1s, normally up
ok: down: nginx: 0s, normally up
ok: down: postgresql: 0s, normally up
ok: down: redis: 1s, normally up
ok: down: sidekiq: 0s, normally up
ok: down: unicorn: 0s, normally up
$ sudo cp -a /var/opt/gitlab /64GB/gitlab
$ sudo mv /var/opt/gitlab /var/opt/gitlab-bak
$ sudo ln -s /64GB/gitlab /var/opt/gitlab
$ sudo gitlab-ctl start

2014年7月2日 星期三

[Linux] 使用 ClamAV 掃毒 @ Ubuntu 14.04 Server

有一台Linode機器一直用來當跳板,若沒出事就不會進去逛,最近突然想到,不會不哪天被入侵還不知道?就先試看看最粗淺的用法,掃毒:

$ sudo apt-get install clamav
$ sudo freshclam
$ sudo clamscan -r /
...

----------- SCAN SUMMARY -----------
Known viruses: 3492457
Engine version: 0.98.1
Scanned directories: 13386
Scanned files: 50860
Infected files: 0
Total errors: 8826
Data scanned: 1996.67 MB
Data read: 19701.90 MB (ratio 0.10:1)
Time: 210.216 sec (3 m 30 s)

$ df -h
Filesystem      Size  Used Avail Use% Mounted on
/dev/xvda        47G   20G   25G  44% /
none            4.0K     0  4.0K   0% /sys/fs/cgroup
devtmpfs        996M  4.0K  996M   1% /dev
none            200M  208K  200M   1% /run
none            5.0M     0  5.0M   0% /run/lock
none            997M     0  997M   0% /run/shm
none            100M     0  100M   0% /run/user


看起來耗時不多,有沒有用就是另一回事了 XDD 例如躲在記憶體內以及沒被偵測出來的...

2014年6月20日 星期五

AWS 筆記 - 從 Godaddy 搬到 AWS Route 53


AWS Route 53 有很多收費機制,但為了 GeoDNS 的使用,開始來搬遷。原先購買的 Domain name 是在 Godaddy 上購買以維護的,整個匯出流程還滿容易的。

  1. AWS Route 53: Create Hosted Zone

  2. AWS Route 53: Import Zone File

  3. Godaddy: Export DNS Setttings

  4. AWS Route 53: Import Zone File 貼上需要的,如 A系列、CNAME系列、MX系列等

  5. Godaddy: Set NameServer,改用 AWS Route 53 提供的清單


最後,可以用 dig 去追蹤看看,是不是真的改用 AWS Route 53 提供的 NS 囉

$ dig +trace example.com

2014年4月14日 星期一

[Linux] 安裝 Glances - An eye on your system @ Ubuntu 12.04


Glances - An eye on your system

$ sudo apt-get install python-pip build-essential python-dev
$ sudo pip install Glances
$ glances


如此就可以看到美美的系統監控了 :D

其中 glances 來支援 server/client 模式,並支援 password 管控,可以把它當作可以遠端看 server 的狀態吧

Server:
$ glances -s -B 0.0.0.0 -p 12345 -P helloworld
Glances server is running on 0.0.0.0:12345


Client
$ glances -c ServerIP -p 12345 -P helloworld

2014年4月10日 星期四

[Linux] 更新 OpenSSH Server Key @ Ubuntu 12.04

由於熱門議題 OpenSSL Security Advisory [07 Apr 2014] / CVE-2014-0160 的影響,只好重新處理一下 OpenSSH Server key 了:

$ lsb_release -a
Distributor ID: Ubuntu
Description: Ubuntu 12.04.4 LTS
Release: 12.04
Codename: precise
$ sudo rm /etc/ssh/ssh_host_*
$ sudo dpkg-reconfigure openssh-server

2014年3月27日 星期四

[Linux] MySQL Server & Client characterset 設定 @ Ubuntu 12.04

這...太久沒設定了,記得 n 年前也都會碰到 Orz

首先先查詢現況:

mysql> status;
...
Server characterset:    latin1
Db     characterset:    latin1
Client characterset:    utf8
Conn.  characterset:    utf8


接著設定:

$ ls -la /etc/mysql/
total 24
drwxr-xr-x  3 root root 4096 Mar 27 08:58 .
drwxr-xr-x 91 root root 4096 Mar 26 22:41 ..
drwxr-xr-x  2 root root 4096 Mar 27 09:03 conf.d
-rw-------  1 root root  333 Mar 25 16:00 debian.cnf
-rwxr-xr-x  1 root root 1220 Jan 22 05:48 debian-start
-rw-r--r--  1 root root 3638 Mar 27 08:56 my.cnf
$ sudo touch /etc/mysql/conf.d/charset.cnf
[client]
default-character-set=utf8

[mysqld]
character-set-server=utf8
collation-server=utf8_unicode_ci

$ sudo service mysql restart


再查詢一次:

mysql> status;
...
Server characterset:    utf8
Db     characterset:    utf8
Client characterset:    utf8
Conn.  characterset:    utf8


參考資料:

2014年2月13日 星期四

[Linux] 架設 OpenVPN server 與 OpenVPN client 設定 @ Ubuntu 12.04

嘗過過 PPTP、L2TP 後,接著把玩 OpenVPN。此例 OpenVPN server 跟 OpenVPN client 都是 Ubuntu 12.04,其中一個是 server 版,另一個是 desktop 版。

Ubuntu Server: 安裝:

$ sudo apt-get install openvpn

Ubuntu Server: 憑証(順便把 OpenVPN client 做完):

$ cp -r /usr/share/doc/openvpn/examples/easy-rsa/2.0 /tmp/easy-rsa
$ cp /tmp/easy-rsa/openssl-1.0.0.cnf /tmp/easy-rsa/openssl.cnf
$ cd /tmp/easy-rsa/
$ source ./vars
$ ./clean-all
$ ./build-dh
$ ./pkitool --initca
$ ./pkitool --server server
$ ./build-key client
$ sudo su
# chown -R root:root /tmp/easy-rsa/keys/
# cd keys
# cp ca.crt server.crt server.key dh*.pem /etc/openvpn/


Ubuntu Server: 建立 /etc/openvpn/server.conf:

$ sudo cp /usr/share/doc/openvpn/examples/sample-config-files/server.conf.gz /etc/openvpn
$ sudo gunzip /etc/openvpn/server.conf.gz


Ubuntu Server: 設定 /etc/openvpn/server.conf (修改要跑的 port, ip, tcp or udp mode):

$ sudo vim /etc/openvpn/server.conf

Ubuntu Server: 讓 OpenVPN client 可以透過 OpenVPN server 連出去外網,其中 eth0 為 OpenVPN server 對外網卡、10.8.0.0/24 是預設的 OpenVPN 區段:

$ sudo vim /etc/openvpn/server.conf
push "redirect-gateway def1 bypass-dhcp"
push "dhcp-option DNS 8.8.8.8"

$ iptables -t nat -A POSTROUTING -s 10.8.0.0/24 -o eth0 -j MASQUERADE


Ubuntu Client: 安裝(從OpenVPN server 取得 ca.crt、client.crt、client.key):

$ sudo apt-get install openvpn
$ sudo cp -r /usr/share/doc/openvpn/examples/sample-config-files/ /etc/openvpn/example
$ sudo cp ca.crt client.crt client.key /etc/openvpn/example


Ubuntu Client: 設定(修改 server ip, port, tcp or udp mode):

$ sudo vim /etc/openvpn/example/client.conf

Ubuntu Client: 執行:

$ sudo openvpn --config /etc/openvpn/example/client.conf

Ubuntu Client: 開機執行:

$ sudo vim /etc/rc.local
openvpn --config /etc/openvpn/example/client.conf > /var/log/openvpn_client.log 2>&1 &


如果 OpenVPN client 還有提供 NAT 服務,那記得 iptables 要加上這段(tun0可以用 ifconfig查看):

VIF="tun0"
iptables -t nat -A POSTROUTING -o $VIF -j MASQUERADE

2014年1月28日 星期二

[Linux] 架設 VPN Server (PPTP/IPSEC/L2TP) @ Ubuntu 12.04

研究上需要架設一台 VPN,於是架了 PPTP 後,也順便把 IPSEC、L2TP 補齊。流程:

安裝需要的軟體:

$ sudo apt-get install pptpd openswan xl2tpd ppp

PPTP:

$ sudo vim /etc/pptpd.conf
# (Recommended)
localip 192.168.0.1
remoteip 192.168.0.234-238,192.168.0.245

$ sudo vim /etc/ppp/pptpd-options
# …
ms-dns 8.8.8.8
# …
logfile /var/log/pptpd.log

$ sudo touch /var/log/pptpd.log

$ sudo vim /etc/ppp/chap-secrets
# PPTP
username pptpd password *
# L2TP
username l2tpd password *

其中 username, password 都是明碼


IPSEC/L2TP:

$ sudo su
$ echo "net.ipv4.ip_forward = 1" | tee -a /etc/sysctl.conf
$ echo "net.ipv4.conf.all.accept_redirects = 0" | tee -a /etc/sysctl.conf
$ echo "net.ipv4.conf.all.send_redirects = 0" | tee -a /etc/sysctl.conf
$ for vpn in /proc/sys/net/ipv4/conf/*; do echo 0 > $vpn/accept_redirects; echo 0 > $vpn/send_redirects; done
$ sysctl -p


$ sudo vim /etc/rc.local
for vpn in /proc/sys/net/ipv4/conf/*; do echo 0 > $vpn/accept_redirects; echo 0 > $vpn/send_redirects; done
iptables --table nat --append POSTROUTING --jump MASQUERADE


$ sudo vim /etc/ipsec.conf
conn L2TP-PSK-NAT
    rightsubnet=vhost:%priv
    also=L2TP-PSK-noNAT

conn L2TP-PSK-noNAT
    authby=secret
    pfs=no
    auto=add
    keyingtries=3
    rekey=no
    ikelifetime=8h
    keylife=1h
    type=transport
    left=SERVER_IP
    leftprotoport=17/1701
    right=%any
    rightprotoport=17/%any


$ sudo vim /etc/ipsec.secrets
SERVER_IP  %any:  PSK "L2TP_PRIVATE_KEY"


$ sudo vim /etc/xl2tpd/xl2tpd.conf
[global]
ipsec saref = yes

[lns default]
ip range = 10.1.2.2-10.1.2.255
local ip = 10.1.2.1
;require chap = yes
refuse chap = yes
refuse pap = yes
require authentication = yes
ppp debug = yes
pppoptfile = /etc/ppp/options.xl2tpd
length bit = yes


$ sudo vim /etc/ppp/options.xl2tpd
require-mschap-v2
ms-dns 8.8.8.8
asyncmap 0
auth
crtscts
lock
hide-password
modem
debug
name l2tpd
proxyarp
lcp-echo-interval 30
lcp-echo-failure 4


重啟相關服務:

$ sudo service pptpd restart
Restarting PPTP:
Stopping PPTP: pptpd.
Starting PPTP Daemon: pptpd.

$ sudo service ipsec restart
ipsec_setup: Stopping Openswan IPsec...
ipsec_setup: Starting Openswan IPsec 2.6.37...
ipsec_setup: No KLIPS support found while requested, desperately falling back to netkey
ipsec_setup: NETKEY support found. Use protostack=netkey in /etc/ipsec.conf to avoid attempts to use KLIPS. Attempting to continue with NETKEY

$ sudo service xl2tpd restart
Restarting xl2tpd: xl2tpd.


服務驗證:

$ sudo ipsec verify
Checking your system to see if IPsec got installed and started correctly:
Version check and ipsec on-path                                 [OK]
Linux Openswan U2.6.37/K3.2.0-58-generic (netkey)
Checking for IPsec support in kernel                            [OK]
 SAref kernel support                                           [N/A]
 NETKEY:  Testing XFRM related proc values                      [OK]
        [OK]
        [OK]
Checking that pluto is running                                  [OK]
 Pluto listening for IKE on udp 500                             [OK]
 Pluto listening for NAT-T on udp 4500                          [OK]
Two or more interfaces found, checking IP forwarding            [OK]
Checking NAT and MASQUERADEing                                  [OK]
Checking for 'ip' command                                       [OK]
Checking /bin/sh is not /bin/dash                               [WARNING]
Checking for 'iptables' command                                 [OK]
Opportunistic Encryption Support                                [DISABLED]