老闆相對於公司就是棋手,專門擬定策略;員工相對於公司就是棋子,負責執行老闆的策略。
許多時候,棋子待久了也會希望棋手多多用它,增加出場的機會,殊不知,使得出“將軍抽車”的招數不是常態,更多佈局可能是換掉敵方的棋子 XD
有意識的棋子,到底多公司是好是壞?這一切都是結果論 orz 只是,若棋手很威了,那棋子還是乖乖執行即可,完美地執行任務才能驗證棋手策略,若棋手不威,我看棋子在政治鬥爭下拿不到權力時,還是乖乖離開吧 XD
前幾天跟一位老棋手閒聊,老棋手說:你的經驗都只是當個棋子而已,我們的視野差距極大。過去老棋手在當棋子時,錯過了一些邀約,令旁人感到惋惜,但一切都基於對自己人生的選擇權,許多事物都是結果論的。老棋手說著說著,只希望每一次的戰場上的輸贏,都可以讓妻小安心地生活。這一切都只是選擇。並且叮嚀著:你無法選擇機運或聰明才智,但你可以選擇努力、用心地過日子,把握機會。
聽著聽著,原本想跟老棋手分享周邊朋友在外商新創打滾的故事,瞬間就不知該說沒,只能點頭唯喏了 XD

2017年10月27日 星期五
Firebase 開發筆記 - 使用 PHP 之 Verify ID tokens using a third-party JWT library
PHP 漸漸地越來越沒有愛了 XD Ubuntu server 預設還是停留在 php5.5 系列,而許多套件都進入了 PHP 7 世界了。不知是不是這樣子,所以官方沒再推出 PHP SDK ?於是乎,只好自己刻一下下。也順勢認識 JWT,第一次認識是在 APNs Auth Key 的使用,沒想到這麼快又要上戰場了 XD
網路資源:
用法:
連續動作(PHP Codeigniter Usage):
網路資源:
- https://firebase.google.com/docs/auth/admin/verify-id-tokens
- https://jwt.io/
- https://github.com/lcobucci/jwt/tree/3.2 (因應 PHP 5.x 使用 3.2.2版)
- https://github.com/kreait/firebase-php
用法:
$ mkdir jwt-3.2.2 ; cd jwt-3.2.2 ; composer require lcobucci/jwt

$ vim test.php

<?php

require 'vendor/autoload.php';


$token_string = 'XXXXXXXXXXX';


$signer = new Lcobucci\JWT\Signer\Rsa\Sha256();

$keychain = new Lcobucci\JWT\Signer\Keychain;

$parser = new Lcobucci\JWT\Parser;


try {

 $token = $parser->parse($token_string);

} catch( Exception $e ) {

 echo "decode failed\n";

 exit;

}


// check key field

foreach (array( 'iat', 'exp', 'aud', 'iss', 'user_id' ) as $field) {

 if (!$token->hasClaim($field)) {

  echo "no $field\n";

  exit;

 }

}


if ($token->isExpired()) {

 echo "exp expired\n";

 exit;

}


if (!$token->hasHeader('kid')) {

 echo "no kid\n";

 exit;


}

$kid = $token->getHeader('kid');


$keys = json_decode(file_get_contents('https://www.googleapis.com/robot/v1/metadata/x509/securetoken@system.gserviceaccount.com'), true);


if (!isset($keys[$kid])) {

 echo "kid not found\n";

 exit;

}


try {

 if( $token->verify($signer, $keychain->getPublicKey($keys[$kid])) )

  echo "PASS\n";

} catch (Exception $e) {

 echo "Failed";

}


$user_id = $token->getClaim('user_id');
連續動作(PHP Codeigniter Usage):
$ cat Jwt_library.php

<?php

require_once 'jwt-3.2.2/vendor/autoload.php';

class Jwt_library {

 public function __construct() {

  $this->ci = &get_instance();

  $this->parser = new Lcobucci\JWT\Parser;

  $this->keychain = new Lcobucci\JWT\Signer\Keychain;

  $this->signer = new Lcobucci\JWT\Signer\Rsa\Sha256;

 }


 public function verify_firebase_token(&$error, $user_token, $project_id, $service_public_keys = array()) {

  $user_id = NULL;

  $error = NULL;

  $token = false;

  try {

   $token = $this->parser->parse($user_token);

  } catch (Exception $e) {

   $error= 'decode failed';

   return NULL;

  }


  // check filed name

  foreach (array( 'iat', 'exp', 'aud', 'iss', 'user_id' ) as $field) {

   if (!$token->hasClaim($field)) {

    $error = "no $field";

    return NULL;

   }

  }


  if ($token->isExpired()) {

   $error = 'exp expired';

   return NULL;

  }

  //if ($token->getClaim('iat') > time() )

  // return 'token has been issued in the future';


  if ($token->getClaim('aud') != $project_id ) {

   $error = 'aud error';

   return NULL;

  }


  $user_id = $token->getClaim('user_id');


  $kid = false;

  try{

   $kid = $token->getHeader('kid');

  } catch (Exception $e) {

   $error = 'no kid';

   return NULL;

  }


  if (!isset($service_public_keys[$kid])) {

   $error = 'kid not found: '.$kid;

   return NULL;

  }


  try {

   if ($token->verify($this->signer, $this->keychain->getPublicKey($service_public_keys[$kid])))

    return $user_id;

  } catch (Exception $e) {

   $error = 'verify failed';

  }


  return NULL;

 }

}
$ cat php_ci_controller.php

<?php

$output = array( 'status' => false );


$authorization_info = $this->input->get_request_header('Authorization', True);

if (empty($authorization_info) || strstr($authorization_info, 'Bearer ') == false) {

        $output['error'] = -1;

        $output['message'] = 'no Authorization';

        $this->_json_output($output);

        return;

}


$firebase_user_token = trim(substr($authorization_info, strlen('Bearer ')));

$this->load->library('jwt_library');

$keys = @json_decode(@file_get_contents('https://www.googleapis.com/robot/v1/metadata/x509/securetoken@system.gserviceaccount.com'), true);

$firebase_user_id = $this->jwt_library->verify_firebase_token($verify_error, $firebase_user_token, 'YourFirebaseProjectId', $keys);

if (empty($firebase_user_id)) {

 $output['error'] = 1;

 $output['message'] = 'verify: '.$verify_error;

 $this->_json_output($output);

 return;

}
2017年10月26日 星期四
網域交易 - 使用 Sedo.com 交易與 Namecheap 網域轉移
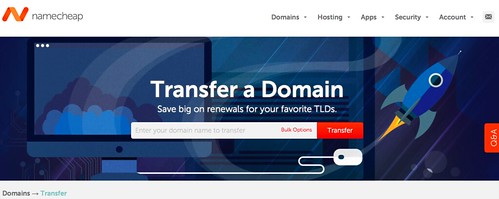
由於追求更佳的 SEO 效果,強者同事跟原網域擁有者進行議價,並且採用數家網路服務推論網域的價格、Google 關鍵字比較:
最後,老闆也接受提案跟給予此次任務的資源範圍,就開始這一連串的網域轉移過程,整個過程為:
- 查 whois 得知網域擁有者,與賣家通信議價
- 談定價錢後,賣家挑定 Sedo.com 進行交易
- 賣家把 Domain 的特定 Email 聯繫設定為 Sedo.com,如TRANSFERSERVICE@SEDO.COM
- Sedo.com 驗證賣家的確擁有網域,如 Email 聯繫、domain name server 設定等
- 買家電匯至 Sedo.com 指定帳戶
- 賣家解除 Domain 鎖定、Sedo.com 提供 Domain 轉移 Auth Code
- 買家進行網域移轉,過程會發信給 whois record 填寫的 Admin Email進行最後認證
- 由於 Sedo.com 為此 Domain Admin Email 收信者,可自動完成驗證
- 買家完成網域轉移,可以掌握該網域
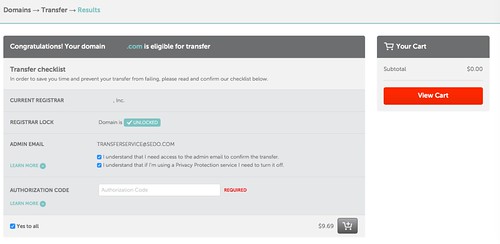
付款完,可以在 Namecheap Dashboard 上看到 domain 的狀態,依序為:
- Domain is with another registrar. / Transfer will begin shortly.
- Domain is with another registrar. / Verifying domain contacts.
- Domain is with another registrar. / Awaiting release from previous registrar.
關鍵原理:
- 網域移轉時,轉出方須設定 domain unlock 、提供 Auth Code 給對方,接收方需要正確輸入 Auth Code 才能進行,而接收的網域服務管理者,也會發信給原網域的 Admin Email 告知此事,對方可以有七天的時間思考,七天沒回應就默認接受,若有異議當下就可以取消
- 流程是 Sedo.com 先幫忙確認該網域可以被轉移,透過檢查 domain lock/unlock 狀態、指定對方要更新 Amdin Email 聯絡人等等的機制
- 整筆交易 Sedo.com 收取 3% 服務費(此次並未在 Sedo.com 平台議價),金額超過一萬鎂時,無法使用 Paypal ,只能用電匯;若單純在 Sedo.com 進行採購標案,Sedo.com 本身會先檢驗買家的財務能力,包含要給予戶頭資訊,像辦理信用卡一樣
- 使用 Namecheap 接收時,會收一筆 ICANN fee $0.18 費用 + Domain transfer 費用(滿像原網域續約一年的費用),最後接收後,網域有效時間應當會多增加一年
2017年10月18日 星期三
Firebase 開發筆記 - FCM 與 Web app debug
之前已經小試身手了,在此把 Web app notification debug 訊息紀錄一下。
1. 關於發 push 要用的 Serverkey 擺在 Firebase -> Project -> Settings -> Project settings -> CLOUD MESSAGING -> Project credentials 的 Server key
2. 初始化 index.html ,請至 Firebase -> Project -> Overview -> Add Firebase to your web app,把他埋在 <head></head> 即可
3. 使用 const messaging = firebase.messaging(); 來操作,如要求收訊權限,取得後則進行要 FCM token:
4. 開發上請使用 Chrome browser ,想要重置 FCM token 可以在 chrome://settings/content/notifications 將指定網域清除
5. 碰到要不到 FCM token 錯誤訊息
解法一:在根目錄建置一個空的檔案,檔名為 firebase-messaging-sw.js (最方便的解法)
解法二:刻一個 ServiceWorker 處理 (彈性的解法)
6. 建置收訊息的部分:
前景:
背景(/firebase-messaging-sw.js 或是自訂的 ServiceWorker):
7. 背景工作補充 /firebase-messaging-sw.js (或是自訂的 ServiceWorker)
當 /firebase-messaging-sw.js (或是自訂的 ServiceWorker) 是空白時,這時 web app (chrome browser) 都到訊息時,只會提醒有訊息在背景更新,且前景都不會觸發 messaging.onMessage 的事件。
8. 若發現異常,例如 Web 前景有 token 又收不到訊息時,請留意背景工作是否有實作,建議把 chrome browser 重開,仍不行時,甚至在 chrome://settings/content/notifications 清除重新來過
9.善用 curl command 測試:
10. 若 user 移除接收,送訊息時會收到回饋:
11. FCM 跟用戶有沒有登入(Google帳號)無關
1. 關於發 push 要用的 Serverkey 擺在 Firebase -> Project -> Settings -> Project settings -> CLOUD MESSAGING -> Project credentials 的 Server key
2. 初始化 index.html ,請至 Firebase -> Project -> Overview -> Add Firebase to your web app,把他埋在 <head></head> 即可
<script src="https://www.gstatic.com/firebasejs/4.5.2/firebase.js"></script>

<script>

  // Initialize Firebase

  var config = {

    apiKey: "YourAPIKey",

    authDomain: "your-app.firebaseapp.com",

    databaseURL: "https://your-app.firebaseio.com",

    projectId: "your-app",

    storageBucket: "your-app.appspot.com",

    messagingSenderId: "your-app-id"

  };

  firebase.initializeApp(config);

</script>
3. 使用 const messaging = firebase.messaging(); 來操作,如要求收訊權限,取得後則進行要 FCM token:
 <script>

  const messaging = firebase.messaging();

  messaging.requestPermission()

   .then(function() {

    console.log('Notification permission granted.');

    try_to_get_token();

   })

   .catch(function(err) {

    console.log('Unable to get permission to notify.', err);

   });

  function try_to_get_token() {

   messaging.getToken()

    .then(function(currentToken) {

     if (currentToken) {

      console.log("currentToken:", currentToken);

     } else {

      console.log('No Instance ID token available. Request permission to generate one.');

     }

    })

    .catch(function(err) {

     console.log('An error occurred while retrieving token. ', err);

    });

  }

 </script>
4. 開發上請使用 Chrome browser ,想要重置 FCM token 可以在 chrome://settings/content/notifications 將指定網域清除
5. 碰到要不到 FCM token 錯誤訊息
browserErrorMessage: "Failed to register a ServiceWorker: A bad HTTP response code (404) was received when fetching the script."

code: "messaging/failed-serviceworker-registration"

message: "Messaging: We are unable to register the default service worker. Failed to register a ServiceWorker: A bad HTTP response code (404) was received when fetching the script. (messaging/failed-serviceworker-registration)."
解法一:在根目錄建置一個空的檔案,檔名為 firebase-messaging-sw.js (最方便的解法)
$ touch /path/www/document_root/firebase-messaging-sw.js
解法二:刻一個 ServiceWorker 處理 (彈性的解法)
$ touch sw.js (與 index.html 同層即可)

$ vim index.html

 <script>

  const messaging = firebase.messaging();


  if ('serviceWorker' in navigator) {

   navigator.serviceWorker.register('sw.js').then(function(registration) {

    console.log('ServiceWorker registration successful with scope: ', registration.scope);

    messaging.useServiceWorker(registration);

    //try_to_get_token();

    messaging.requestPermission()

     .then(function() {

      console.log('Notification permission granted.');

      try_to_get_token();

     })

     .catch(function(err) {

      console.log('Unable to get permission to notify.', err);

     });


   }).catch(function(err) {

    //registration failed :(

    console.log('ServiceWorker registration failed: ', err);

   });

  }

 </script>
6. 建置收訊息的部分:
前景:
 <script>

  const messaging = firebase.messaging();

  messaging.onTokenRefresh(function() {

   console.log("onTokenRefresh");

   try_to_get_token();

  });


  messaging.onMessage(function(payload) {

   console.log("Message received. ", payload);

  });


  if ('serviceWorker' in navigator) {

   console.log("test 'serviceWorker' in navigator");

   navigator.serviceWorker.register('sw.js').then(function(registration) {

    console.log('ServiceWorker registration successful with scope: ', registration.scope);

    messaging.useServiceWorker(registration);

    //try_to_get_token();

    messaging.requestPermission()

     .then(function() {

      console.log('Notification permission granted.');

      try_to_get_token();

     })

     .catch(function(err) {

      console.log('Unable to get permission to notify.', err);

     });


   }).catch(function(err) {

    //registration failed :(

    console.log('ServiceWorker registration failed: ', err);

   });

  }


  function try_to_get_token() {

   messaging.getToken()

    .then(function(currentToken) {

     if (currentToken) {

      console.log("currentToken:", currentToken);

     } else {

      console.log('No Instance ID token available. Request permission to generate one.');

     }

    })

    .catch(function(err) {

     console.log('An error occurred while retrieving token. ', err);

    });

  }

 </script>
背景(/firebase-messaging-sw.js 或是自訂的 ServiceWorker):
$ vim sw.js

// Import and configure the Firebase SDK

// These scripts are made available when the app is served or deployed on Firebase Hosting

// If you do not serve/host your project using Firebase Hosting see https://firebase.google.com/docs/web/setup

importScripts('https://www.gstatic.com/firebasejs/4.5.2/firebase-app.js');

importScripts('https://www.gstatic.com/firebasejs/4.5.2/firebase-messaging.js');

importScripts('https://www.gstatic.com/firebasejs/4.5.2/firebase.js');


  // Initialize Firebase

  var config = {

    apiKey: "YourAppApiKey",

    authDomain: "your-app.firebaseapp.com",

    databaseURL: "https://your-app.firebaseio.com",

    projectId: "your-app",

    storageBucket: "your-app.appspot.com",

    messagingSenderId: "your-app-id"

  };

  firebase.initializeApp(config);


const messaging = firebase.messaging();


// If you would like to customize notifications that are received in the

// background (Web app is closed or not in browser focus) then you should

// implement this optional method.

// [START background_handler]

messaging.setBackgroundMessageHandler(function(payload) {

  console.log('[firebase-messaging-sw.js] Received background message ', payload);

  // Customize notification here

  const notificationTitle = 'Background Message Title';

  const notificationOptions = {

    body: 'Background Message body.',

    icon: '/firebase-logo.png'

  };


  return self.registration.showNotification(notificationTitle,

      notificationOptions);

});

// [END background_handler]
7. 背景工作補充 /firebase-messaging-sw.js (或是自訂的 ServiceWorker)
當 /firebase-messaging-sw.js (或是自訂的 ServiceWorker) 是空白時,這時 web app (chrome browser) 都到訊息時,只會提醒有訊息在背景更新,且前景都不會觸發 messaging.onMessage 的事件。
8. 若發現異常,例如 Web 前景有 token 又收不到訊息時,請留意背景工作是否有實作,建議把 chrome browser 重開,仍不行時,甚至在 chrome://settings/content/notifications 清除重新來過
9.善用 curl command 測試:
curl -X POST -H "Authorization: key=YourAppServerKey" -H "Content-Type: application/json" -d '{

  "notification": {

    "title": "Hello",

    "body": "World",

    "icon": "firebase-logo.png",

    "click_action": "http://localhost:8081"

  },

  "to": "FCM token"

}' "https://fcm.googleapis.com/fcm/send"
10. 若 user 移除接收,送訊息時會收到回饋:
{"multicast_id":####,"success":0,"failure":1,"canonical_ids":0,"results":[{"error":"NotRegistered"}]}
11. FCM 跟用戶有沒有登入(Google帳號)無關
2017年10月17日 星期二
Firebase 開發筆記 - Firebase Cloud Messaging (FCM) 初體驗、 Topic 管理與 Web notification
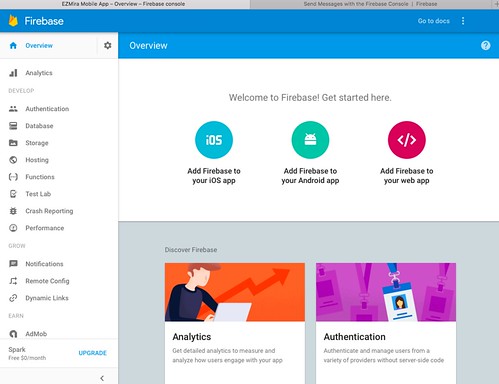
最近強者同事推薦使用 FCM ,看了一下,對於計費方式有點抖,若一切免費的話,真的超佛心 :P 由於支援潮流的訊息訂閱架構,基本上幾乎可以不用自行紀錄 notification token 了,用起來很直觀又方便。例如,想要個別通知時,可以每一個 user 給予一個 topic id (如 user id) ,就能夠不用紀錄 raw notification token 單獨發訊給對方!有一點點像用運算取代空間感。
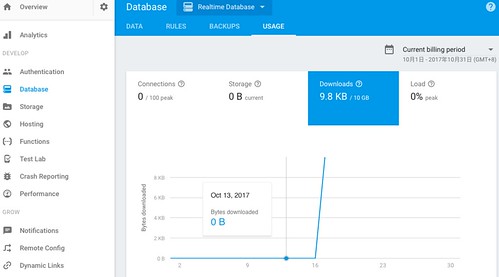
聊聊趣味的地方,關於 Topic 管理機制,當你有 FCM token 後,可以在 server site 幫 device 訂閱 topic 喔!這功能很便利,就像...你紀錄了一堆 GCM token / APNs token 後,自己過濾對象,再進行發送。然而,topic 概念在於"使用情境"知道後,直接刻在 app 端,只是突然新增使用情境時,就得變成新版 app user 可以接受,舊版則無法接受到訊息,這時 server site 若有記錄 FCM token 時,就可以代勞幫忙訂閱:
https://developers.google.com/instance-id/reference/server#manage_relationship_maps_for_multiple_app_instances
https://iid.googleapis.com/iid/v1:batchAdd

Content-Type:application/json

Authorization:key=API_KEY

{

   "to": "/topics/movies",

   "registration_tokens": ["nKctODamlM4:CKrh_PC8kIb7O...", "1uoasi24:9jsjwuw...", "798aywu:cba420..."],

}
同理,也可以取消訂閱:https://iid.googleapis.com/iid/v1:batchRemove
若 server site 是 node.js 的,可以直接用 SDK :https://firebase.google.com/docs/cloud-messaging/admin/manage-topic-subscriptions
最後,筆記一下 Web app 的部分:假設網站服務位置為 https://example.com/fcm/ ,預設都要在根目錄埋上 firebase-messaging-sw.js 檔案,可以空白。
$ touch /var/www/firebase-messaging-sw.js

$ vim /var/www/fcm/index.html

<html>

 <head>

  <script src="https://www.gstatic.com/firebasejs/4.5.2/firebase.js"></script>

  <script>

   // Initialize Firebase

   var config = {

    apiKey: "your-app-apikey",

    authDomain: "your-app.firebaseapp.com",

    databaseURL: "https://your-app.firebaseio.com",

    projectId: "your-app",

    storageBucket: "your-app.appspot.com",

    messagingSenderId: "your-app-id"

   };

   firebase.initializeApp(config);

  </script>

 </head>

<body>

 <script>

  const messaging = firebase.messaging();


  messaging.onTokenRefresh(function() {

   messaging.getToken()

    .then(function(refreshedToken) {

     console.log('Token refreshed.', refreshedToken);

    })

    .catch(function(err) {

     console.log('Unable to retrieve refreshed token ', err);

    });

  });


  messaging.onMessage(function(payload) {

   console.log("Message received. ", payload);

  });


  messaging.requestPermission()

   .then(function() {

    console.log('Notification permission granted.');

    resetUI();

   })

   .catch(function(err) {

    console.log('Unable to get permission to notify.', err);

   });


  function resetUI() {

   console.log('resetUI');

   messaging.getToken()

    .then(function(currentToken) {

     if (currentToken) {

      console.log("currentToken:", currentToken);

     } else {

      console.log('No Instance ID token available. Request permission to generate one.');

     }

    })

    .catch(function(err) {

     console.log('An error occurred while retrieving token. ', err);

    });

  }

 </script>

</body>

</html>
如此一來,用 chrome browser 瀏覽 https://example.com/fcm/ 會彈跳視窗詢問是否接收訊息,點擊接受後,在 dev tools 的 console 可以看到:
Notification permission granted.
resetUI
currentToken: thisClientFCMToken
如此一來,就可以對他發訊、設定此 client 去訂閱 topic 了:
$ curl -X POST -H "Authorization: key=YourFCMAppServerKey" -H "Content-Type: application/json" -d '{

  "notification": {

    "title": "Hello",

    "body": "World",

    "icon": "firebase-logo.png",

    "click_action": "http://localhost:8081"

  },

  "to": "thisClientFCMToken"

}' "https://fcm.googleapis.com/fcm/send"


$ curl -X POST -H "Authorization: key= YourFCMAppServerKey" -H "Content-Type: application/json" -d '{

  "registration_tokens":["thisClientFCMToken"],

  "to": "/topics/foo-bar"

}' "https://iid.googleapis.com/iid/v1:batchAdd"


$ curl -X POST -H "Authorization: key= YourFCMAppServerKey" -H "Content-Type: application/json" -d '{

  "notification": {

    "title": "Hello",

    "body": "World",

    "icon": "firebase-logo.png",

    "click_action": "http://localhost:8081"

  },

  "to": "/topics/foo-bar"

}' "https://fcm.googleapis.com/fcm/send"
訂閱:
文章 (Atom)