2012年9月20日 星期四

Android 開發筆記 - 使用 HTTP Post 上傳檔案並支援 Cookie 資訊

file_upload


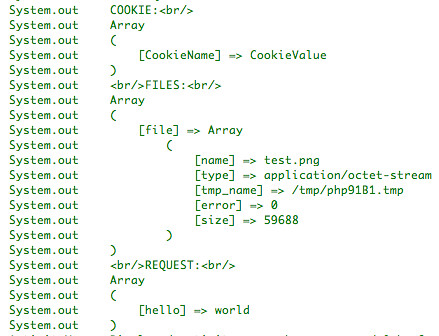
之前已寫過一篇 Android 開發筆記 - HTTP、HTTPS、GET、POST、Cookie 筆記,最近則需要用 POST 上傳檔案,就順手在記一下。首先需從 http://hc.apache.org/downloads.cgi 下載 HttpClient (4.2.1) 後,從裡頭取出 httpmime-4.2.1.jar 檔拖到 Package Explorer > Your Project > libs 後,在按右鍵 Build Path > Add to Build Path...,如此一來在 Android 裡就能使用 MultipartEntity 進行上傳檔案的行為。若不使用的話,大概就自行實作鄉對應的格式也行。


PHP CGI:


<?php
echo "\nCOOKIE:<br/>\n";
print_r( $_COOKIE );


echo "\n<br/>FILES:<br/>\n";
print_r( $_FILES );


echo "\n<br/>REQUEST:<br/>\n";
print_r( $_REQUEST );


Android/Java:


public static void upload_testing() {
       // config
       String server = "127.0.0.1";
       String cgi = "http://"+server+"/upload.php";
       String file_path = "/mnt/sdcard/test.png";


       // http request parameters
       List<NameValuePair> params = new ArrayList<NameValuePair>();
       params.add( new BasicNameValuePair("hello", "world") ); // $_REQUEST['hello'] = 'world'


       MultipartEntity entity=new MultipartEntity(HttpMultipartMode.BROWSER_COMPATIBLE);


       // build post parameters
       for( NameValuePair item : params )
              try {
                     entity.addPart(item.getName(),new StringBody(item.getValue(), Charset.forName("UTF-8")));
              } catch (UnsupportedEncodingException e) {
                     e.printStackTrace();
              }


       // add file data
       File src = new File(file_path);
       if( src.exists() )
              entity.addPart( "file", new FileBody( src ) ); // $_FILES['file']['name'] = 'test.png'


       // use cookie
       CookieStore cookies = new BasicCookieStore();
       Cookie mCookie = new BasicClientCookie("CookieName", "CookieValue"); // $_COOKIE['CookieName']
       ((BasicClientCookie)mCookie).setPath("/");
       ((BasicClientCookie)mCookie).setDomain(server);
       cookies.addCookie(mCookie);


       // build post query
       HttpPost post = new HttpPost(cgi);
       post.setEntity(entity);


       // do query with cookie
       HttpClient client = new DefaultHttpClient();
       HttpContext mHttpContext = new BasicHttpContext();
       mHttpContext.setAttribute(ClientContext.COOKIE_STORE, cookies);


       try {
              HttpResponse response = client.execute( post, mHttpContext );
              HttpEntity result = response.getEntity();
              System.out.println( EntityUtils.toString(result) );
       } catch (Exception e) {
              e.printStackTrace();
       }
}


成果:


2012年9月19日 星期三

[PHP] 使用 Yahoo! Content Analysis API (斷章取義)


Yahoo! Content Analysis API


簡易筆記:


<?php
$url = 'http://query.yahooapis.com/v1/public/yql';
$q = array();
$q['q']= 'select * from contentanalysis.analyze where text="你好嗎 台灣 生活樂趣";';


$ch = curl_init();
curl_setopt( $ch, CURLOPT_URL, $url );
curl_setopt( $ch, CURLOPT_RETURNTRANSFER, true );
curl_setopt( $ch, CURLOPT_POST, true );
curl_setopt( $ch, CURLOPT_POSTFIELDS, http_build_query( $q ) );
echo curl_exec( $ch );
curl_close( $ch );


Android 開發筆記 - 取得 Mac Address 和 IP Address

網路服務常需要拿 IP 或 MAC Address 來做存取管控。筆記一下。


權限:


<uses-permissionandroid:name="android.permission.ACCESS_WIFI_STATE"/>


程式碼:


public static String getMacAddress(Context context) {
       WifiManager wifiMan = (WifiManager) context.getSystemService(Context.WIFI_SERVICE);
       WifiInfo wifiInf = wifiMan.getConnectionInfo();
       return wifiInf.getMacAddress();
}


public static String getIPAddress(Context context) {
       WifiManager wifiMan = (WifiManager) context.getSystemService(Context.WIFI_SERVICE);
       WifiInfo wifiInf = wifiMan.getConnectionInfo();
       long ip = wifiInf.getIpAddress();
       if( ip != 0 )
              return String.format( "%d.%d.%d.%d",
                     (ip & 0xff),
                     (ip >> 8 & 0xff),
                     (ip >> 16 & 0xff),
                     (ip >> 24 & 0xff));
       try {
              for (Enumeration<NetworkInterface> en = NetworkInterface.getNetworkInterfaces(); en.hasMoreElements();) {
                     NetworkInterface intf = en.nextElement();
                     for (Enumeration<InetAddress> enumIpAddr = intf.getInetAddresses(); enumIpAddr.hasMoreElements();) {
                            InetAddress inetAddress = enumIpAddr.nextElement();
                            if (!inetAddress.isLoopbackAddress()) {
                                   return inetAddress.getHostAddress().toString();
                            }
                     }
              }
       } catch (Exception e) {
        }
       return "0.0.0.0";
}


2012年9月18日 星期二

[Linux] 讓 GitWeb 的 Owner 顯示支援 Gitolite 的 Creator @ Ubuntu 12.04

最近裝了 3 次 Git + Gitweb + Gitolite ,最後就順手稍微修改 Gitweb 。由於 Gitolite 可以 remote create repos ,因此想要讓 Gitweb 顯示誰建立了 repo 。而 Gitolite 會在 repo 中建立一個 gl-creator 檔案記錄誰建立的,所以只需修改 Gitweb 顯示 owner 的片段程式即可。


目前用的 gitweb 版本:


$ sudo dpkg -l | grep gitweb
ii gitweb 1:1.7.9.5-1 fast, scalable, distributed revision control system (web interface)


修改片段:


$ sudo vim /usr/share/gitweb/index.cgi
sub git_get_project_owner {
       my $project = shift;
       my $owner;


       return undef unless $project;
       $git_dir = "$projectroot/$project";


       if (!defined $gitweb_project_owner) {
              git_get_project_list_from_file();
       }


       if (exists $gitweb_project_owner->{$project}) {
              $owner = $gitweb_project_owner->{$project};
       }
       if (!defined $owner){
              $owner = git_get_project_config('owner');
       }
       if (!defined $owner) {
              if( open(GLCreator, "$git_dir/gl-creator" ) ) {
                     $owner = '';
                     while(<GLCreator>) {
                            $owner .= $_;
                     }
                     close(GLCreator);
              }
       }
       if (!defined $owner) {
              $owner = get_file_owner("$git_dir");
       }


       return $owner;
}


2012年9月17日 星期一

Android 開發筆記 - 匯入圖片至模擬器中

gallery_apps


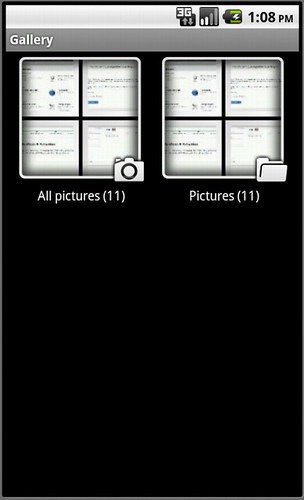
雖然 Android 開發是用實機才是王道,但有時就是想偷懶看模擬器跑的如何,這時就仍需要模擬器的環境。如果要處理照片、影片的應用時,就需要匯入一些圖片影片來測試。一開始若直接用 adb shell 或 DDMS push 資料至模擬器時,會顯示 failed to copy: Read-only file system:


$ adb push test.png /sdcard/
failed to copy 'test.png' to '/sdcard//test.png': Read-only file system


這時因為 / 目錄為 Read-Only file system,需要稍微處理一下:


$ adb shell mount -o remount rw /sdcard


接著就可以 DDMS 或 adb shell 匯入資料:


$ adb push images/ /sdcard/
push: images/1.png -> /mnt/sdcard/1.png
push: images/2.png -> /mnt/sdcard/2.png
push: images/3.png -> /mnt/sdcard/3.png
push: images/4.png -> /mnt/sdcard/4.png
push: images/5.png -> /mnt/sdcard/5.png


然而,匯入後仍無法被系統偵測,無論是寫程式還是開 Gallery app 也都一樣,但只需跑一下模擬器內建軟體 Dev Tools > Media Scanner 後,即可解決。


簡易的取出系統內所有 image 方式:


Cursor imgcursor = managedQuery(
       MediaStore.Images.Media.EXTERNAL_CONTENT_URI,
       { MediaStore.Images.Media.DATA, MediaStore.Images.Media._ID }, // columns
       null,
       null,
       MediaStore.Images.Media._ID // order by
);
if( imgcursor != null ) {
       int count = imgcursor.getCount();
       int media_data_index = imgcursor.getColumnIndex(MediaStore.Images.Media.DATA);
       int media_id_index = imgcursor.getColumnIndex(MediaStore.Images.Media._ID);
       for( int i=0 ; i<count ; ++i ) {
              imgcursor.moveToPosition(i);
              String path = imgcursor.getString(media_data_index);
              Bitmap thumbnail = MediaStore.Images.Thumbnails.getThumbnail( getApplicationContext().getContentResolver(), media_id_index, MediaStore.Images.Thumbnails.MICRO_KIND, null);
              System.out.println("path :"+path);
       }
}


用 Intent  開啟單張圖片:


Intent intent = new Intent();
intent.setType("image/*");
intent.setAction(Intent.ACTION_GET_CONTENT);
startActivityForResult(Intent.createChooser(intent,"Pictures"), 1);


依檔案型態開啟對應程式:


Intent intent = new Intent();
intent.setAction(Intent.ACTION_VIEW);
intent.setDataAndType(Uri.parse("file://" + path), "image/*");
startActivity(intent);