2013年5月14日 星期二

[Raspberry Pi] 安裝 Raspbian “wheezy” @ Mac 10.8.3

Raspberry Pi


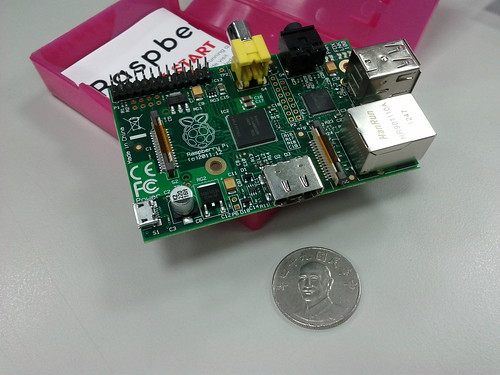
這東西其實跟我半年來的工作有很高度的相關,但過了那麼久才團購買了一個裸板,團購價不用 1100 台幣 :D


不多說,簡介一下快速裝法:


  1. 從官網下載官方 OS - Raspbian “wheezy”

  2. 解壓縮 img 出來,並輸出到 SDCard

  3. 開機,初次設定

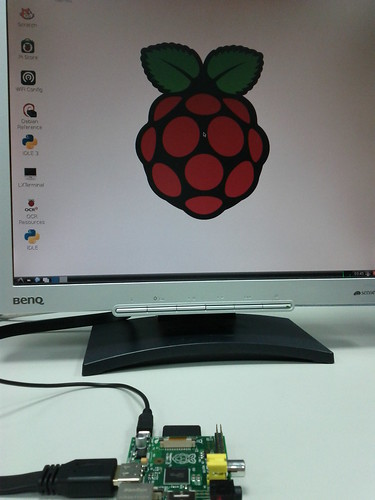
  4. 重開機,享受 Window 介面


Raspberry Pi


此例在 Mac 10.8.3 操作與一張 8GB SDCard,可以留意最後的分割大小:


$ sudo diskutil list

/dev/disk1
  #: TYPE NAME SIZE IDENTIFIER
  0: FDisk_partition_scheme *7.7 GB disk1
  1: DOS_FAT_32 8GB 7.7 GB disk1s1


$ sudo diskutil unmountDisk /dev/disk1


$ sudo diskutil unmountDisk /dev/disk1s1
Unmount of all volumes on disk1 was successful


$ unzip ~/Downloads/2013-02-09-wheezy-raspbian.zip


$ ls -lh 2013-02-09-wheezy-raspbian.img
-rw-r--r--@ 1 changyy staff 1.8G 2 9 11:44 2013-02-09-wheezy-raspbian.img


$ sudo time dd bs=1m if=2013-02-09-wheezy-raspbian.img of=/dev/rdisk1
1850+0 records in
1850+0 records out
1939865600 bytes transferred in 381.258572 secs (5088058 bytes/sec)
381.28 real 0.00 user 1.14 sys


$ sync


$ sudo diskutil list

/dev/disk1
#: TYPE NAME SIZE IDENTIFIER
  0: FDisk_partition_scheme *7.7 GB disk1
  1: Windows_FAT_32 58.7 MB disk1s1
  2: Linux 1.9 GB disk1s2
$ sudo diskutil unmountDisk /dev/disk1


初始化後的分配狀況:


$ sudo diskutil list

/dev/disk1
#: TYPE NAME SIZE IDENTIFIER
  0: FDisk_partition_scheme *7.7 GB disk1
  1: Windows_FAT_32 58.7 MB disk1s1
  2: Linux 1.9 GB disk1s2


初玩 Raspberry Pi - 安裝 Raspbian “wheezy” @ Mac 10.8.3

Raspberry Pi


這東西其實跟我半年來的工作有很高度的相關,但過了那麼久才團購買了一個裸板,團購價不用 1100 台幣 :D


不多說,簡介一下快速裝法:


  1. 從官網下載官方 OS - Raspbian “wheezy”

  2. 解壓縮 img 出來,並輸出到 SDCard

  3. 開機,初次設定

  4. 重開機,享受 Window 介面


Raspberry Pi


此例在 Mac 10.8.3 操作與一張 8GB SDCard,可以留意最後的分割大小:


$ sudo diskutil list

/dev/disk1
  #: TYPE NAME SIZE IDENTIFIER
  0: FDisk_partition_scheme *7.7 GB disk1
  1: DOS_FAT_32 8GB 7.7 GB disk1s1


$ sudo diskutil unmountDisk /dev/disk1


$ sudo diskutil unmountDisk /dev/disk1s1
Unmount of all volumes on disk1 was successful


$ unzip ~/Downloads/2013-02-09-wheezy-raspbian.zip


$ ls -lh 2013-02-09-wheezy-raspbian.img
-rw-r--r--@ 1 changyy staff 1.8G 2 9 11:44 2013-02-09-wheezy-raspbian.img


$ sudo time dd bs=1m if=2013-02-09-wheezy-raspbian.img of=/dev/rdisk1
1850+0 records in
1850+0 records out
1939865600 bytes transferred in 381.258572 secs (5088058 bytes/sec)
381.28 real 0.00 user 1.14 sys


$ sync


$ sudo diskutil list

/dev/disk1
#: TYPE NAME SIZE IDENTIFIER
  0: FDisk_partition_scheme *7.7 GB disk1
  1: Windows_FAT_32 58.7 MB disk1s1
  2: Linux 1.9 GB disk1s2
$ sudo diskutil unmountDisk /dev/disk1


初始化後的分配狀況:


$ sudo diskutil list

/dev/disk1
#: TYPE NAME SIZE IDENTIFIER
  0: FDisk_partition_scheme *7.7 GB disk1
  1: Windows_FAT_32 58.7 MB disk1s1
  2: Linux 1.9 GB disk1s2


2013年5月4日 星期六

其實什麼都沒有


投入在新案子的時間已有四個月了,卻還滿常有空蕩蕩的回音,好像做了不少事,但回想起來又什麼都沒有。比較深刻的體驗倒是人事管理,在嘗試的過程中,才更明瞭彼此角色定位。角色啊,真的是非常關鍵的,且是最原始的起點,無論後來怎樣走都仍要記著這點,更讓我想起來去年長輩一直在慫恿我去創業的理由 XD 畢竟,人與人的互動,總會有看不慣的走法跟方向,那是一種目的地一致,但走法不一樣,真的沒有對錯,只有順不順眼的觀點而已。


最近發現周邊朋友,累積三五年經驗後,漸漸有強勢的觀點、試著說服別人的氣勢,如何在互動過程中不動肝火,真的越來越需要智慧了 cc 不然就真的只能選擇離開環境,尋找走向相似的朋友。(只是選擇離開環境,不代表問題解決,有一定的機會,未來又再次相逢)


2013年5月3日 星期五

[Linux] Dropbear with PAM & nonexistent user problem

最近把玩 Dropbear 當 SSH Server 方案,碰到想要用 PAM 的情境,試玩結果尚可,但是會碰到白名單的問題。


簡單的說,原先 PAM 就只處理帳號認證而已,應用服務常常會需要有白名單才能進行,例如 Mail Server 收信要白名單,非白名單的信件會丟掉,而在 Dropbear SSHD 方案上,則需要白名單來決定使用者登入後的 HOME、SHELL、UID、GID 等資訊,所以就手養改一下 dropbear ,讓它跑在 server mode 下,可以用一個參數來處理 nonexistent user,如 -c "root" 為例,代表使用 PAM 登入過程中,若該帳號不存在,則改用 root 權限代替。


完整的 patch 擺在 dropbear-2013.58-pam-nonexistent-user-handle.patch ,也順手丟去 maillist 問看看作者意思,除了變數名稱亂取外,程式邏輯應該算還ok吧? :P 看看會不會收到回音囉。


2013年4月28日 星期日

[Linux] 計算程式運行的最低需求(Code size & Shared libraries) @ Ubuntu 12.04

這幾個月處理一些跑在 Embedded System 的小工具、小服務,每次 porting 後,總要計算一下程式的大小,這時計算的原理就是用 ldd、objdump 或 readelf 看一下呼叫了哪些 shared library,把他們加一加就差不多了。然而,需要留意的則是 shared library 還會在 link 其他 shared library,所以用到的 shared library 也要一併挑出來查看一下才行。


不知不覺就寫了 script 來處理,原理就是建 hash 來判斷 shared library 判斷過了沒。


$ git clone https://github.com/changyy/resource-calculator.git
$ ./resource-calculator/resource-calculator.sh
Usage> ./resource-calculator.sh -v -r path_bin_readelf -s path_bin_strip -o output_dir -l path_for_library_finding  [ BIN_FILE | BIN_DIR | LIB_FILE | LIB_DIR ] ...


其中 -r 是吃 readelf 工具位置,可以用 -r `which armv6-linux-gnueabi-readelf`;-s 是指定 strip 位置,也就是產出時順便 strip 一下;-o 則是輸出到指定輸出目錄;-l 是指定讀取 shared library 位置,如 cross compiler 的 library 位置、platform sysroot/lib 位置和第三方 shared library 位置等;最後的參數則是要驗證的 tool 或 library ,若接目錄則是進去撈 bin 或 so 出來。


實例 (已在 PATH 環境變數中加入 cross compiler 的搜尋位置):


$ ./resource-calculator/resource-calculator.sh -o /tmp/output -r `which armv6-linux-gnueabi-readelf` -s `which armv6-linux-gnueabi-strip` -l /path/armv6-linux-gnueabi/compiler/lib -l /path/armv6-linux-gnueabi/platform/sysroot/lib -l /path/armv6-linux-gnueabi/3rd-party/lib /path/imagemagick-convert

[INFO] READELF: /path/armv6-linux-gnueabi-readelf
[INFO] STRIP: /path/armv6-linux-gnueabi-strip
[INFO] OTHER LIB: /path/armv6-linux-gnueabi/compiler/lib /path/armv6-linux-gnueabi/platform/sysroot/lib /path/armv6-linux-gnueabi/3rd-party/lib
[INFO] TARGET: /path/imagemagick-convert
[INFO] OUTPUT: /tmp/output/lib /tmp/output/bin /tmp/output/slib
-------------
..............*...............*
All:
       libdl.so.2 libm.so.6 librt.so.1 libpthread.so.0 libMagickWand-6.Q8.so.1 libgcc_s.so.1 libjpeg.so.62 libpng10.so.0 libtiff.so.5 libz.so.1 libMagickCore-6.Q8.so.1 libc.so.6 ld-linux.so.3 libxml2.so.2 libgomp.so.1

$ du -h /tmp/output/
6.7M    /tmp/output/lib
1.9M    /tmp/output/slib
12K     /tmp/output/bin
8.5M   /tmp/output/

$ ls -R /tmp/output/
/tmp/output/:
bin  lib  slib

/tmp/output/bin:
convert

/tmp/output/lib:
libdl.so.2     libMagickCore-6.Q8.so.1  libtiff.so.5
libgomp.so.1   libMagickWand-6.Q8.so.1  libxml2.so.2
libjpeg.so.62  libpng10.so.0            libz.so.1

/tmp/output/slib:
ld-linux.so.3  libc.so.6  libgcc_s.so.1  libm.so.6  libpthread.so.0  librt.so.1


故程式運行時所需的 size 是 8.5MB ,但其中有 sysroot libraries 為 1.9MB ,所以移植到板子上的程式碼大小 = 8.5MB - 1.9MB。