參考資料:
- Obtaining a Maps API Key - Google Projects for Android
- Sign Up for the Android Maps API - Android Maps API - Google Code
- Hello, MapView | Android Developers
- Google APIs Reference - com.google.android.maps
- setBuiltInZoomControls method for MapView causes application to crash
想要在 Android 上頭使用 Google Maps 的功能,有幾道流程:
- 申請 Android Maps API Key
- 建立使用 Google APIs 的模擬器
- 建立使用 Google Maps API 的 projects (在此 Build Target 使用 Google APIs/Google Inc./2.2/8 )
- 設定 Android Application 環境,使用 INTERNET permissions 及相關使用的 lib
- 設定 MapView 的 layout
- 設定程式碼
首先關於取得 Google Maps API Key,此部份跟一般申請上的不一樣,需使用 Android 的申請 Sign Up for the Android Maps API - Android Maps API - Google Code,此時會需要一組認證指紋(MD5),而這組序號用在開發程式的階段(debug mode),而當你要將程式上架時,必須在用另一組(release mode),細節請參考 Getting the MD5 Fingerprint of the SDK Debug Certificate,在此就依 debug mode 申請一組:
$ keytool -list -keystore ~/.android/debug.keystore
...
Certificate fingerprint (MD5): 94:1E:43:49:87:73:BB:E6:A6:88:D7:20:F1:8E:B5:98
其中認證指紋(MD5)為 94:1E:43:49:87:73:BB:E6:A6:88:D7:20:F1:8E:B5:98 (此為範例,請輸入自己產生的),帶著這組就可以去申請 Android Maps API Key 囉,請輸入到 My certificate's MD5 fingerprint 欄位。送出後,頁面將顯示 "您的金鑰" 、 "金鑰適合所有使用以下指紋憑證所簽署的應用程式" 和 "此處提供您 xml 配置的範例",共三筆資。請保存好,這邊只會使用"您的金鑰"。
建立 Android API 模擬器,如果你已經有設定一台可運行 Google APIs 2.2 的話,那可以略過此步。
[Eclipse]->[Window]-> [Android SDK and AVD Manager]->[New]
Name: Map
Target: Google APIs(Google Inc.) - API Level 8
按下 Create AVD 及建立完成
建立一個專案
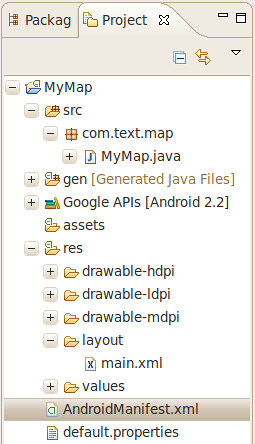
[Eclipse]->[File]->[New]->[Android Project]
Project name: MyMap
Build Target: Google APIs, Google Inc., 2.2, 8
Application name: MyMap
Package name: com.test.map
Create Activity: MyMap
Min SDK Version: 8
設定完就可以按 Finish 囉
緊接著設定 Application 的權限和相關 lib 部份,請在左邊點選 AndroidManifest.xml 檔案,此時右邊視窗則顯示該檔相關的設定,可以在底部找到 Manifest/Application/Permissions/Instrumentation/AndroidManifest.xml 等子頁面切換,在此切換 AndroidManifest.xml 分頁,直接編輯此 xml 檔案,在 <application> 裡頭增加 <uses-library android:name="com.google.android.maps" /> 資訊,在 <manifest> 裡增加 <uses-permission android:name="android.permission.INTERNET" />,分別代表要使用函式庫:(com.google.android.maps)和需要使用網路資源(android.permission.INTERNET)
<?xml version="1.0" encoding="utf-8"?>
<manifest xmlns:android="http://schemas.android.com/apk/res/android"
package="com.test.map"
android:versionCode="1"
android:versionName="1.0">
<application android:icon="@drawable/icon" android:label="@string/app_name">
<activity android:name=".MyMap"
android:label="@string/app_name">
<intent-filter>
<action android:name="android.intent.action.MAIN" />
<category android:name="android.intent.category.LAUNCHER" />
</intent-filter>
</activity>
<uses-library android:name="com.google.android.maps" />
</application>
<uses-sdk android:minSdkVersion="8" />
<uses-permission android:name="android.permission.INTERNET" />
</manifest>
設定完應用程式執行環境後,接著設定排版部份(layout),透過左邊視窗請點選 main.xml 檔案,直接用下面的資訊覆蓋掉:
<?xml version="1.0" encoding="utf-8"?>
<RelativeLayout xmlns:android="http://schemas.android.com/apk/res/android"
android:id="@+id/mainlayout"
android:orientation="vertical"
android:layout_width="fill_parent"
android:layout_height="fill_parent" >
<com.google.android.maps.MapView
android:id="@+id/mapview"
android:layout_width="fill_parent"
android:layout_height="fill_parent"
android:clickable="true"
android:apiKey="Your Maps API Key"
/>
</RelativeLayout>
其中 Your Maps API Key 請改填"您的金鑰",如此一來即完成排版的部份
最後,則是修改程式碼的部份,請點選 MyMap.java 檔案
- 增加 import com.google.android.maps.*;
- 將 public class MyMap extends Activity 修改為 public class MyMap extends MapActivity
- 實做必要函數 boolean isRouteDisplayed()
完整程式碼:
package com.test.map;
import android.app.Activity;
import android.os.Bundle;
import com.google.android.maps.*;
public class MyMap extends MapActivity {
/** Called when the activity is first created. */
@Override
public void onCreate(Bundle savedInstanceState) {
super.onCreate(savedInstanceState);
setContentView(R.layout.main);
}
@Override
protected boolean isRouteDisplayed() {
return false;
}
}
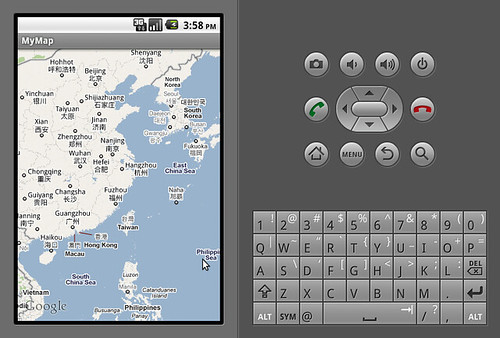
如此一來,則可以執行,並看到模擬器顯示 Google Maps 囉!
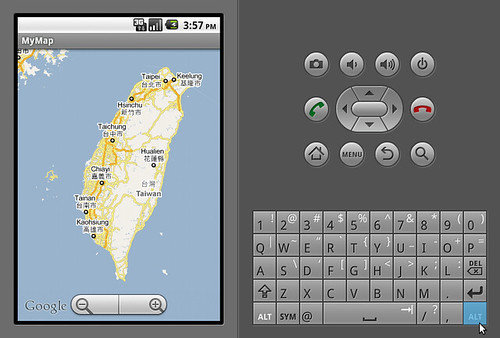
上述算是一個簡單的設定流程,但僅供了解流程而已,因為產生的程式除了呈現一個 Google Maps 外,沒有太多的互動,因此,如果想要增加一些使用者互動部份,如 Zoom In/Zoom Out,請在 onCreate 加上兩行程式碼:
MapView mapView = (MapView) findViewById(R.id.mapview);
mapView.setBuiltInZoomControls(true);
請記得加到 setContentView(R.layout.main); 後面,如果加在前面會導致程式 crash 喔,可以看看 setBuiltInZoomControls method for MapView causes application to crash 的敘述,避免 crash 也可以改成:
MapView mapView;
if( ( mapView = (MapView) findViewById(R.id.mapview) ) != null )
mapView.setBuiltInZoomControls(true);
但沒擺在 setContentView(R.layout.main); 後面,還是沒用的喔。
其他資料:


不好意思,我跟著你的教學做,但顯示不到MAP,只顯示出一格格,請問是什麼原因呢?
回覆刪除版主回覆:(08/30/2010 02:43:41 PM)
不好意思,我對 Android 沒那麼熟,我現在只想到會不會是 main.xml (layout xml 描述檔案) 裡頭的 android:apiKey (Google Maps API Key) 沒輸入好呢?
因為你的google map初始化沒有值
回覆刪除所以跑不出地圖內容
解決方法你可以初始設中心點就可以了
版主回覆:(03/13/2011 04:48:32 PM)
你是幫忙回樓上的嗎 :D 感謝啊~我有一陣子沒寫 Android 了 Orz
你的文章對我很有幫助,多謝分享!
回覆刪除