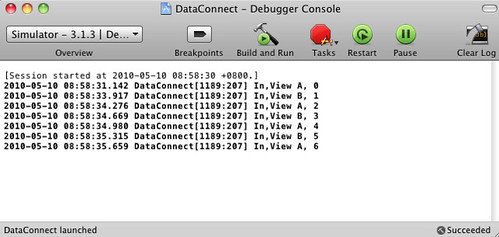
有時候呈現多個 View 時,用的資料會有相關性,此例以兩個 UITableViewController 為例,他們的 dataSource 是同一個來源,當透過底下的 TabBar 進行接換時,會自動增加 dataSource 的資料,接著呈現最新的清單列表,並且在 Console 上印出從哪個 View 新增的資料,以及目前 dataSource 的個數。此作法是共用記憶體資料,另一種作法是每次讀資料都從 databases 或 file 更新。
程式碼:
DataConnectAppDelegate.h
#import <UIKit/UIKit.h>
@interface DataConnectAppDelegate : NSObject <UIApplicationDelegate> {
UIWindow *window;
NSMutableArray *dataSource;
}
@property (nonatomic, retain) IBOutlet UIWindow *window;
@end
@interface DataConnectAppDelegate : NSObject <UIApplicationDelegate> {
UIWindow *window;
NSMutableArray *dataSource;
}
@property (nonatomic, retain) IBOutlet UIWindow *window;
@end
DataConnectAppDelegate.m
#import "DataConnectAppDelegate.h"
#import "MyTableViewController.h"
@implementation DataConnectAppDelegate
@synthesize window;
- (BOOL)application:(UIApplication *)application didFinishLaunchingWithOptions:(NSDictionary *)launchOptions {
// Override point for customization after application launch
dataSource = [[NSMutableArray alloc] init];
MyTableViewController *a = [[MyTableViewController alloc] init];
a.dataSource = dataSource;
a.title = @"View A";
MyTableViewController *b = [[MyTableViewController alloc] init];
b.dataSource = dataSource;
b.title = @"View B";
UITabBarController *tabBar = [[UITabBarController alloc] init];
tabBar.viewControllers = [NSArray arrayWithObjects:a, b, nil];
[window addSubview:tabBar.view];
[window makeKeyAndVisible];
return YES;
}
- (void)dealloc {
[dataSource release];
[window release];
[super dealloc];
}
@end
MyTableViewController.h
#import <UIKit/UIKit.h>
@interface MyTableViewController : UITableViewController {
NSMutableArray *dataSource;
}
@property (nonatomic ,assign) NSMutableArray *dataSource;
@end
@interface MyTableViewController : UITableViewController {
NSMutableArray *dataSource;
}
@property (nonatomic ,assign) NSMutableArray *dataSource;
@end
MyTableViewController.m
#import "MyTableViewController.h"
@implementation MyTableViewController
@synthesize dataSource;
#pragma mark -
#pragma mark Initialization
#pragma mark -
#pragma mark View lifecycle
- (void)viewWillAppear:(BOOL)animated {
[super viewWillAppear:animated];
NSLog( @"In,%3@, %d" , self.title , [self.dataSource count]);
[self.dataSource addObject:[NSString stringWithFormat:@"%d) %@" , [self.dataSource count] , self.title ]];
[[self tableView] reloadData];
}
#pragma mark -
#pragma mark Table view data source
- (NSInteger)numberOfSectionsInTableView:(UITableView *)tableView {
// Return the number of sections.
return 1;
}
- (NSInteger)tableView:(UITableView *)tableView numberOfRowsInSection:(NSInteger)section {
// Return the number of rows in the section.
if( dataSource == nil )
return 0;
return [dataSource count];
}
// Customize the appearance of table view cells.
- (UITableViewCell *)tableView:(UITableView *)tableView cellForRowAtIndexPath:(NSIndexPath *)indexPath {
static NSString *CellIdentifier = @"Cell";
UITableViewCell *cell = [tableView dequeueReusableCellWithIdentifier:CellIdentifier];
if (cell == nil) {
cell = [[[UITableViewCell alloc] initWithStyle:UITableViewCellStyleDefault reuseIdentifier:CellIdentifier] autorelease];
}
// Configure the cell...
cell.textLabel.text = (NSString*)[dataSource objectAtIndex:indexPath.row];
return cell;
}
#pragma mark -
#pragma mark Table view delegate
- (void)tableView:(UITableView *)tableView didSelectRowAtIndexPath:(NSIndexPath *)indexPath {
// Navigation logic may go here. Create and push another view controller.
/*
<#DetailViewController#> *detailViewController = [[<#DetailViewController#> alloc] initWithNibName:@"<#Nib name#>" bundle:nil];
// ...
// Pass the selected object to the new view controller.
[self.navigationController pushViewController:detailViewController animated:YES];
[detailViewController release];
*/
}
#pragma mark -
#pragma mark Memory management
- (void)didReceiveMemoryWarning {
// Releases the view if it doesn't have a superview.
[super didReceiveMemoryWarning];
// Relinquish ownership any cached data, images, etc that aren't in use.
}
- (void)viewDidUnload {
// Relinquish ownership of anything that can be recreated in viewDidLoad or on demand.
// For example: self.myOutlet = nil;
}
- (void)dealloc {
[super dealloc];
}
@end
成果:


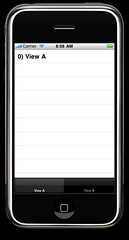
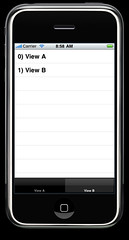
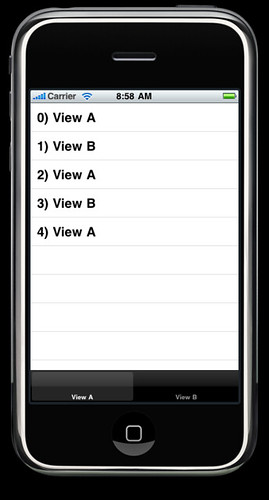
左邊一開始執行程式時,由於預設是進入 View A ,故一開始是新增一筆 View A 資料,接著點選下方的 TabBar 切換到 View B 時,則會新增另一筆資料 View B ,接著再 Table View 就會呈現出兩筆資料,最後,不斷掉交替切換到 View A 或 View B 那則會呈現以下的資料列表
此例在 UITableViewController 中的 - (void)viewWillAppear:(BOOL)animated; 進行實作的,要記得呼叫 [[self tableView] reloadData]; 才會更新 Table View 的資料,否則不斷地切換就只會顯示上面兩個小圖而已,那就是因為沒有叫 tableView 更新資料。

沒有留言:
張貼留言