顯示具有 user 標籤的文章。 顯示所有文章

2023年10月3日 星期二

PHP 開發筆記 - 用 Matomo Analytics HTTP API 取代 GA4 Measurement Protocol 服務 @ Ubuntu 22.04


由於 Google Analytics 4 在後端端數據搜集情境已殘,可能起源於 GA4 著重隱私等設計(?),現況數據收集已強調必須先從 Web or App 開始,透過 JS SDK 或 APP SDK 做事,而後端回報為輔助而已,在 Web & App 端可以做隱私宣告。如此,使得純後端回報幾乎無法妥善使用 GA4 的功能,包括無法區分 new user / old user 屬性等等,也不像 GA3 可以把 remote client 的 IP 回報出去而顯示使用者的世界全貌。

架設 Matomo 方式還滿簡單的,就 Web Server + PHP + MySQL ,並且官方也有 docker 安置方式:

由於看到別人的文章提到要記得設置定期分析任務,不然久久登入網頁會很卡的,推論也是從網頁端發送查詢資料,過程中也一同處理資料分析。這個用瀏覽器時,從開發者工具中也可以看到定期在發送 ajax 的 requests。


目前就先弄個 Matomo project 出來,根據上頭的指示很簡單就埋好 js script code 去追蹤網站流量,可以看得到 Matomo 比 GA 提供更多細膩的資訊,這就像隱私的那些規劃,在 GA 上頭只能很粗略地觀看到“趨勢”,而在 Matomo 上頭,則是可以細到把指定的 client 展開出他的 Profile:


我認為跟 GA 相比有滿明顯的設計差距。

接著,關於透過 REST API 回報數據與查詢回報的方式,可以參考:

回報 PageView/Event:

% cat test.php
require 'report.php';

print_r(matomoPageview(
[
[
'url' => 'http://localhost/page1',
'action_name' => 'PageView 01 - Title',
'uid' => '123456789012',
//'cip' => getUserIP(),
],
[
'url' => 'http://localhost/page2',
'action_name' => 'PageView 02 - Title',
'uid' => '123456789012',
//'cip' => getUserIP(),
],
[
'url' => 'http://localhost/page3',
'action_name' => 'PageView 03 - Title',
'uid' => '123456789012',
//'cip' => getUserIP(),
'e_c' => 'Service',
'e_a' => 'Auth',
'e_n' => 'Login',
],

]
,'idSite'
,'MatomoAPI'
));

% php test.php
Array
(
    [status] => 1
    [error] => 
    [info] => Array
        (
            [0] => Array
                (
                    [apiResult] => {"status":"success","tracked":1,"invalid":0}
                )

        )

)

得到 Report:

% cat test.php
require 'report.php';

print_r(matomoQueryReport(
        [   
                'idSite' => 1,
                'period' => 'day',
                'date' => '2023-10-01,2023-10-03',
                'method' => 'VisitsSummary.get',
        ]   
        , 'https://your-matomo.example.com/'
        , 'access_token'
));

% php test.php
Array
(
    [status] => 1
    [data] => Array
        (
            [0] => Array
                (
                    [2023-10-01] => Array
                        (
                        )

                    [2023-10-02] => Array
                        (
                        )

                    [2023-10-03] => Array
                        (
                            [nb_uniq_visitors] => 1
                            [nb_users] => 1
                            [nb_visits] => 1
                            [nb_actions] => 2
                            [nb_visits_converted] => 0
                            [bounce_count] => 0
                            [sum_visit_length] => 1
                            [max_actions] => 2
                            [bounce_rate] => 0%
                            [nb_actions_per_visit] => 2
                            [avg_time_on_site] => 1
                        )

                )

        )

    [error] => 
    [info] => Array
        (
        )

)

2018年5月9日 星期三

Alexa Skill 開發筆記 - 使用 AWS Lambda 與 OAUTH2 帳號連結

公司的產品是 WiFi Display 設備,結合智慧音箱後,透過音控請裝置執行動作,如播放影片。在此就順便紀錄這些開發過程。此處不會提及 OATUH2 開發項目。

首先,Alexa Skill 是個滿好玩的點子,說穿了就像 Apple TV 可以安裝 Apps 的概念,他是個市集,可以讓開發者提供更多智慧音箱的技能擴充,大約是 2015 年開始的。上頭也可以有簡單的變現機制,可以參考:Alexa開發者也可以賺錢了!看亞馬遜怎麼開啟語音應用的全新獲利模式

首先,沒有 Alexa device 也可以開發,善用模擬器即可。開發流程:

  1. 建立 Alexa Developer 帳號(過程就是建立 Amazon 帳號)
  2. 建立 AWS 帳號(綁定信用卡,有免費額度可善用)
  3. 使用模擬器服務 - https://echosim.io/


01-skill01

02-skill02

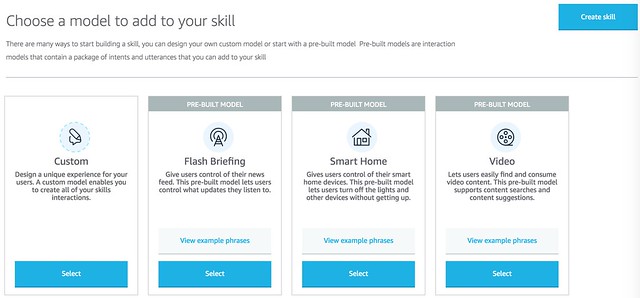
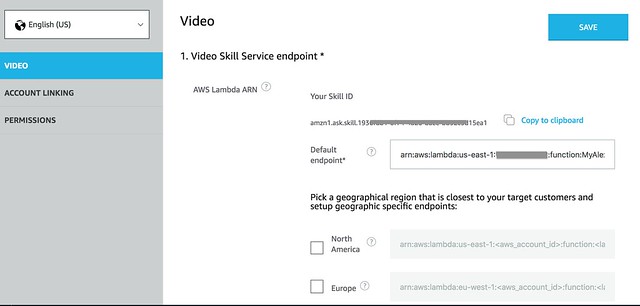
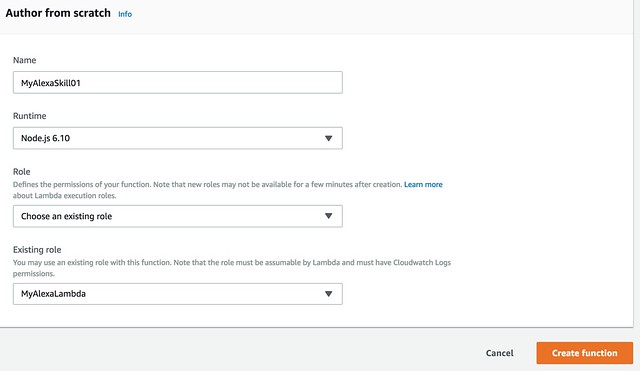
先在 Alexa Developer 先建立一個 Skill project,此例是 Video ,接著就要填寫 AWS Lambda 的位置,就切換到 AWS Lambda 創建流程,而 Alexa Skill 預設是提供 English (US) 的語系,參照 To create a Lambda function 第三步有強調 AWS Region 的部分:
Make sure you’ve selected the N.Virginia for English (US) skills or the EU (Ireland) region for English (UK) and German skills. The region is displayed in the upper right corner. Providing your Lambda function in the correct region prevents latency issues.
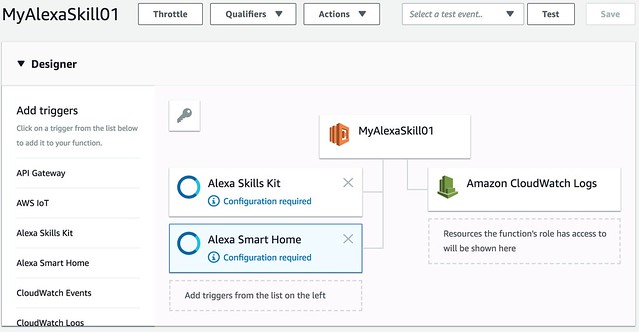
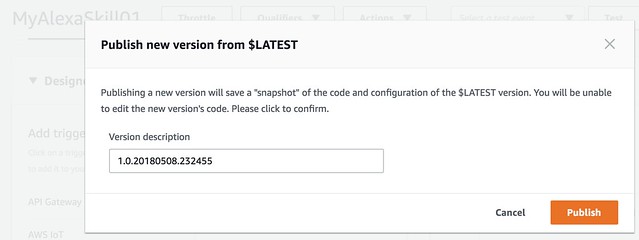
就要在 N.Virginia 創建 AWS Lambda function,不然亂建立根本無法互動。建立完 AWS Lambda function 後,替他增加 Alexa Skill Kit 和 Alexa Smart Home ,並且設定它的 Skill ID,並且把對應的程式碼上傳,且要記得發布出去!

03-aws01

04-aws02

05-aws03

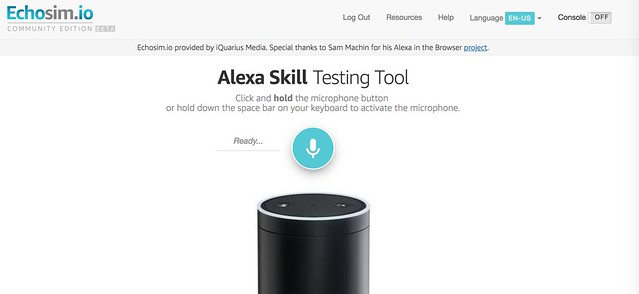
如此一來,此 Skill 作者基本上已經可以測試了,而測試的條件包括要有一個 Alexa 音控裝置,這時就要靠模擬器,可以先到 https://echosim.io/ 登入 Amazon 帳號,即可獲得一台虛擬器。

15-simulator

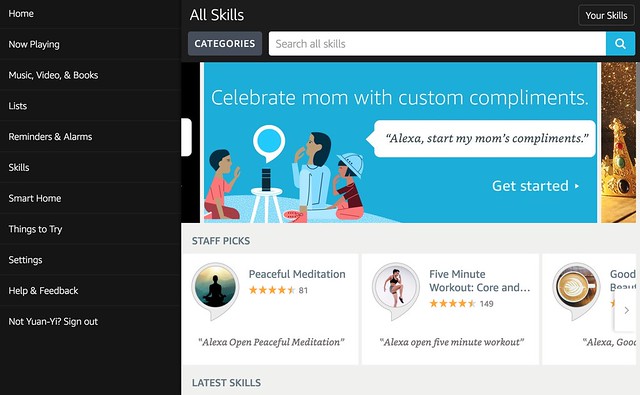
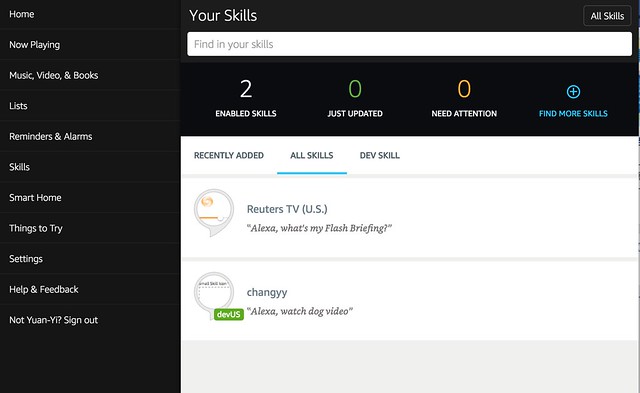
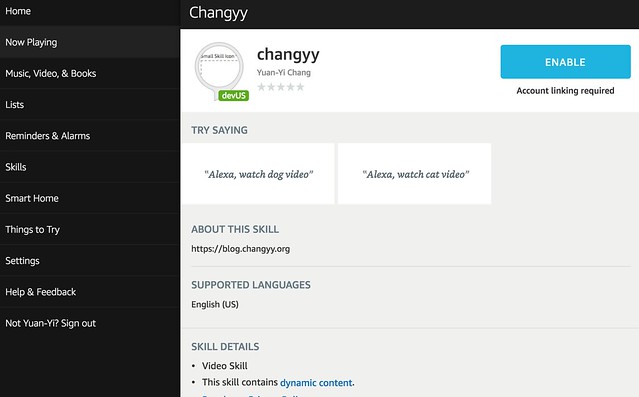
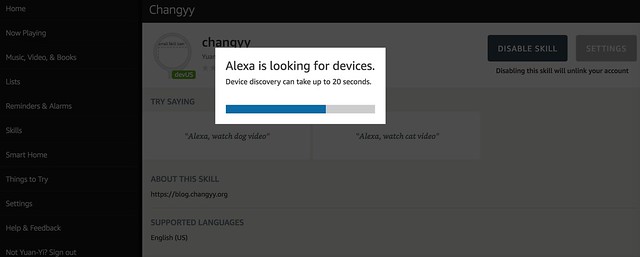
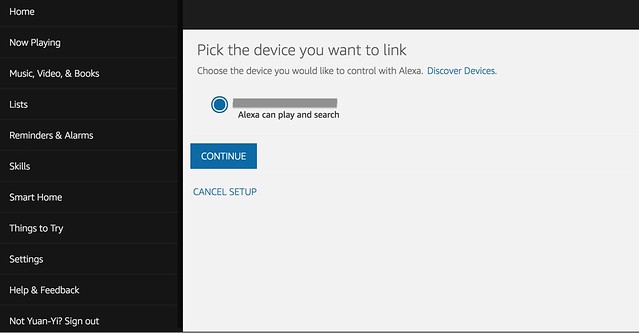
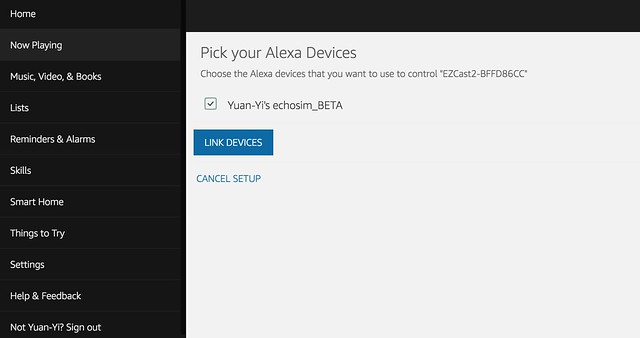
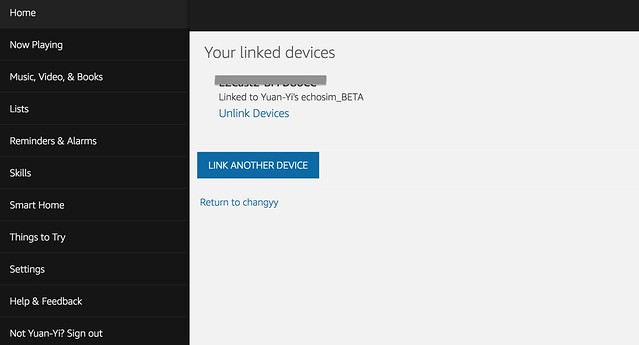
接著,若你人在美國或是擁有美國的 iTunes / Google play 帳號可以下載得到 Amazon Alexa app ,那就直接用,不然只好跟我一樣用用網頁版: https://alexa.amazon.com/spa/index.html ,只要有先把 Amazon 帳號配對過 Alexa 音箱就可以正常切換到 Skill 頁面,點選右上角的 Your skill 即可切換到 Dev skill 來查看,並把自己開發的 skill 給 enable,過程就會觸發 OAUTH2 服務帳號的綁定並授權 Skill 服務使用等等,後續的過程先挑選哪個硬體裝置要被智慧音箱控制(AWS Lambda 要實作 device discovery 等機制),接著再挑哪個智慧音箱來搭配,整個過程用瀏覽器開發工具查看到 api response:

  • https://alexa.amazon.com/api/phoenix/discovery
    • 得知哪些硬體裝置要被控制
  • https://alexa.amazon.com/api/devices-v2/device
    • 得知你的帳號有哪些智慧音箱裝置


06-skill03

07-skill04

08-skill05

09-skill06

10-skill07

11-skill08

12-skill09

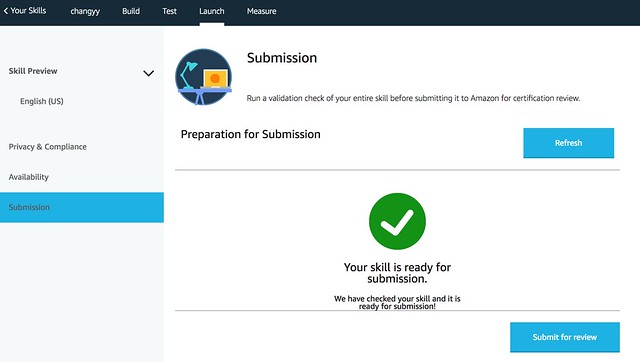
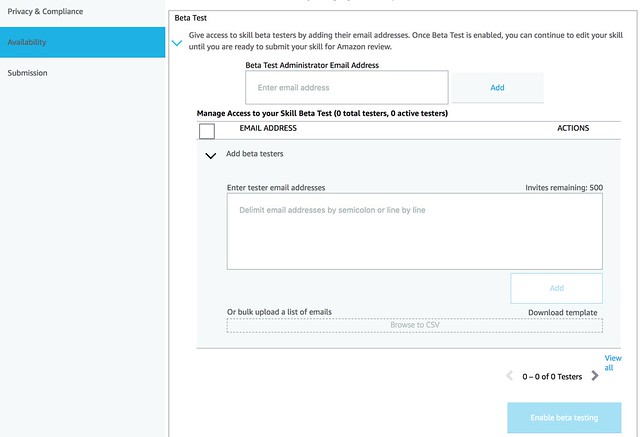
最後,自己測試完後,可以再開啟 Beta Test 機制,邀請其他人來測試。而要開啟 Beta Test 只需要把資料填一填,並處於 ready for submission 即可(送審前一步),關鍵的地方就是補一補 icon、描述、甚至一些網址等等,若只要一直內測就可以先亂填

13-skill10

14-skill11

最後,有問題真的要好好看文件 XD 而 AWS Lambda 則可以善用 Cloud Watch 看 logs ,以此確保真的有連線

2016年4月25日 星期一

[PHP] Use iTunesConnect API to Add iOS App External Test User

其實,已經有 TestFlight 很方便了,但基於一些練習,就稍微仿別人做過的流程練習一下,原理不難:

  1. 使用 cURL + cookie 完成登入 iTunesConnect
  2. 切換至 App 頁面資訊,查看有多少 Test User
  3. 添加 Test User
  4. 刪除 Test User
如此而已 :P 於是乎,用 https://github.com/changyy/codeigniter-library-ios-test-user 紀錄一下。

2015年3月11日 星期三

Facebook 開發筆記 - Facebook app 無法取得真實的 account id

最近在開發 Facebook app 時,發現 Facebook API 已經有更新不少東西,其中有一項還滿不錯的,第三方 Facebook app 無法取得 Facebook user 的真實 ID 資訊,每個 app 會各別拿到一個,例如在 A app 跟 B app 詢問 graph api: /me 時,拿到的 id 會不一樣。然而,不一樣的 ID 卻仍可以一樣定位到同一個使用者。

這個最大的缺點是各個 Facebook app 沒有互通的資訊,但對於各個 facebook app 取得到的資訊卻還是一樣夠用。此外,可以用 www.facebook.com/id 去測試,可以發現仍可以定位到同一個 user,算是滿貼心的隱私設計。

https://developers.facebook.com/docs/graph-api/reference/v2.2/user
The id of this person's user account. This ID is unique to each app and cannot be used across different apps. Our upgrade guide provides more info about this.

2014年8月18日 星期一

iOS 開發教學 - 邀請使用者評論、評分 iOS app (Review/Rate your iOS app)

原理就是第一次使用時,埋一個時間進去,等下次使用者使用 iOS app 時,判斷時間是否夠長,達到時間間距時,使用 UIAleterView 詢問使用者是否願意 Rate your app。

假設 iOS app 預設啟用時,停留在某個 ViewController:

@interface ViewController () <UIAlertViewDelegate>
// ...
@end


@implementation ViewController

- (void)alertView:(UIAlertView *)alertView clickedButtonAtIndex:(NSInteger)buttonIndex
{
    switch (alertView.tag) {
        case YOUR_APP_ID:
        {
            //NSLog(@"buttonIndex: %d", buttonIndex);
            NSDate * now = [[NSDate alloc] init];
            switch (buttonIndex) {
                case 1: // YES
                    [[UIApplication sharedApplication] openURL:[NSURL URLWithString:[NSString stringWithFormat:@"itms-apps://itunes.apple.com/app/id%d", alertView.tag]]];
                    [[NSUserDefaults standardUserDefaults] setObject:now forKey:@"rateDone"];
                    break;
                case 2: // Remind me later
                    [[NSUserDefaults standardUserDefaults] setObject:now forKey:@"rateDate"];
                    break;
                default:
                    [[NSUserDefaults standardUserDefaults] setObject:now forKey:@"rateDone"];
                    break;
            }
            [[NSUserDefaults standardUserDefaults] synchronize];
        }
            break;
    }
}

- (void)viewDidLoad
{
    [super viewDidLoad];
    @try {
        //[[NSUserDefaults standardUserDefaults] removeObjectForKey:@"rateDone"];
        //[[NSUserDefaults standardUserDefaults] removeObjectForKey:@"rateDate"];
        //[[NSUserDefaults standardUserDefaults] synchronize];
     
        if (![[NSUserDefaults standardUserDefaults] objectForKey:@"rateDone"]) {
            NSDate * now = [[NSDate alloc] init];
            if (![[NSUserDefaults standardUserDefaults] objectForKey:@"rateDate"]) {
                [[NSUserDefaults standardUserDefaults] setObject:now forKey:@"rateDate"];
                [[NSUserDefaults standardUserDefaults] synchronize];
            } else {
                NSDate *prevDate = [[NSUserDefaults standardUserDefaults] objectForKey:@"rateDate"];
                if ([now timeIntervalSinceDate:prevDate] > 60 * 60 * 10) {
                    UIAlertView *alterView = [[UIAlertView alloc] initWithTitle:@"Rate this app" message:@"If you enjoy using this app, would you mind taking a moment to rate it?" delegate:self cancelButtonTitle:@"NO, Thanks" otherButtonTitles:@"YES", @"Remind me later", nil];
                    alterView.tag = YOUR_APP_ID;
                    [alterView show];
                }
            }
        }
    }
    @catch (NSException *exception) {
    }
    @finally {
    }
}

@end

2014年1月18日 星期六

iOS 開發筆記 - The app references non-public selectors in Payload/.app/: id

這次碰到的問題是使用 Facebook SDK 造成的 Orz 但很妙的事,一樣的 code 再 10 天前並沒有這個現象。

追了一下可能的問題是在於 Facebook SDK 的設計:

id<FBGraphUser> friend
id<FBGraphUserExtraFields> user


然後範例都教人使用:

user.id 或 [user id]

解法:

[user objectForKey:@"id"]

只要透過存取方式的修改,即可避開。