顯示具有 create 標籤的文章。 顯示所有文章

2019年4月4日 星期四

[macOS] 製作 macOS High sierra USB 安裝碟 @ macOS 10.13.6

build macOS USB install 10.13

手上這台 Macbook Pro 已經無法安裝 macOS 10.14 了,正準備更換 SSD ,因此想先準備 USB 安裝碟時,發現竟然無法製作 Orz 透過官網教學文才找到 macOS 10.13 下載位置  ( https://itunes.apple.com/tw/app/macos-high-sierra/id1246284741?ls=1&mt=12 ) ,發現僅 15MB 的大小,執行指令時會看到以下錯誤訊息:

$ time sudo /Applications/Install\ macOS\ High\ Sierra.app/Contents/Resources/createinstallmedia --volume /Volumes/8GUSB/
/Applications/Install macOS High Sierra.app does not appear to be a valid OS installer application.


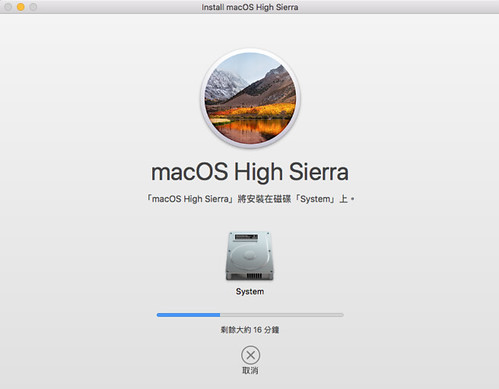
最後研究一下,原來要靠安裝流程,讓系統根目錄 macOS Install Data 會產生必要的資料,接著安裝過程下載完必須的軟體時,會停在要重開機的路上,這時就可以關閉安裝,並把必要的資料取出來使用。

$ tree /macOS\ Install\ Data/ ; sudo du -hd1 /macOS\ Install\ Data/
/macOS\ Install\ Data/
├── AppleDiagnostics.chunklist
├── AppleDiagnostics.dmg
├── BaseSystem.chunklist
├── BaseSystem.dmg
├── InstallESDDmg.pkg
├── InstallInfo.plist
├── Locked\ Files
└── index.sproduct

1 directory, 7 files
 20K /macOS Install Data//Locked Files
4.9G /macOS Install Data/


接著可透過"顯示套件"的方式,在 Install macOS High Sierra.app 內的 Contents 中,建立 SharedSupport 目錄,並把 macOS Install Data 複製進去:

$ tree /Applications/Install\ macOS\ High\ Sierra.app/Contents/SharedSupport
/Applications/Install\ macOS\ High\ Sierra.app/Contents/SharedSupport
├── AppleDiagnostics.chunklist
├── AppleDiagnostics.dmg
├── BaseSystem.chunklist
├── BaseSystem.dmg
├── InstallESDDmg.pkg
├── InstallInfo.plist
└── index.sproduct

0 directories, 7 files


就可以製作 USB 安裝碟:

$ time sudo /Applications/Install\ macOS\ High\ Sierra.app/Contents/Resources/createinstallmedia --volume /Volumes/8GUSB/
Password:
Ready to start.
To continue we need to erase the volume at /Volumes/8GUSB/.
If you wish to continue type (Y) then press return: Y


Updated @ 2019/04/06:

雖說可以順利製作出開機碟,但發現該 USB 無法完成 10.13.6 作業系統的安裝。推論是系統安裝流程已被修改的關係,應當是系統安裝時,會要求要安裝的系統碟的根目錄上,配有 "/macOS Install Data/" 資料,才能重開機後完成安裝流程。

以上並未驗證 :P 因為這次重安裝是為了把筆電換上新的 SSD ,因此單純先把原本的系統碟透過外接方式重啟,並跑正常的系統安裝流程,安置在新的 SSD ,而安裝過程就完全不靠 USB 開機碟。

或許把 SharedSupport 複製一份到新 SSD 的 "/macOS Install Data/" 有可能就可以搞定?!

2018年5月9日 星期三

Alexa Skill 開發筆記 - 使用 AWS Lambda 與 OAUTH2 帳號連結

公司的產品是 WiFi Display 設備,結合智慧音箱後,透過音控請裝置執行動作,如播放影片。在此就順便紀錄這些開發過程。此處不會提及 OATUH2 開發項目。

首先,Alexa Skill 是個滿好玩的點子,說穿了就像 Apple TV 可以安裝 Apps 的概念,他是個市集,可以讓開發者提供更多智慧音箱的技能擴充,大約是 2015 年開始的。上頭也可以有簡單的變現機制,可以參考:Alexa開發者也可以賺錢了!看亞馬遜怎麼開啟語音應用的全新獲利模式

首先,沒有 Alexa device 也可以開發,善用模擬器即可。開發流程:

  1. 建立 Alexa Developer 帳號(過程就是建立 Amazon 帳號)
  2. 建立 AWS 帳號(綁定信用卡,有免費額度可善用)
  3. 使用模擬器服務 - https://echosim.io/


01-skill01

02-skill02

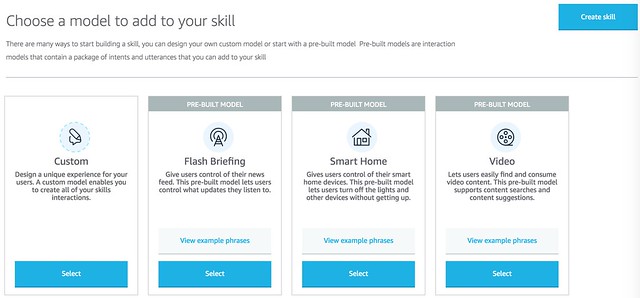
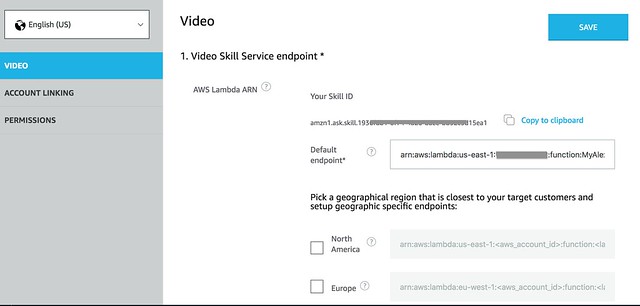
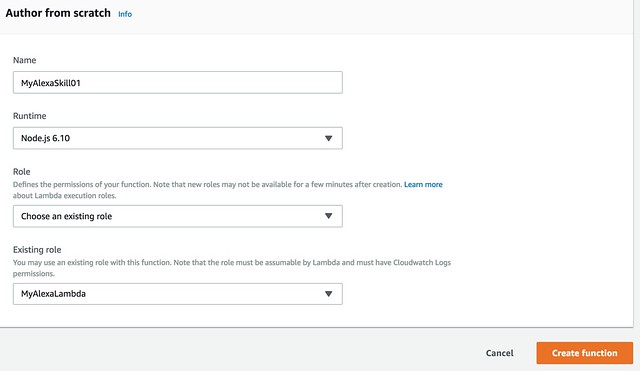
先在 Alexa Developer 先建立一個 Skill project,此例是 Video ,接著就要填寫 AWS Lambda 的位置,就切換到 AWS Lambda 創建流程,而 Alexa Skill 預設是提供 English (US) 的語系,參照 To create a Lambda function 第三步有強調 AWS Region 的部分:
Make sure you’ve selected the N.Virginia for English (US) skills or the EU (Ireland) region for English (UK) and German skills. The region is displayed in the upper right corner. Providing your Lambda function in the correct region prevents latency issues.
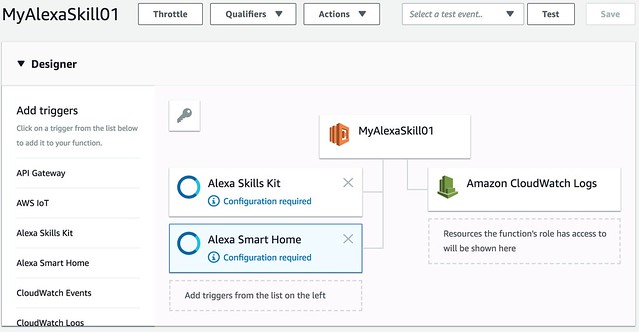
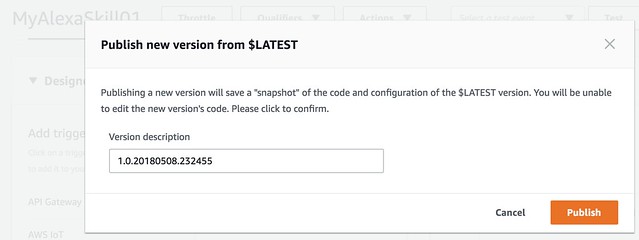
就要在 N.Virginia 創建 AWS Lambda function,不然亂建立根本無法互動。建立完 AWS Lambda function 後,替他增加 Alexa Skill Kit 和 Alexa Smart Home ,並且設定它的 Skill ID,並且把對應的程式碼上傳,且要記得發布出去!

03-aws01

04-aws02

05-aws03

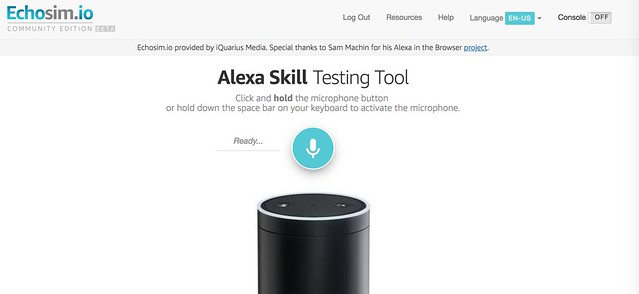
如此一來,此 Skill 作者基本上已經可以測試了,而測試的條件包括要有一個 Alexa 音控裝置,這時就要靠模擬器,可以先到 https://echosim.io/ 登入 Amazon 帳號,即可獲得一台虛擬器。

15-simulator

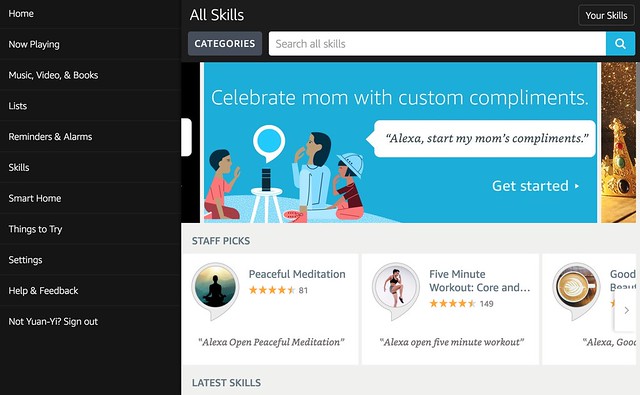
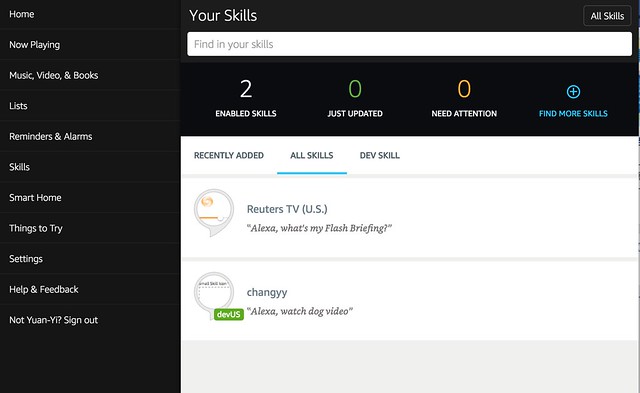
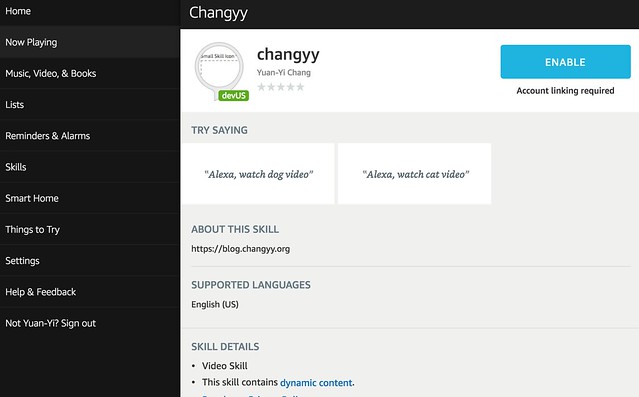
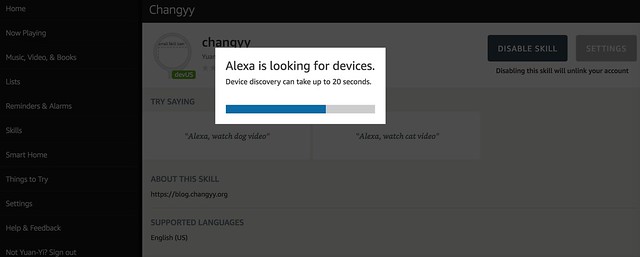
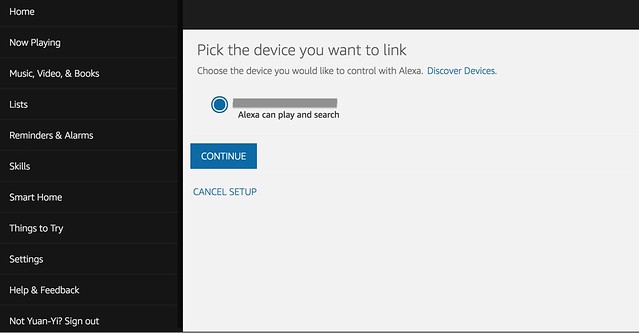
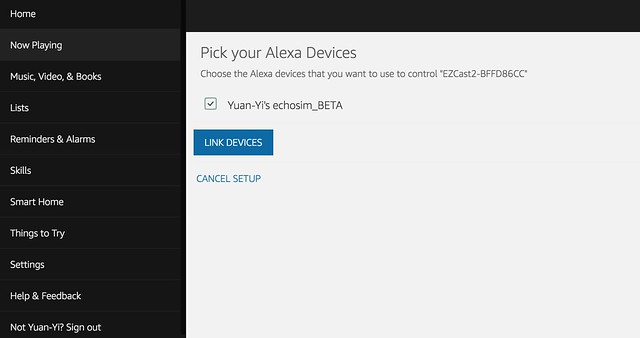
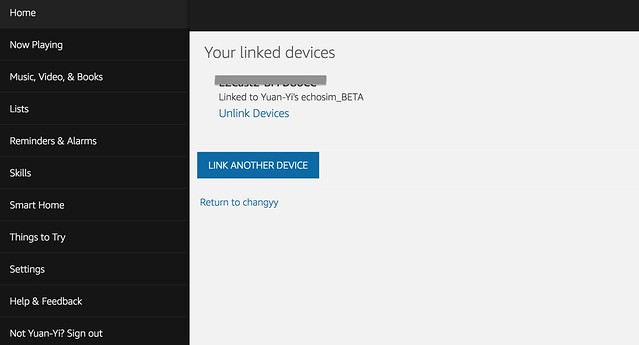
接著,若你人在美國或是擁有美國的 iTunes / Google play 帳號可以下載得到 Amazon Alexa app ,那就直接用,不然只好跟我一樣用用網頁版: https://alexa.amazon.com/spa/index.html ,只要有先把 Amazon 帳號配對過 Alexa 音箱就可以正常切換到 Skill 頁面,點選右上角的 Your skill 即可切換到 Dev skill 來查看,並把自己開發的 skill 給 enable,過程就會觸發 OAUTH2 服務帳號的綁定並授權 Skill 服務使用等等,後續的過程先挑選哪個硬體裝置要被智慧音箱控制(AWS Lambda 要實作 device discovery 等機制),接著再挑哪個智慧音箱來搭配,整個過程用瀏覽器開發工具查看到 api response:

  • https://alexa.amazon.com/api/phoenix/discovery
    • 得知哪些硬體裝置要被控制
  • https://alexa.amazon.com/api/devices-v2/device
    • 得知你的帳號有哪些智慧音箱裝置


06-skill03

07-skill04

08-skill05

09-skill06

10-skill07

11-skill08

12-skill09

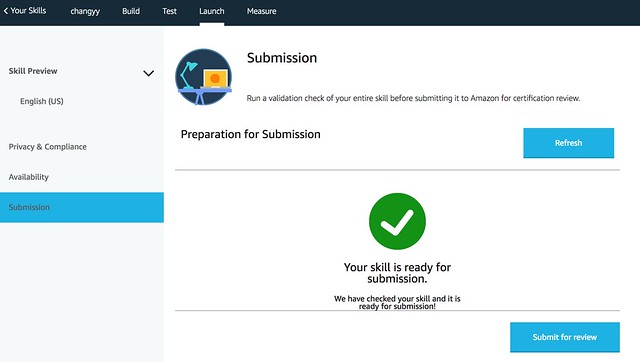
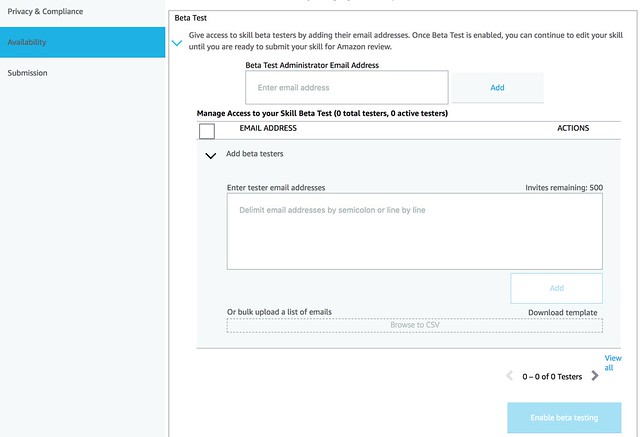
最後,自己測試完後,可以再開啟 Beta Test 機制,邀請其他人來測試。而要開啟 Beta Test 只需要把資料填一填,並處於 ready for submission 即可(送審前一步),關鍵的地方就是補一補 icon、描述、甚至一些網址等等,若只要一直內測就可以先亂填

13-skill10

14-skill11

最後,有問題真的要好好看文件 XD 而 AWS Lambda 則可以善用 Cloud Watch 看 logs ,以此確保真的有連線

2016年8月2日 星期二

Microsoft Azure 管理筆記 - 使用 Azure CLI 自訂映像檔的維護方式

大部分的潮流都是走 PaaS 架構,然而,有些歷史的包袱只能走 IaaS 的架構 XD 而建立 Image 更是最基本的方式,甚至搭配 rsync 完成發布。而對於 Resource manage 機器來說,每次透過 capture 建立 Image 後,等於報廢回收,所以寫了個簡單的步驟記憶一下:
  1. 登入機器清除基本設定檔: $ sudo waagent -deprovision+user
  2. 透過 azure cli 執行 Shutdown:$ azure vm deallocate -g MyResource -n MyCurrentServer --subscription MySubscription
  3. 透過 azure cli 執行 Generalized:$ azure vm generalize MyResource MyCurrentServer --subscription MySubscription
  4. 透過 azure cli 執行 Capture:$ azure vm capture MyResource MyCurrentServer MyImageName -t MyImageName-Date.json --subscription MySubscription
做完後,原機器就可以下去領便當,可以把它 Delete 囉。

若預設產生的 MyImageName-Date.json 不夠用時,會自行添加資料,因此維護上就會出現麻煩,每次產生新的 template 中,其實只有 storageProfile 的設定,可以用 jq 跟 vimdiff 方便更新一下:

$ jq '' < MyImageName-old.json > old-formated.json
$ jq '' < MyImageName-Date.json > date-formated.json
$ vimdiff old-formated.json date-formated.json


把 old-formated.json 裡的 storageProfile 更新完成即可。

$ mv old-formated.json MyImageName-Date-formated.json

未來要建置原先那台機器時,就可以用以下指令在重建出來:

$ azure group deployment create MyResource -f MyImageName-Date-formated.json --subscription MySubscription

其他提醒:
  1. template.json 有描述 VHD 的資訊,若用上述 azure group deployment create 時,會彈跳出已存在的錯誤訊息,這時除了更新 template.json 資訊外,也可以到 Azure Portal -> Browse -> Storage account -> Blobs -> 沿路去找資料,把舊的、沒在用的砍掉再重跑
  2. 每次建立映像檔時,在 Azure Portal -> Browse -> Storage account -> Blobs -> system -> Microsoft.Compute -> Images -> vhds  會有 Image.vhd 跟 template.json 檔案,想清掉舊的可以去刪掉
  3. 製作完 Image 後的 server ,可以直接把它刪掉,但他的 NIC應當還會在,下次建立時,就可以沿用舊的網卡,通常 private ip 可以沿用,若有 public ip 的,若是 dynamic 配置則會變動
  4. 想使用同一個 template 開機器時,若多道指令一直跑時,指使用同一個 template file 時,會出現 Unable to edit or replace deployment 'filename-template.json' 
    : previous deployment from 'DATETIME' is still active. Please see https://aka.ms/arm-deploy for usage details. 偷懶的解法就是複製出來用 Orz 不知是不是 azure 採用 local file lock 等機制
  5. 若要採用 Availability Set 時,必須一開機就設定了,解法製作兩份 template.json ,一份用來維護 Image ,另一份就是開機就擺進 Availability Set,只需在 resources 中,多添加 : { "availabilitySet": { "id" : "/subscriptions/MySubscription/resourceGroups/MyResource/providers/Microsoft.Compute/availabilitySets/MyAvailabilitySet" } }, 來處理即可

Microsoft Azure 管理筆記 - 使用 Azure CLI 建立自訂的映像檔與開新機器的方式 (create a custom image/launch a server)

由於 Azure Portal 對 Resource manager 機器尚為提供 Web UI 可以方便點擊處理,就還是下海摸一下 command line 啦。

參考文件:

對 server 建立 image 過程中,server 狀態改變後會無法重啟,得用建立好的 Resource template 重新建立,需分外留意!機器就這樣下去領便當了 囧 (Azure/azure-powershell: UN-generalize a VM)

首先,遠端登入機器,執行此道指令

$ sudo waagent -deprovision+user

此命令會嘗試清除系統,使之適合重新佈建。這項作業會執行下列工作:

移除 SSH 主機金鑰 (如果組態檔中的 Provisioning.RegenerateSshHostKeyPair 是 'y')
清除 /etc/resolv.conf 中的名稱伺服器設定
移除 /etc/shadow 中的 root 使用者密碼 (如果組態檔中的 Provisioning.DeleteRootPassword 是 'y')
移除快取的 DHCP 用戶端租用
將主機名稱重設為 localhost.localdomain
刪除最後佈建的使用者帳戶 (取自於 /var/lib/waagent) 和相關聯的資料。


接著,再回到自己的常用的機器,改用 azure cli 對該機器設置以下流程:

$ azure config mode arm
info:    Executing command config mode
info:    New mode is arm
info:    config mode command OK


// Shutdown a virtual machine in a resource group and release the compute resources
$ azure vm deallocate -g MyResource -n MyCurrentVM --subscription MySubscription
info:    Executing command vm deallocate
+ Looking up the VM "MyCurrentVM"                            
+ Deallocating the virtual machine "MyCurrentVM"            
info:    vm deallocate command OK


// Set the state of a VM in a resource group to Generalized.
$ azure vm generalize MyResource MyCurrentVM --subscription MySubscription
info:    Executing command vm generalize
+ Looking up the VM "MyCurrentVM"                            
+ Generalizing the virtual machine "MyCurrentVM"            
info:    vm generalize command OK


$ azure vm capture MyResource MyCurrentVM MyImageID -t MyImageID-base.json --subscription MySubscription
info:    Executing command vm capture
+ Looking up the VM "MyCurrentVM"                            
+ Capturing the virtual machine "MyCurrentVM"                
info:    Saved template to file "MyImageID-base.json"
info:    vm capture command OK


接著,可以建立新開機器!只是開機器前又得好好管理"Resouce"建立,由於我已經有常用的 Resource 跟 Location 了,在此只需建立 IP 跟 NIC 即可!

$ azure network public-ip create MyResource MyImageID-ip-1 -l westus --subscription MySubscription
info:    Executing command network public-ip create
warn:    Using default --idle-timeout 4
warn:    Using default --allocation-method Dynamic
warn:    Using default --ip-version IPv4
+ Looking up the public ip "MyImageID-ip-1"                              
+ Creating public ip address "MyImageID-ip-1"                            
data:    Id                              : /subscriptions/MySubscription/resourceGroups/MyResource/providers/Microsoft.Network/publicIPAddresses/MyImageID-ip-1
data:    Name                            : MyImageID-ip-1
data:    Type                            : Microsoft.Network/publicIPAddresses
data:    Location                        : westus
data:    Provisioning state              : Succeeded
data:    Allocation method               : Dynamic
data:    IP version                      : IPv4
data:    Idle timeout in minutes         : 4
info:    network public-ip create command OK


$ azure network nic create MyResource MyImageID-nic-1 -k default -m MyResource -p MyImageID-ip-1 -l westus --subscription MySubscription
info:    Executing command network nic create
+ Looking up the network interface "MyImageID-nic-1"                    
+ Looking up the subnet "default"                                            
+ Looking up the public ip "MyImageID-ip-1"                              
+ Creating network interface "MyImageID-nic-1"                          
data:    Id                              : /subscriptions/MySubscription/resourceGroups/MyResource/providers/Microsoft.Network/networkInterfaces/MyImageID-nic-1
data:    Name                            : MyImageID-nic-1
data:    Type                            : Microsoft.Network/networkInterfaces
data:    Location                        : westus
data:    Provisioning state              : Succeeded
data:    Internal domain name suffix     : #############.dx.internal.cloudapp.net
data:    Enable IP forwarding            : false
data:    IP configurations:
data:      Name                          : default-ip-config
data:      Provisioning state            : Succeeded
data:      Private IP address            : 10.0.0.6
data:      Private IP version            : IPv4
data:      Private IP allocation method  : Dynamic
data:      Public IP address             : /subscriptions/MySubscription/resourceGroups/MyResource/providers/Microsoft.Network/publicIPAddresses/MyImageID-ip-1
data:      Subnet                        : /subscriptions/MySubscription/resourceGroups/MyResource/providers/Microsoft.Network/virtualNetworks/MyResource/subnets/default
data:  
info:    network nic create command OK


建立機器吧!

$ azure --version
0.10.2 (node: 4.2.4)


$ azure group deployment create MyResource -f MyImageID-base.json --subscription MySubscription
$ azure group deployment create MyResource -f MyImageID-base.json --subscription MySubscription -p '{"vmName":{"value":"MyVM"},"adminUserName":{"value":"ubuntu"},"adminPassword":{"value":"MyPassword"},"networkInterfaceId":{"value":"/subscriptions/MySubscription/resourceGroups/MyResource/providers/Microsoft.Network/networkInterfaces/MyImageID-nic-base"}}'


然而,因為預設產出的 template 定義了以下資訊,以至於開機器必須填寫以下資訊:

$ cat template.json | jq '.parameters'
{
  "vmName": {
    "type": "string"
  },
  "vmSize": {
    "type": "string",
    "defaultValue": "Standard_A1"
  },
  "adminUserName": {
    "type": "string"
  },
  "adminPassword": {
    "type": "securestring"
  },
  "networkInterfaceId": {
    "type": "string"
  }
}


用在這邊:

$ cat template.json | jq '.resources[0].properties.osProfile'
{
  "computerName": "[parameters('vmName')]",
  "adminUsername": "[parameters('adminUsername')]",
  "adminPassword": "[parameters('adminPassword')]"
}


接著,稍微修改來支援 ssh keypair 登入方式,將 template.json 中的 parameters 多增加個 adminPublicKey/adminPublicKeyPath:

$ cat template.json | jq '.parameters'
{
  "vmName": {
    "type": "string"
  },
  "vmSize": {
    "type": "string",
    "defaultValue": "Standard_A1"
  },
  "adminUserName": {
    "type": "string"
  },
  "adminPassword": {
    "type": "securestring",
    "defaultValue": null
  },
  "networkInterfaceId": {
    "type": "string"
  },
  "adminPublicKey": {
    "type": "array"
  },
  "adminPublicKeyPath": {
    "type": "string"
  }
}


並修改 properties.osProfile 區:

$ cat template.json | jq '.resources[0].properties.osProfile'
{
  "computerName": "[parameters('vmName')]",
  "adminUsername": "[parameters('adminUsername')]",
  "adminPassword": "[parameters('adminPassword')]",
  "linuxConfiguration": {
    "disablePasswordAuthentication": true,
    "ssh": {
      "publicKeys": [
         {
           "path": "[parameters('adminPublicKeyPath')]",
           "keyData": "[parameters('adminPublicKey')]"
         }
      ]
    }
  }
}


如此一來,就開機能用 keypair 登入機器:

$ azure group deployment create MyResource -f MyImageID-base.json --subscription MySubscription -p '{"adminPassword":{"value":""},"vmName":{"value":"MyVM"},"adminUserName":{"value":"ubuntu"},"adminPublicKey":{"value":"ssh-rsa ########"},"adminPublicKeyPath":{"value":"/home/ubuntu/.ssh/authorized_keys"},"networkInterfaceId":{"value":"/subscriptions/MySubscription/resourceGroups/MyResource/providers/Microsoft.Network/networkInterfaces/MyImageID-nic-base"}}'

2016年7月27日 星期三

Microsoft Azure 管理筆記 - 建立自訂的映像檔 (create a custom image)

最近一直沿用在 AWS 的維護經驗,對應到 Azure 的服務部署,不斷的產生概念上的衝突 XD
總之,太多用 AWS 了,還是從 AWS 的角度來寫個筆記吧。

首先,有些服務不能老是從一台乾淨的 linux server + script 部署出來,有時效的問題,因此就有了自建映像檔的需求,以 AWS 來說,就是 amazon machine image (AMI) 的部分。

然而,在 2016 年的夏天,Azure 的管理介面已經有分新舊版的差異 XD

新版:https://portal.azure.com
舊版:https://manage.windowsazure.com

其中在 Azure 開機器時,也會分 Virtual Machines 跟 Virtual machines (classic) 兩種,其中前者就是新一代的 resource 管理方式,資源管控設計是不錯的,可以做到很細微。但是,對於建立自訂的映像檔的部分,只有 Virtual machines (classic) 在新版選單上有。

Virtual machines (classic):
azure_vm_classic_create_image

Virtual machines:
azure_vm_without_create_image

根據與微軟技術傳教士的討論,據說新版有在開發了 Orz 希望能夠趕快提供這服務。

總之,若不想要用指令 create image 的話,可以先挑 Virtual machines (classic) 來使用。然而,建立完的 image 該怎樣叫出來開機器,新舊版操作介面都是可以處理的。

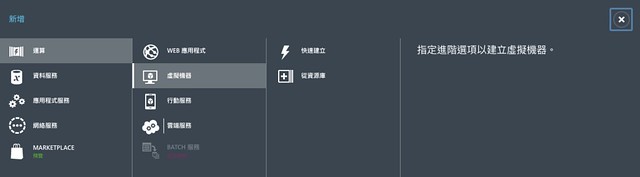
舊版 https://manage.windowsazure.com -> 新增 -> 運算 -> 虛擬機器 -> 從資源庫 -> 我的映像

auzre_vm_launch

新版 https://portal.azure.com -> 左下方 Browser -> VM image (classic) -> 挑選剛剛製作好的 Image -> 選 Create VM 即可。

以上就是初探 Azure 自訂映像檔、使用映像檔的流程。目前 Azure 頗像 2009 年的 AWS 服務,當年 AWS Web UI 也有很多功能還沒做出來,當時就是要 call api 做事,我想 Azure 新版 Portal 就是處於這個現狀。為了維護交接的成本,我會偏向盡可能用 Web UI 做事,因為不是每個人都願意去處理 command line 的。

此外,再提一下,新版 Virtual machines 則是以 create a custom template image 關鍵字去找,而大部分的自訂 image 包含常見的 VHD (Virtual Hard Disk) 字眼,只是這個領域比較偏 Windows 的用法。

2015年6月29日 星期一

phpBB3 - 使用 OAuth 登入時,自動添加 phpBB3 系統使用者帳號

phpBB3 提供 OAuth 登入的功能,預設有 Bitly、Facebook 跟 Google+ 服務可作為登入系統。只需在外頭管理介面將帳號認證方式從預設的 Db 改成 oauth,接著只要有填寫 api_key, secret_key 後,網頁端在 login 介面下,就會顯示出額外的 OAuth 登入了!

然而,phpBB3 這邊的規劃:凡事透過 OAuth 登入者,完成登入後還要綁定到 PHPBB3 內部帳號才可以。看得出來可能的影響問題,包含資安等等的。而比較重要的一點是 PHPBB3 帳號底層用 Email 帳號當作獨一無二的 key。

因此,如果想要自動建立帳號,需確保 Email 是獨一無二的資料,這邊就簡單的做個小動作:

1.當使用者完成 OAuth 認證後,使用該服務資訊做出一個 unique email address,例如是 facebook.com 登入的,就拿 fb graph id 再加 graph.facebook.com 拼湊一個 email address:uid@graph.facebook.com  而非拿使用者的資料。
2.建立帳號還需要 username 資訊、phpBB3 group id
3.進行 oauth 帳號與 phpBB3 綁定 (link_account_perform_link)

主體上需改變:phpbb/auth/provider/oauth/oauth.php ,我這邊再埋個小東西,當 oauth provider 有提供 get_user_info 時,才進行自動綁定。

對 phpbb/auth/provider/oauth/oauth.php 的操作:

在 public function login($username, $password) 添加東西即可:

if ($this->request->is_set('code', \phpbb\request\request_interface::GET))
{
$this->service_providers[$service_name]->set_external_service_provider($service);
$unique_id = $this->service_providers[$service_name]->perform_auth_login();

// Check to see if this provider is already assosciated with an account
$data = array(
'provider' => $service_name_original,
'oauth_provider_id' => $unique_id
);
$sql = 'SELECT user_id FROM ' . $this->auth_provider_oauth_token_account_assoc . '
WHERE ' . $this->db->sql_build_array('SELECT', $data);
$result = $this->db->sql_query($sql);
$row = $this->db->sql_fetchrow($result);
$this->db->sql_freeresult($result);

// 添加自動建立帳號流程 -- begin
if (!$row && method_exists($this->service_providers[$service_name], 'get_user_info') && ($user_info = $this->service_providers[$service_name]->get_user_info()))
{
$new_user_data = $this->user_row($user_info['username'], $user_info['user_email']);
// create user automatic
if (!function_exists('user_add'))
{
include($phpbb_root_path . 'includes/functions_user.' . $phpEx);
}
$user_id = user_add($new_user_data);

$data = array(
'user_id' => $user_id,
'provider' => $service_name_original,
'oauth_provider_id' => $unique_id,
);
$this->link_account_perform_link($data);

// Update token storage to store the user_id
$storage->set_user_id($user_id);

$sql = 'SELECT user_id, username, user_password, user_passchg, user_email, user_type, user_login_attempts
FROM ' . $this->users_table . '
WHERE user_id = ' . (int) $user_id;
$result = $this->db->sql_query($sql);
$row = $this->db->sql_fetchrow($result);
$this->db->sql_freeresult($result);

if (!$row)
{
throw new \Exception('AUTH_PROVIDER_OAUTH_ERROR_INVALID_ENTRY');
}

// The user is now authenticated and can be logged in
return array(
'status' => LOGIN_SUCCESS,
'error_msg' => false,
'user_row' => $row,
);
}
// 添加自動建立帳號流程 -- end

...


新增一個函數 user_row ,此參考 phpbb/auth/provider/apache.php - private function user_row($username, $password):

private function user_row($username, $user_email)
{
// first retrieve default group id
$sql = 'SELECT group_id
FROM ' . GROUPS_TABLE . "
WHERE group_name = '" . $this->db->sql_escape('REGISTERED') . "'
AND group_type = " . GROUP_SPECIAL;
$result = $this->db->sql_query($sql);
$row = $this->db->sql_fetchrow($result);
$this->db->sql_freeresult($result);

if (!$row)
{
trigger_error('NO_GROUP');
}

// generate user account data
return array(
'username' => $username,
'user_password' => $user_email,
'user_email' => $user_email,
'group_id' => (int) $row['group_id'],
'user_type' => USER_NORMAL,
'user_ip' => $this->user->ip,
'user_new' => ($this->config['new_member_post_limit']) ? 1 : 0,
);
}


如此一來,當使用者透過 oauth 登入時,第一時間若發現沒有系統對應帳號時,會自動建立一組帳號跟 oauth 帳號綁定,而下次再登入時就會因為已經有帳號綁定而登入動作。而 oauth provider 需要添加一個 get_user_info 的函數,以 facebook 來看就是修改 phpbb/auth/provider/oauth/service/facebook.php 檔案:

public function get_user_info()
{
if (!($this->service_provider instanceof \OAuth\OAuth2\Service\Facebook))
{
throw new exception('AUTH_PROVIDER_OAUTH_ERROR_INVALID_SERVICE_TYPE');
}
// This was a callback request, get the token
$this->service_provider->requestAccessToken($this->request->variable('code', ''));
// Send a request with it
$result = json_decode($this->service_provider->request('/me'), true);
if (isset($result['id']) && isset($result['name']))
return array( 'username' => $result['name'] , 'user_email' => $result['id'].'@graph.facebook.com' );
// Return the unique identifier
return NULL;

}
2014年8月12日 星期二

[PHP] 使用 Mantis SOAP API - Automatically Create an Issue


架好 Mantis 後,預設是有開啟 SOAP API 的,可以瀏覽 /mantis/api/soap/mantisconnect.php?wsdl 試試,應該會看到 SOAP API 的使用列表跟使用方式。

使用上需要指定 user, password 跟 project id,目前沒找到一口氣列出所有 project 的方法?倒是可以用 project name 找 project id,而發一則 issue 必須要有的資訊:project id, category, summary, description,連續動作:

<?php
$c = new SoapClient('http://YourMantisServerIP/mantis/api/soap/mantisconnect.php?wsdl');

$user = 'report_account';
$pass = 'report_password';
$project_name = 'ProjectName';

$issue_summary = 'Report title';
$issue_description = 'Report body';
$issus_category = 'iOS';

$project_id = $c->mc_project_get_id_from_name($user, $pass, $project_name);
if ($project_id == 0) {
        echo "[ERROR] Project ID Not Found: [$project_name]\n";
        exit;
}

$categories = $c->mc_project_get_categories($user, $pass, $project_id);
print_r($categories);

//$custom_fields = $c->mc_project_get_custom_fields($user, $pass, $project_id);
//print_r($custom_fields);

$issue_data = array(
        'project' => array(
                        'id' => $project_id
                ),
        'category' => $issus_category,
        'summary' => $issue_summary,
        'description' => $issue_description
);

$issus_id = $c->mc_issue_add($user, $pass, $issue_data);

echo "Issue ID: $issus_id\n";


成功的話,就會看到最後印出的 Issue ID。

對於 SOAP 的簡介可以參考:如何透過PHP、SOAP 及 WSDL撰寫Web Service

2014年4月28日 星期一

AWS 筆記 - 使用 Amazon EC2 以及建立自己的 AMI

老實說,已經有 4 年沒摸 EC2 了 XD 上去逛了一下,整個界面都不一樣了,慶幸地使用流程跟 4 年前差不多,連建立 AMI 的部分也是如此。

建立 Ubuntu 14.04 機器一檯:

Step 1:


Step 2:


Step 3:


Step 4:


Step 5:


Step 6:


建立 AMI:

Step a:


Step b:


接著,開機器時,可以從自己的 AMI 開一檯機器出來: